I’m so excited to share How to Build Banquette Seating with this Easy DIY Banquette Seating tutorial! It is such a simple way to customize your Kitchen or Dining Area! I was really shocked how simple and inexpensive this was to build! When we remodeled our Kitchen, we expanded the Kitchen into the existing Dining Room space. So we now have dining seating at the Kitchen island, and the Breakfast nook, but we don’t have an official Dining Room anymore. That is really fine with us because we would have rarely used it and prefer the open floorplan. We can seat 5 comfortably at the island, and will be able to seat 8 in the new breakfast nook and that is plenty of seating for us.
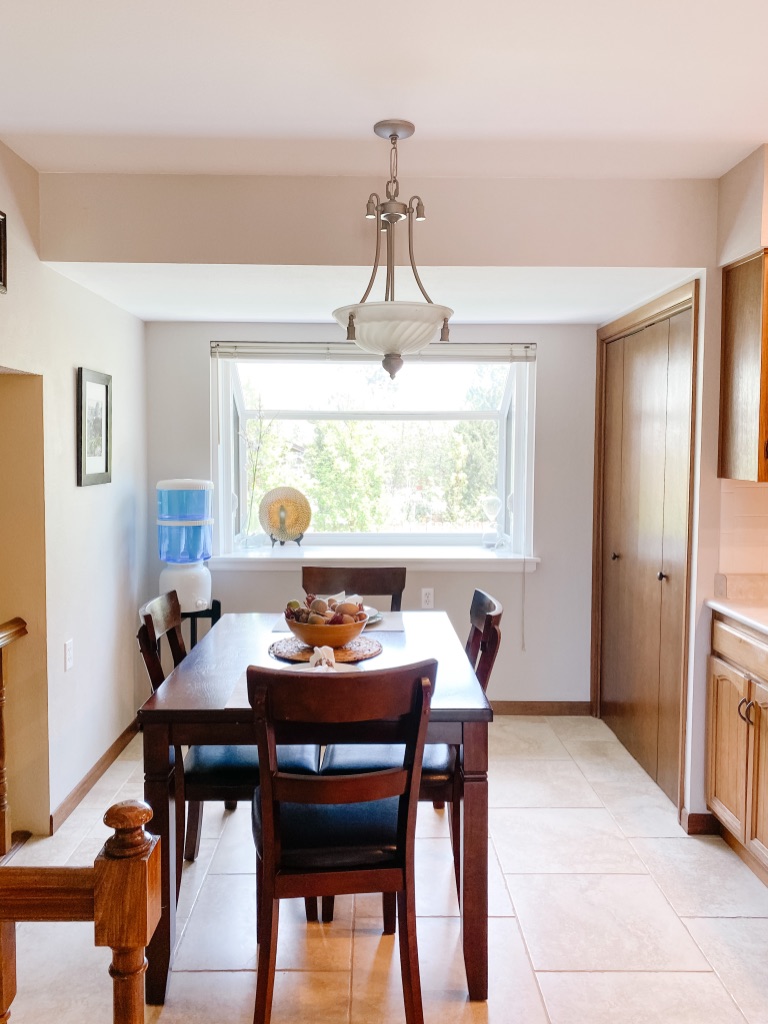
The existing Breakfast Nook area is a little tight when a table is centered in it, so that is the main reason we decided to build in the banquette bench. With the banquette bench against the wall it allows us to move the table over and there is more room to walk behind it to the coffee bar. I also love the look of a built-in banquette seating and have always wanted one! They are so cute and cozy looking, and I love that it is almost like another sofa (once we add the cushions and throw pillows).
We have plans to build a custom sized table for this area and I can’t wait to reveal what it will look like! Read below for a tutorial on How to Build Banquette Seating.
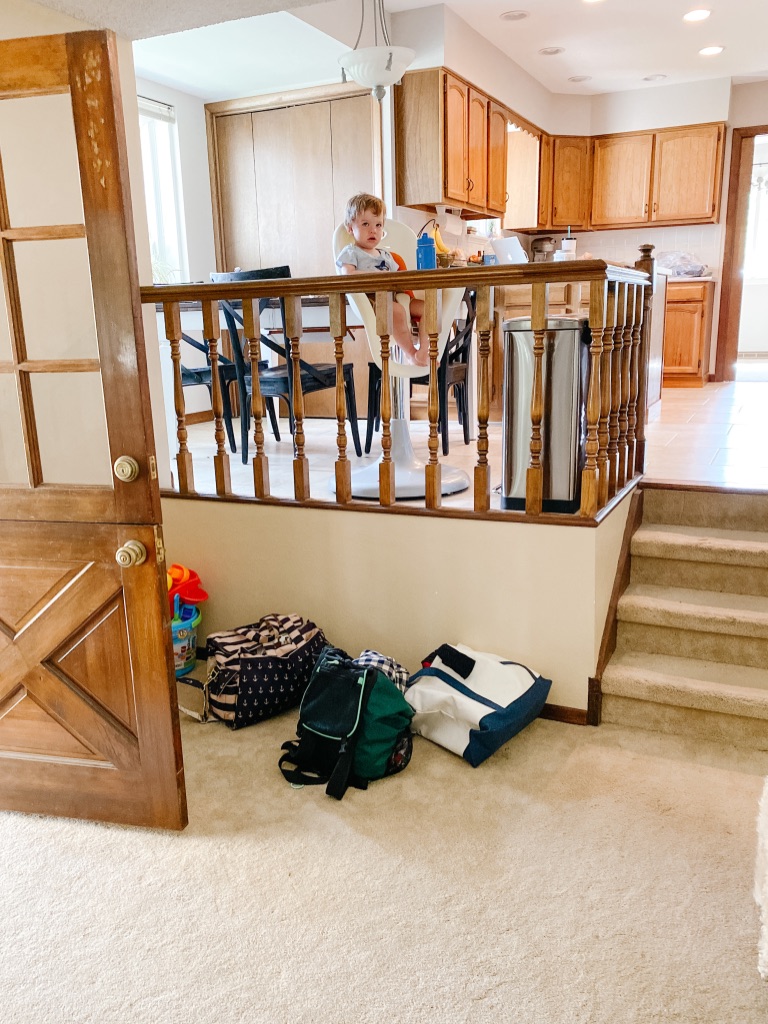
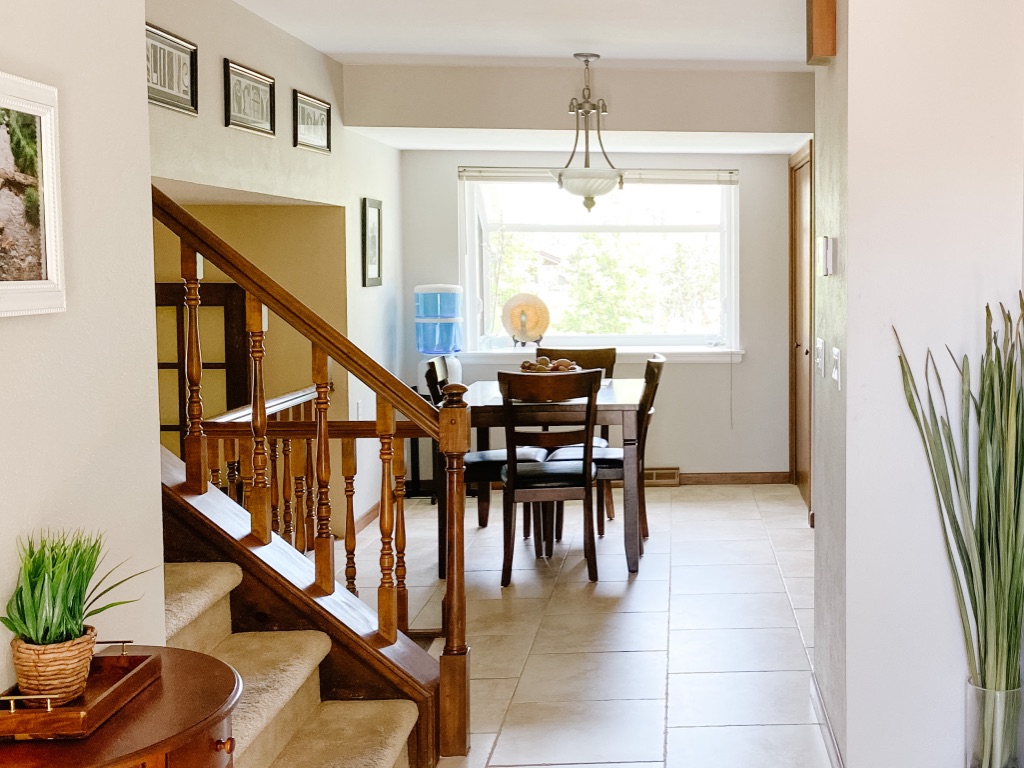
Before Photos:
How to Build Banquette Seating Tutorial
Materials:
- 2x4x8 Pine Boards (we used about 8)
- 3/4″ Thick 4×8 Sheets of Plywood (we used 2)
- 2″ MDF Primed Trim Boards
- 6″ MDF Primed Shiplap
- 3″ Screws
- 16 Gauge Nails
- Liquid Nails
- Spackling
- Sand Paper
- Paint (we used Satin Sherwin Williams Alabaster)
- Clear Paintable Caulk
Tools:
- Laser Level
- Chalk Line
- Level
- Circular Saw (and Table Saw if you have one)
- Drill and Impact Driver
- Nail Gun (and compressor)
- Caulk Gun
- Paint Brush (Purdy is the best!)
- Paint Roller
Step 1: Determine your dimensions
Length – a good rule of thumb is to allow at least 24″ width for each person sitting at the table.
Depth – A typical bench seat depth is anywhere from 16″ – 20″. But, make sure to allow for extra depth if you want a back cushion or space for throw pillows. We made ours 20″ deep so I can add a few throw pillows along the back or at the corners.
Height – Typical seat height is 18″. When you are building the frame remember to keep the seat cushion height in mind (if you have one). We made our frame 16″H to allow for a 2″ thick cushion.
It could be helpful to mark the bench outline on the floor with tape so you can see where it will be. Remember to allow for clearances to get in and out of the bench. Also note that the table should hang over the bench about 1-2″.
Step 2: Measure, Level…

We used a laser level and then snapped a chalk line on the wall to make sure the top of the bench was level before we began to build the frame. we have an older house and the floors aren’t completely level, so there was actually almost an inch difference between the heights on each side of the bench!
Step 3: Build End Frames
Skip this step if building in a straight bench without side seats. Build frames with a top and bottom cap similar to building a wall to give it the most strength. Assemble your frames on the ground first, and then screw into the wall and floor. If spanning more than 20″, you should put in studs 16″ apart across the span to ensure the bench does not bow under weight. Our side frames were different heights because of the 1″ out of level floors. We screwed these boards directly down to the flooring to ensure an accidental kick wouldn’t move them.
Step 4: Add Ledgers
Cut ledger boards for the back and side walls. We aligned them directly with the chalk line we snapped earlier, however, double check everything is level throughout this process and adjust slightly as necessary. Make sure to use a stud finder to ensure you hit studs when screwing in the ledger.
Step 5: Build Interior Frames
When making with side seats, we extended the side frames back to the ledger, and then built another frame to span the gap. See that we added short studs in these spans. Double check everything is level.
Step 6: Add Support for Seam and Mark Plywood Top for Cutting
Because of the length of the bench being longer than 8′, we knew there needed to be a seam in the plywood top. We added a support in the frame to support along the seam. Use 3/4″ thick plywood for strength.
We laid the entire plywood sheet on the bench and then got underneath and marked our cut line at several places along the bench. We knew we were adding a shiplap face to the bottom of the bench so we used a small piece of the shiplap to space the marks the 5/8″ off the face of the bench so the shiplap would aline flush with the face of the plywood edge. See step 9 for clarification.
Step 7: Cut Plywood Top
The above photos show a really nice trick to cut longer boards when you do not have a table-saw. By clamping a board down to the plywood, you can use that as a guide for your circular saw and cut a precise line just like a table saw!
Step 8: Attach Plywood Top to Frame
We put a bead of liquid nail all along the edges to ensure this bench would never squeak. Then we used a 16 gauge nail gun to nail the plywood down to the frame.
Step 9: Add Shiplap to Bottom
We needed to hide the bare plywood edges of the wood so we decided to put a frame around the entire base so these cuts did not need to be perfect. When turning corners, it is nice to try and use the cutoff piece to turn the corner so it looks like the same distance between shiplap grooves. Do not try this if this remaining piece is less than 2″ or that won’t look good either. We nailed directly into the face of shiplap because we knew we needed to putty and paint later and the holes in the shiplap seams always pop when you are painting it white!
Step 10: Add Trim and Shiplap at Back
We finished with the shiplap along the bottom and quickly put on the top. We moved on to the frame around the bottom of the bench. We did not need to miter the corners of the MDF frame because we were going to putty and paint.
Step 11: Fill Holes and Seams with Wood Putty
Using Drydex puddy and a small 2″ putty knife we pressed the putty into holes and seams and then used the knife to blend the seams between boards. Try to scrape as much off as possible while creating an even seam. In the above photo, the right plywood board is lower than the left so all the putty is scraped off the left board. For thick seams, you will likely need to sand the first coat of putty and put down another layer to make the seams blend. This step is really important because it is creating the final texture that will be painted. If you are not covering your bench with a cushion later, it needs to be a very nice and smooth surface before painting. If you paint it and find flaws later, it is much much harder to fix.
Step 12: Mask and then Caulk the Seams
Mask all surfaces you don’t want painted. Tip – Leave a small caulk line, as shown in the middle picture (gap away from the wall with your masking tape). This will be unnoticeable when tape is removed, but will create a very sharp paint line. Use your finger to remove excess caulk, ensure to expose the edge of the tape. If you leave caulk over the edge of the tape it will peel up when unmasking.
Step 13: Paint
This Easy DIY Banquette makes our dining nook feel so cozy and custom! I hope this How to Build Banquette Seating tutorial was helpful! Feel free to leave a comment if you have any questions. I will post an update once we have the table complete. If you missed it, check out our Fireplace Makeover!
This post contains affiliate links; see our Disclosure here.
Your work is beautiful! What is the light wood flooring? It’s perfect!
Thank you so much! It’s LVP from Provenza. You can read more about it here – https://sprucingupmamahood.com/provenza-vinyl-flooring-review/
Your work is amazing!! I love this banquette!
Thank you!
Wow, this morning you have solved our problem concerning putting in a banquette!!! I would like to know how the back side of the banquette looks. Is it just Sheetrock? Do you have a photo?
Thanks, Lynn Cline
Birmingham, Ala.
I’m so happy it helped! We wrapped the shiplap around the whole banquette area. I don’t think I have a photo of the back anywhere on the blog, but if you want to send me a DM on Instagram I’d be happy to send you a photo! http://www.instagram.com/sprucingup.mamahood
I love all of it! Can you please share the overall dimensions of the seating area? I’m trying to work one into a new build with seating for 8. Thank you!
Hi, sorry for the delay! The overall dining nook area is about 8′ wide x 10′ long. The dining table is 36″x83″ and could easily fit 8 people around it. Hope that helps!
This looks fantastic and so functional! Have you had many issues with scuffs or chipping paint from the kids getting in and out or kicking the base while sitting? Our kids are brutal on walls!
Thanks so much! My kids are really rough too… no issues with chipping, but yes there have been some scuffs. But it’s really easy to touch up with new paint a couple times a year, or use a magic eraser to clean them off!