Sharing how we built an indoor climbing wall with a DIY mural at our Kid’s Playroom!
After over 2 long months of painting a mural for my kids in our newly remodeled Playroom, I finally finished and we were able to turn it into a fun indoor climbing wall!! This DIY Climbing Wall project was a huge labor of love! I didn’t think it would be as big of a job as it was, but I’m glad I took it on because our kids love it and it’s a really special addition to our Playroom!
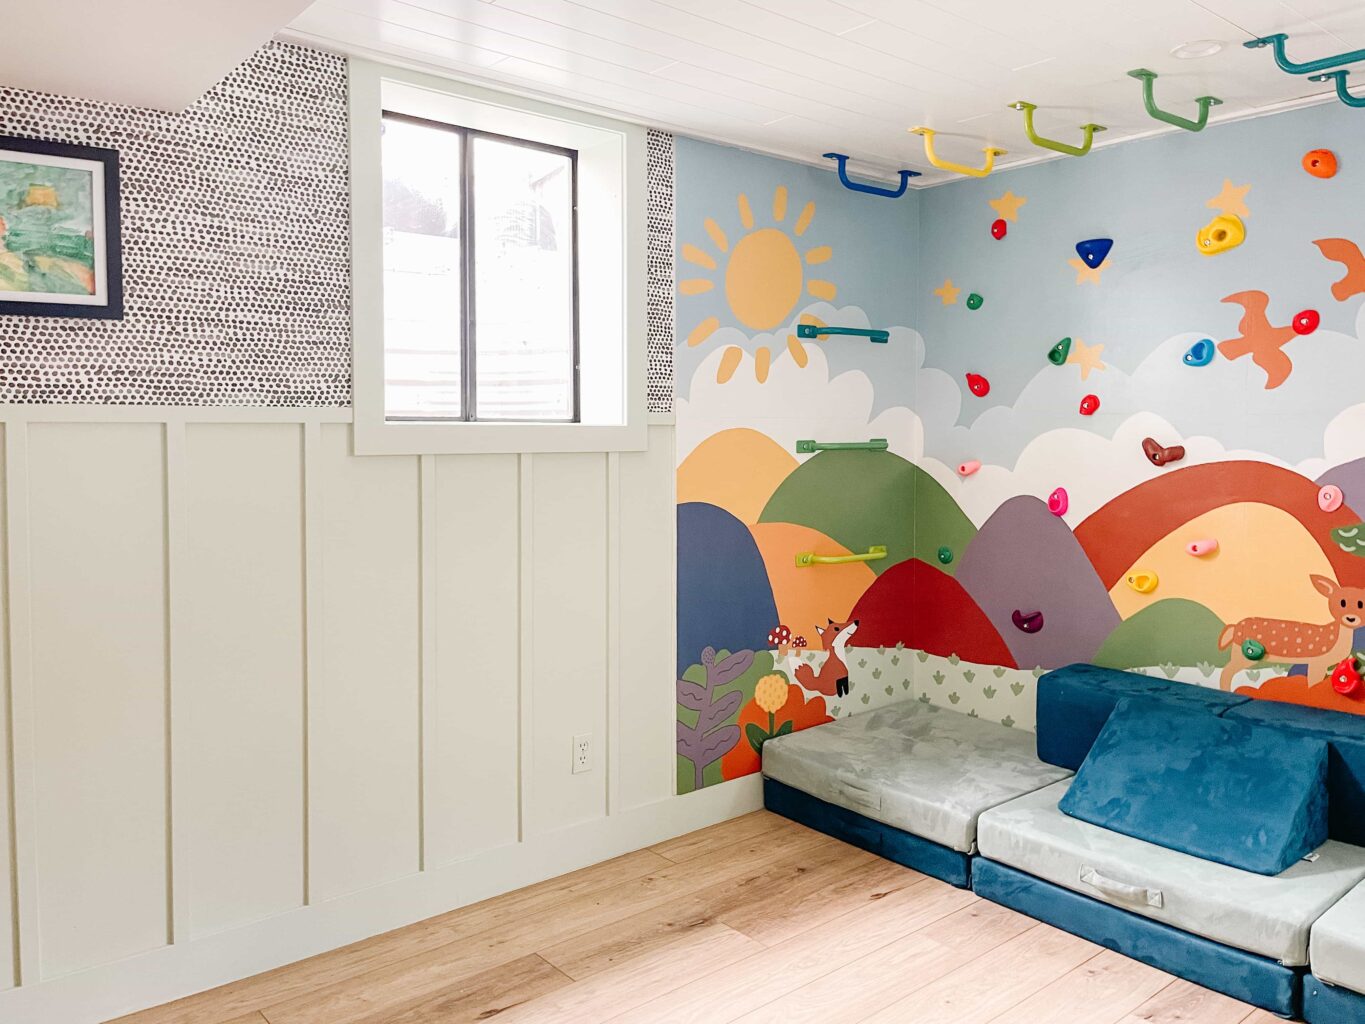
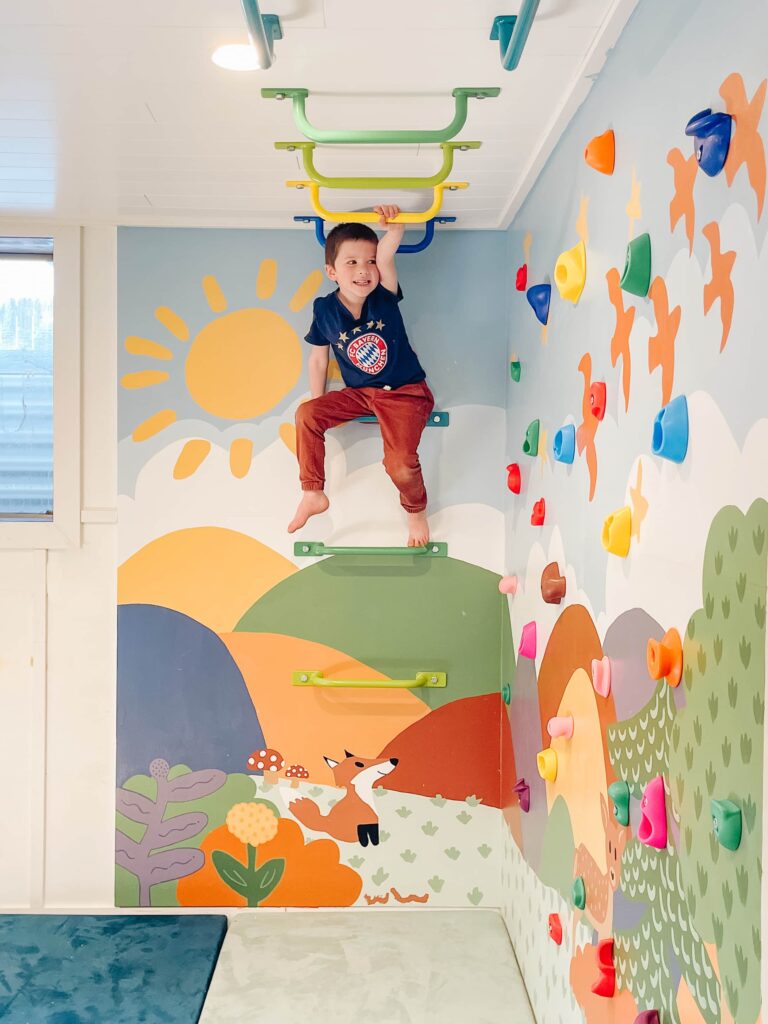
When we decided to remodel our Basement Playroom, I knew I wanted to transform it into a fun and safe space where the kids could be active and get out some energy! An indoor climbing wall felt like the perfect addition for our 3 boys! They love to climb and jump, and really love the big indoor rock climbing wall at our gym. Building our own indoor climbing wall gave them a safe space to practice their climbing skills. Their favorite part is climbing high or swinging on the monkey bars and then jumping down on to the floor mats!
Below I’ll share how we built our kids an indoor climbing wall, how we installed the monkey bars, how I painted the kids Playroom mural, and link all of the products we used.
This post contains affiliate links providing me with a small commission at no additional cost to you; see Disclosure here, and THANK YOU for your support!
Check out these other Playroom Remodel Updates if you missed them for more details on the whole room:
- Fun Playroom Wallpaper Idea
- Easy Way to Update a Drop Ceiling
- Top Basement Playroom Remodel Ideas & Inspiration
How to Build an Indoor Climbing Wall for Kids
Tools & Materials Needed:
- 3/4″ Plywood Sheets (we used 3 4’x8′ sheets)
- 3″ Screws
- 1/2″ x 2″ Lag Screws (for Monkey Bars)
- Wood Filler
- Saw Horse
- White Primer
- Paint (See Color Details Below)
- Climbing Holds with Mounting Hardware
- Monkey Bars
- Laser Level
- Cordless Drill / Impact Driver
- Table Saw (or have Plywood cut to size at Home Depot)
Step 1: Cut Plywood Sheets to Size

We used three 4’x8′ plywood sheets for our indoor climbing wall. We had them cut in half at Home Depot in order to fit them in the car. Once home we used a table saw to trim them down to fit the height of our space. They are installed right above the baseboard and go up to the ceiling.
Step 2: Determine Climbing Hold Placements
We temporarily taped the plywood sheets up on the wall because we thought it would be easier to determine the climbing hold placements that way, but ended up laying them on the floor to mark the hold placements.
Once we had the climbing holds laid out how we liked them, we used a pencil to mark the drill holes.
Take a photo of the climbing holds to remember which one goes with each mark.
Because we had a good amount of climbing holds compared to the area we were installing them at, we didn’t worry too much about the space and if our kids would be able to reach them. Our boys are 5 and 7 (and a 1 year old but he’s too small for this right now!) and they have had no issues with being able to make it to the top.
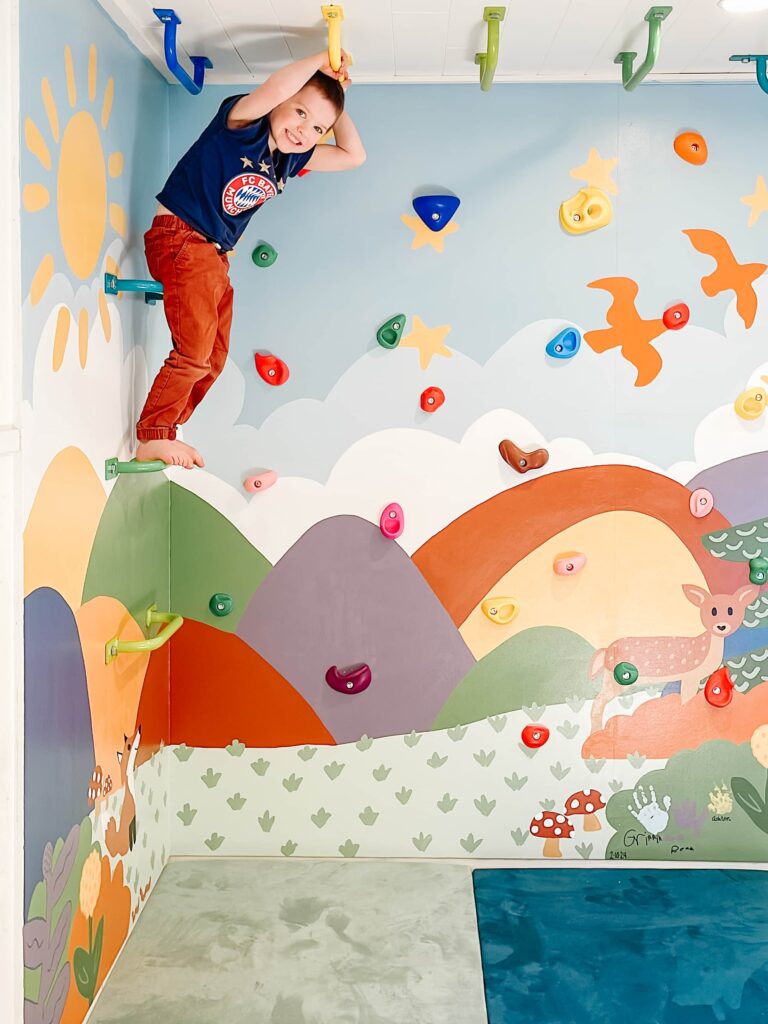
My biggest tip is to make sure you start low enough so they can easily put their feet on the lowest hold, and be thoughtful about spreading out the different climbing hold sizes (make sure all the large holds that are easier to grab are spread out evenly on the wall).
Our climbing holds are all spaced about 12″ – 15″ apart from each other.
Step 3: Drill Holes for Mounting Hardware
Prop the plywood sheets on top of saw horses. Use a 1/2″ drill bit to drill holes into the plywood sheets for each climbing hold.
You can drill extra holes during this step if you’d like to be able to move the climbing holds around in the future. Keep in mind you will need extra mounting hardware (weld nuts) for the extra holes (see next step for details).
If you will have extra exposed holes, you can use a hole-saw from the exposed side to make sure the hole edges are smooth and splinter free. Or taping the drill location with painters tape and drilling through the tape can help make a clean hole.
Knowing ours would be covered up by the climbing holds, we used a regular drill bit which left the edges a little more rough but everything was covered up.
Step 4: Install Mounting Hardware
Because we were installing the plywood sheets directly to the wall, we had to install the back (weld nuts) of the mounting hardware before hanging the plywood sheets.
Use a hammer to push the weld nuts into the holes so the back of the hardware is flush with the plywood.
If you are planning to add extra climbing hold holes for future use, make sure to install extra weld nuts to each hole so you are able to move the climbing holds around once the plywood sheets are attached to the wall. The weld nuts have to be installed from the back side of the plywood, so if you don’t have access to the back side once the sheets are installed you wont be able to install more hardware.
Step 5: Hang Plywood Sheets
Hang the plywood sheets to the wall by screwing directly into the wall studs. Make a pilot hole with a drill bit first to prevent the boards from cracking or splintering.
Step 6: Fill Screw Holes and Seams
Use Wood Filler or spackling to patch any screw holes and seams to make a smooth wall.
Step 7: Paint
You can choose to leave the plywood as is for a natural / rustic look, but we chose to paint the wall to add some color to our Playroom.
I’ll talk more about the Mural details below, but the first step was to prime the plywood wall to prep for the paint.
We used an Interior paint from Benjamin Moore in an Eggshell Finish, and then sealed it with a Clear Matte Water-Based Interior Polyurethane.
Step 8: Install Climbing Holds
Once the mural was complete we were able to install the climbing holds!! This step was really easy – you just use an allen wrench to screw the bolt into the weld nuts that were previously installed.
Monkey Bars
We also added monkey bars to our climbing wall and on the ceiling above! I love how the kids are able to climb and swing and jump from this whole area, and it’s a great space for them to get some exercise!
The monkey bars are from Project Playroom, which is an awesome company that sells everything you need to create a fun and active playroom! I loved that the monkey bars come in all sorts of colors so we chose a variety of greens, blues and yellows that worked with the room. They are also available in a few different lengths (we have two of the “long ninja bars” as well) and depths.
For our climbing wall space we have 3 monkey bars going up the side of the wall, and then they run along the ceiling.
We installed the monkey bars on the side wall directly into the wall studs with these Lag Screws.
For the monkey bars at the ceiling, we added 2″x4″ support beams that run the length of the ceiling where the monkey bars are, before installing the ceiling planks. Then we screwed into the beams with the lag screws, making a pilot hole first with a 3/8″ drill bit.
Floor Mats
For the floor mats we are using the kid’s modular play couches from Figgy! These cushions have been such a fun and useful addition to our playroom! The kids love to use the cushions to build forts, make obstacle courses, towers to climb and jump off of, and they are perfect floor cushions to use underneath the climbing wall and monkey bars.
DIY Playroom Mural
Our DIY Playroom Mural took a ton of time but it was a fun project! It definitely would have been easier to just use peel and stick wallpaper here but it felt more special to add something custom and the kid’s helped me come up with a design idea too.
Step 1 was to come up with an idea of what to draw. I searched for some ideas on Pinterest and then combined a few elements that I was drawn too – bubbly colorful mountains, a few cute animals, a sun and stars…I kept it pretty simple but had fun with all of the colors!
I used the Procreate app on my iPad to sketch out the mural, scaling it to the size of the climbing wall.
Step 2 I scaled the mural on to the climbing wall using a projector and then used a pencil to lightly trace over the lines of the mural on to the wall. This made it sooo much easier to paint the mural onto the wall rather than trying to free-hand it!
Step 3 I started painting! In general I started with the background colors first, like the blue sky, and then painted the smaller details, like the stars, last. I used average-small sized paint brushes to make sure I had clean lines and I had to do about 3 coats for each color.
The kids helped paint a few things too…Roman was so proud of his cute star!
And my favorite part – we added their handprints and signatures at the bottom! I’m going to have to figure out how to bring this with me if we ever move!
Step 4 I added a Clear Matte Polyurethane coat. over the entire mural to protect it from fading and hopefully making it more durable as the kids will be climbing on it!
Below are the paint colors I used. I bought 8 oz. paint samples in each color – Benjamin Moore regularly has 50% off sales making their paint color samples only $3 each!
Playroom Mural Paint Colors
- Benjamin Moore 202 Yellowstone
- Benjamin Moore 1676 Northern Air
- Benjamin Moore 1675 Under the Big Top
- Benjamin Moore 434 Herb Garden
- Benjamin Moore 118 Grand Canyon
- Benjamin Moore 832 Blue Heron
- Benjamin Moore 442 Jack and the Beanstalk
- Benjamin Moore 035 Baked Clay
- Benjamin Moore 2117-40 Tropical Dusk
- Benjamin Moore 433 Forest Hills Green
- Benjamin Moore 1090 Butternut Squash
- Benjamin Moore 070 Topaz
- Benjamin Moore OC-151 White
Kid’s Indoor DIY Climing Wall & DIY Playroom Mural
Overall, adding this DIY Climbing Wall area to our Playroom was an easy DIY project! Aside from how long it took to paint the mural, the rest of it was simple to install.
The monkey bars were the most expensive part, but I highly recommend them or any other products from Project Playroom! They are great quality and made to last.
You can also find a ton of affordable options for rock climbing wall holds for kids on Amazon.
As soon as we finished this climbing wall our son said it was “the best present ever!” and that made all the work worth it! I know they will have so much fun climbing and playing here for years to come.
Let me know if you have any questions in the comments below!
Do you have a link for the mural you projected to paint on the wall?
Do you have a recommendation for installing the monkey bars if we already have a drywalled ceiling directly attached to the joists? I assume we can just screw the Lag Screws into those along the way if I can locate them well with a stud finder…
Also, did you casually have a projector laying around? Or did you get one for this purpose (any recommendations for something simple?)
Yes you would have to use a stud finder and screw directly into the joists. I believe the monkey bars are made so they are the same length as typical posts are spaced though!
And yes we had one that my husband uses for a golf simulator but there are a lot of affordable options on Amazon!
The bolts for the holds seem to be too long. They go through the other end of the plywood. How did you navigate that when installing them? Just continue to tighten them knowing the drywall behind the wood is going to be damaged? TIA!
Yes I believe they went into the drywall a little bit.
Beautiful job! I’m curious how the paint has held up to use? Have you tried to remove the holds and did the paint stick or peel?
I have a mural design for our climbing wall that is a mixture of stain and paint and I am trying to source the right paint products to use. Our wall has holes in a grid pattern to change up the holds as our child grows to create new and more challenging problems. Any advice on what products to use (or avoid) to execute a durable and aesthetically pleasing wall is appreciated 🙂
Hi! We’ve had no issues with the paint!! We havent removed the holds but they can twist a little and the paint is not sticking to them. I think adding a clear poly acrylic coat helped a lot.