Hi! Today I’m sharing some super easy DIY wood shelves that my husband and I made this past weekend! These were probably one of the easiest DIY projects we’ve ever done, and they make such a huge impact in the space! They were very affordable too, about $60 for the pair, and are a DIY project that anyone could tackle!
Supplies you’ll need:
- Wood Planks – We used ended up using two 1″ x 12″ x 4′ select pine boards, similar to this, from Home Depot
- 12 Inch Shelf Brackets from Amazon, hardware was included with this set
- Drill & Impact Driver – We have a set similar to this
- Hammer
- Level
- Wood Stain – We used this one from Home Depot
- Stain Brush
- Cloth Rag
Step 1 – Cut Boards to Size
We bought boards that were just about the right size, but ended up trimming a very small amount off the edges to clean them up and make them less rough.
Step 2 – Stain the Wood

Use a brush to apply one coat of stain. Move quickly and keep a wet edge so the stain doesn’t dry and create a line. Wipe excess stain with a rag immediately after application. Apply a second coat if needed (we only used one coat). Let dry approximately 1-2 hours. Clean your brush with mineral spirits.
Step 3 – Install the Wall Brackets
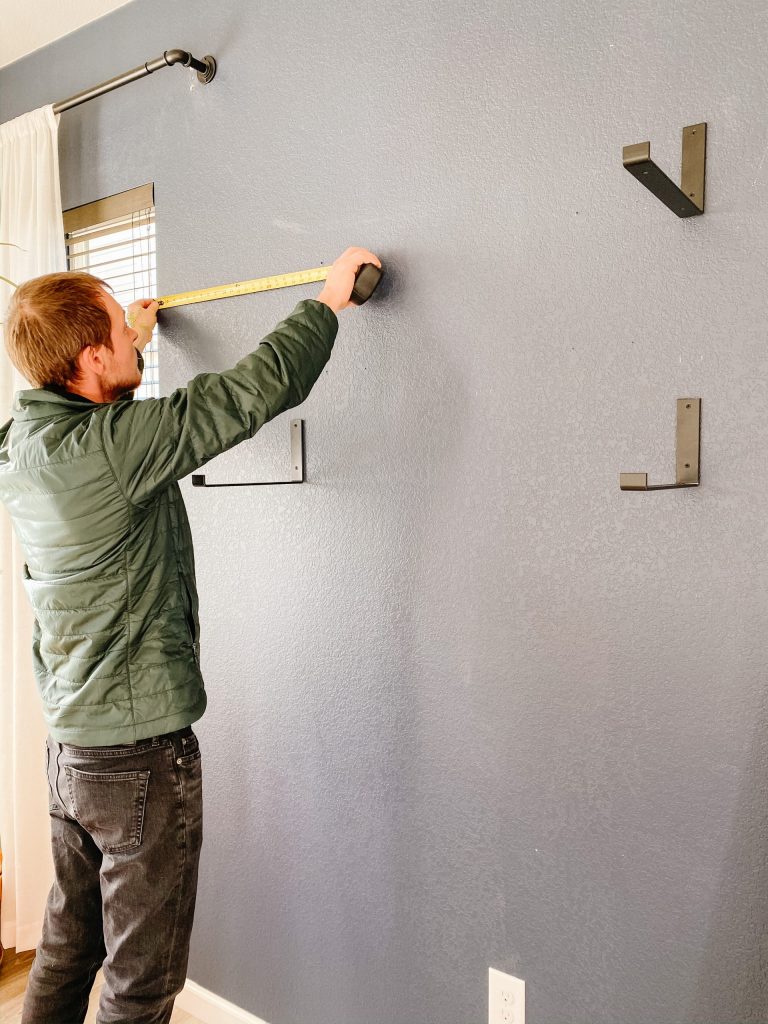
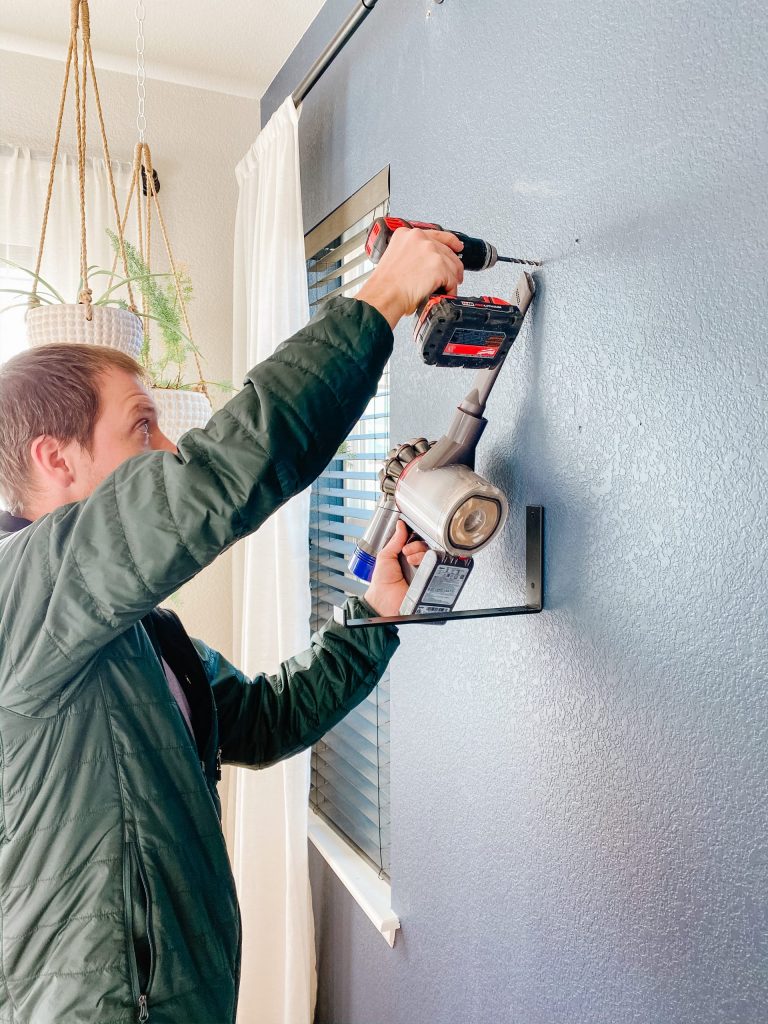
Measure and make small marks on the wall with a pencil where you will want the wall brackets. Make sure they are at the same height so the shelf will be level! The wall brackets that we bought came with all the hardware you need (screws and wall anchors). Pre-drill a hole, slightly smaller than the wall anchor. Lightly tap the anchor with a hammer to insert. Of course, if you can find the wall stud to insert a screw into instead of using the wall anchor, that is preferable. Hang the brackets by inserting the screw into the wall anchors.
Step 4 – Attach Wood Shelves

Lay the wood boards on the brackets. Make sure they are centered and level. Attach the wood boards to the brackets using the screws provided in the kit.
And you’re finished!
We have 9′ high ceilings, so we were able to hang our shelves pretty high, which I like. I knew I wanted the bottom shelf to be about 18″ – 20″ above the top of our buffet table because I like having plants and taller items on there. The next shelf is about 18″ above the bottom shelf. Our buffet table is about 52″ long, and our shelves are about 48″ long, so slightly inside the length of the table.
These DIY wood shelves are such an easy project and only took us about an hour to do! I love how they turned out and feel like they make our Dining Room feel a little cozier! I’m excited to switch up the decor on these shelves for the different seasons and holidays!
See our Disclosure here.
Leave a Reply