Happy Monday! I hope you all had a great weekend! We spent the whole weekend cleaning, purging and organizing the house and it felt so good to get done! Now that we have most of the clutter that has been lying around taken care of, I want to do more of a deep clean next weekend! I love “spring cleaning”! And it definitely helped that the weather was SO BEAUTIFUL here in Colorado this weekend! It also felt good to finally get this project done!
Today I’m sharing something that I’ve been wanting to do for a while – How to make a Blanket Ladder! I’ve been wanting a blanket ladder for so long but I couldn’t find one that was tall enough! All of the options that I saw in stores were only 6′ high. I knew I wanted it to go on this wall and I thought it would look good to do something taller and more dramatic here, since our ceilings are so high in this room, so we decided to make one! I’m happy with how it turned out, and it was very easy and affordable to make! See below for the simple steps on how to make a blanket ladder!

Supplies:
- Three 2″ x 4″ x 8′ Cedar Boards
- Miter Saw
- Circular Saw
- Drill / Impact Driver and Screws
- Electric Sander
- Wood Stain – We used Golden Oak
- L-Brackets (to attach to wall)
How to Make a Blanket Ladder:
The first thing we did was cut one of the 2″ x 4″ boards in half, length wise, to make two 2″ x 2″ boards. Next we determined how wide we wanted to ladder to be, and cut the 2″ x 2″ board into smaller pieces. We ended up tapering the ladder so that the bottom was slightly wider than the top.
The ladder is about 8′ high. The bottom is about 24″ wide and the top is about 18″ wide.

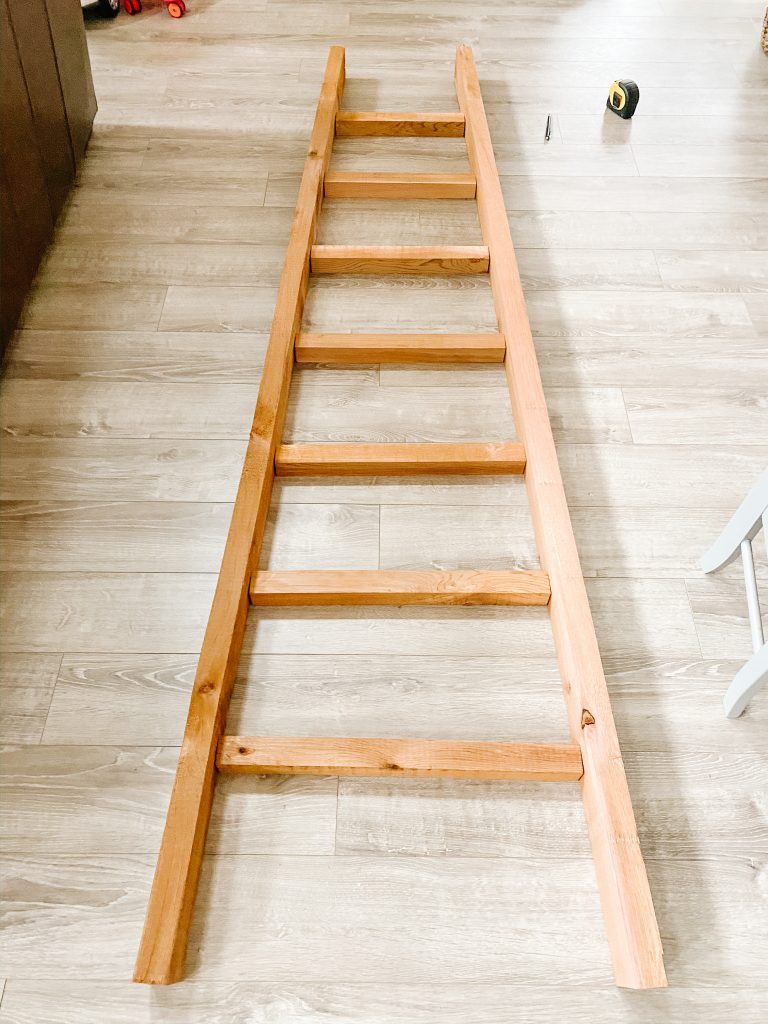
Next we laid the pieces on the floor to determine the spaces of the rows. We ended up making them about 12″ apart.
Then we screwed the pieces together. We first measured the distance and marked the center of the 2″ x 4″ board with a pencil. The drilled a hole with the drill bit.
Next use the impact driver to insert the screw. Attach the 2″ x 2″ board with the screw, and then repeat on the other side. We left them slightly loose until we had all of the pieces put together, and then adjusted and tightened them once we had the ladder straightened and squared off.

Next, we sanded the ladder down with an electric sander to remove any splinters.
Then we applied one coat of stain. We attached the top of the ladder to the wall with L-brackets to make sure it stays in place. That’s it! This was a very simple DIY project and I love how it turned out! I really wanted a taller ladder and I could only find ones that were about 6′ high, so I’m glad we were able to make one so easily!
My only regret with this project is using Cedar. I wanted a rough cut wood, and all of the pine boards at Home Depot were very smooth, so that is why we chose to go with Cedar. It turned out much darker and more red than I wanted. The rough wood soaked up a ton of the stain and it is much darker than my wood shelves, which I used the same stain on. Overall though I am happy with how it turned out and it fits perfectly on this small wall!
For another simple DIY project, check out Kaylee’s Board and Batten project, or the wood shelves I recently made!
See our Disclosure here.
I’ve been wanting to do this for awhile too, thanks for the tutorial!
Thanks for reading! It’s such a simple DIY and I love how it turned out!
Could you provide a photo of how the L bracket attachment to the wall is positioned? It would be very helpful for safety reasons. Thanks