This post has been a long time coming! We completed this DIY Wood Ceiling at the very beginning of quarantine. Seems like so long ago! I can’t believe it is already June and how quickly Spring has flown by! First day of Summer is officially this weekend! Yay!
We have actually stayed pretty busy while stuck at home which probably helped the time fly by. We have completed multiple DIY projects, did a ton of yard work and spent a lot of time working on both our vegetable and flower gardens! I wish I would have had even more time to organize the inside of my house, but that is always something I put off till I absolutly have to do it, ha!
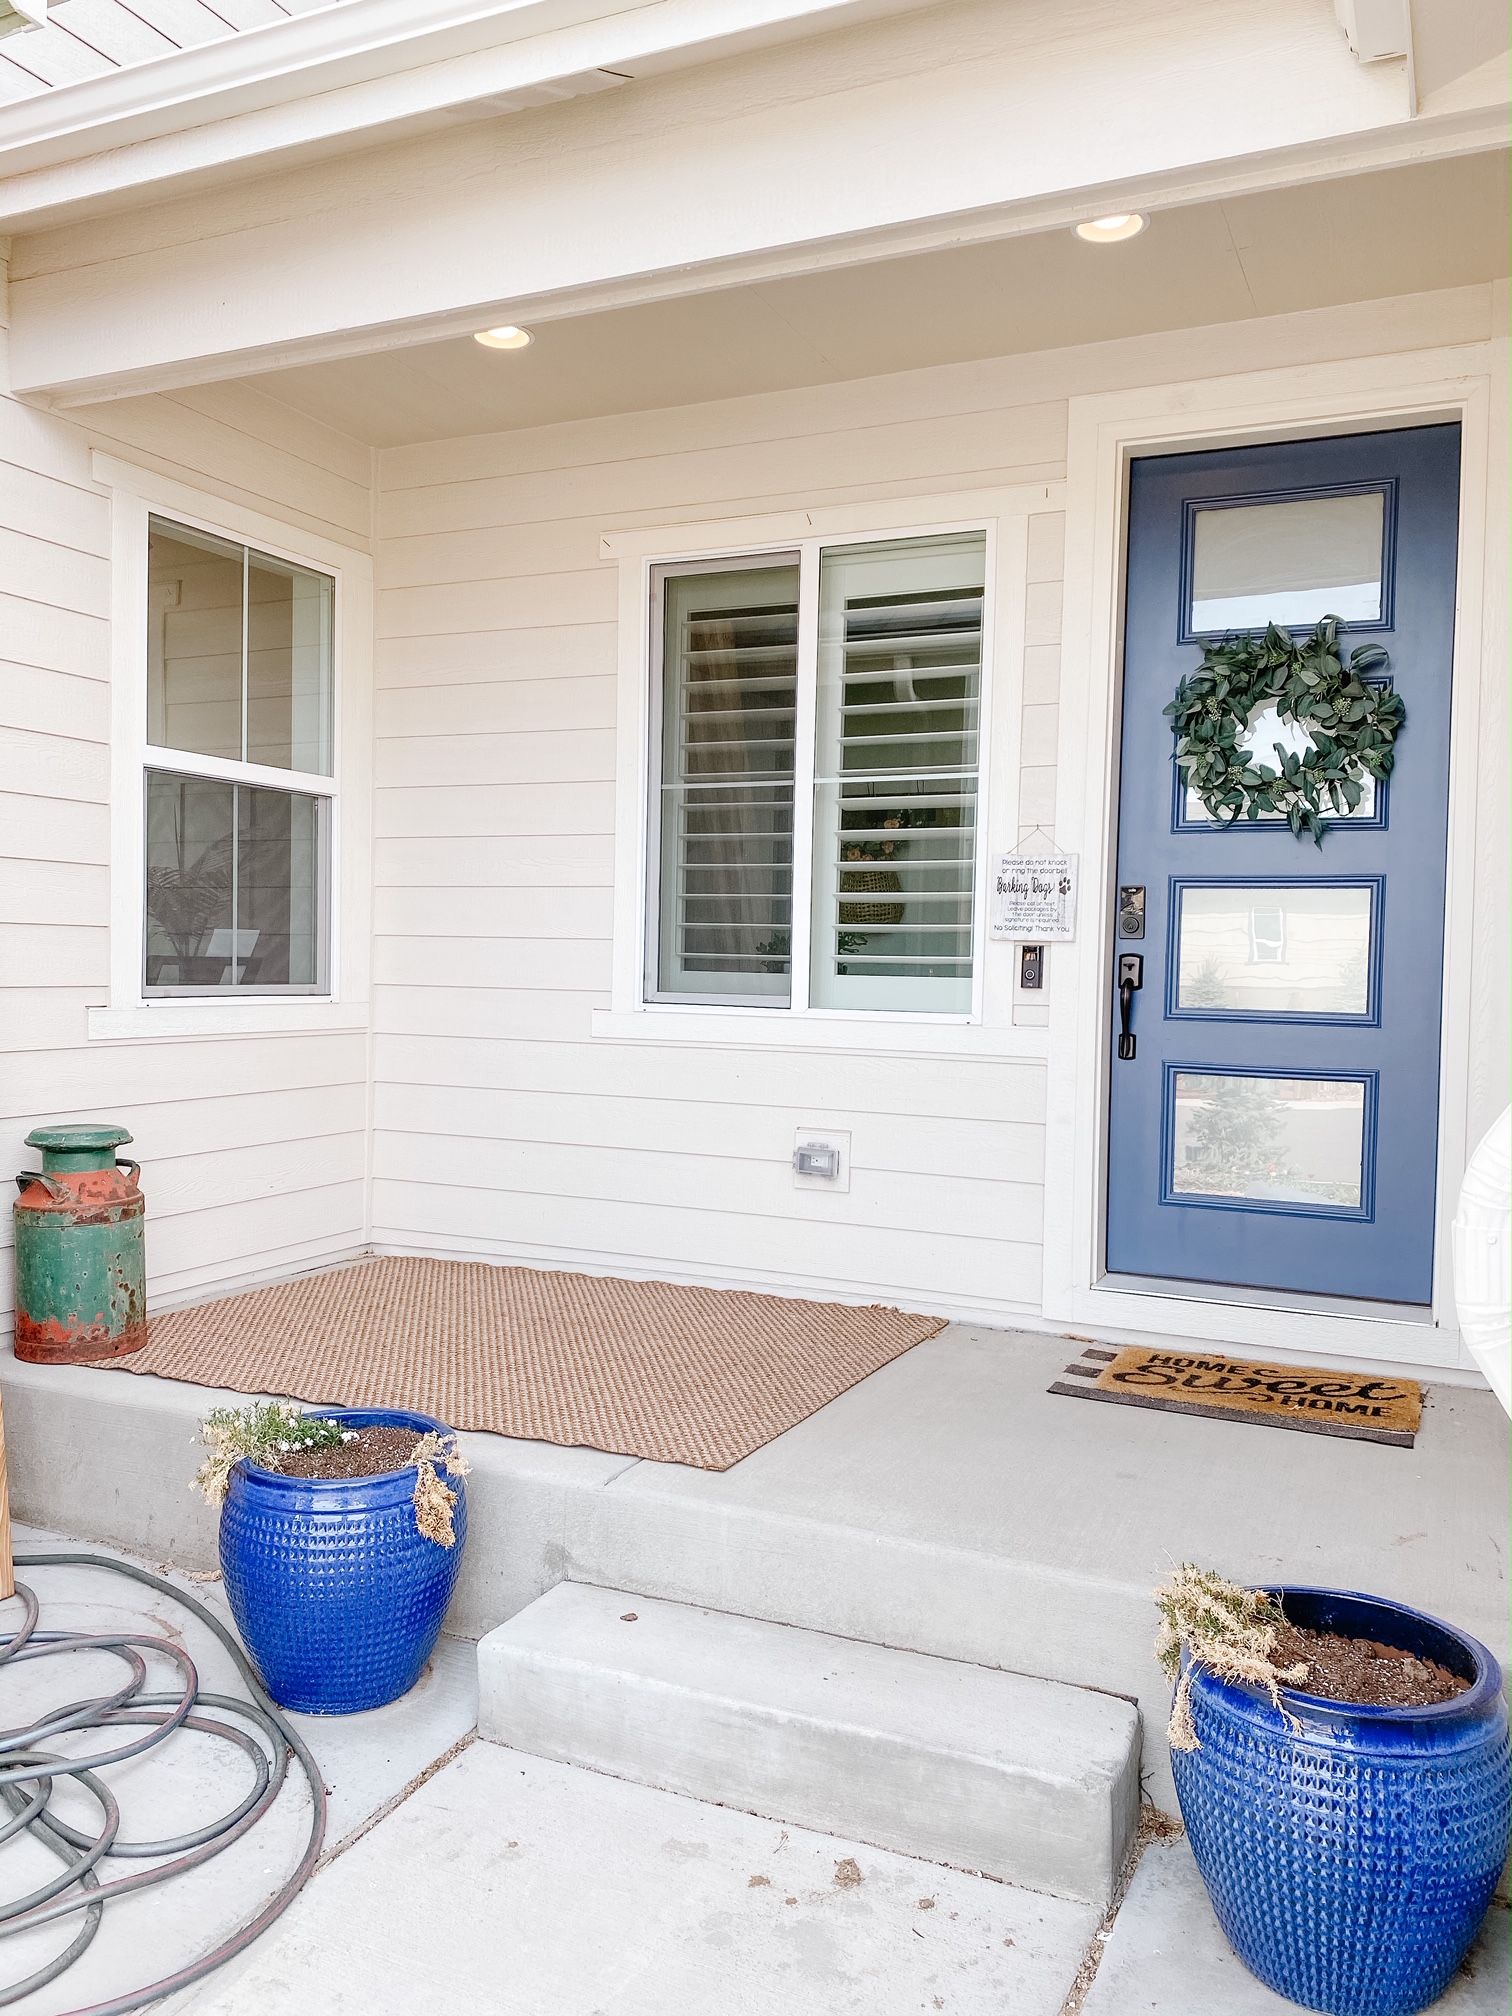
This wood ceiling is honestly one of my favorite DIY projects we have done. It made such a huge impact to the look and feel of our front porch! Plus, it was relatively inexpensive and easy to do! We are definitely going to be adding a wood ceiling to our back porch as well eventually, that’s how much I love it!
DIY Wood Ceiling
Supplies:
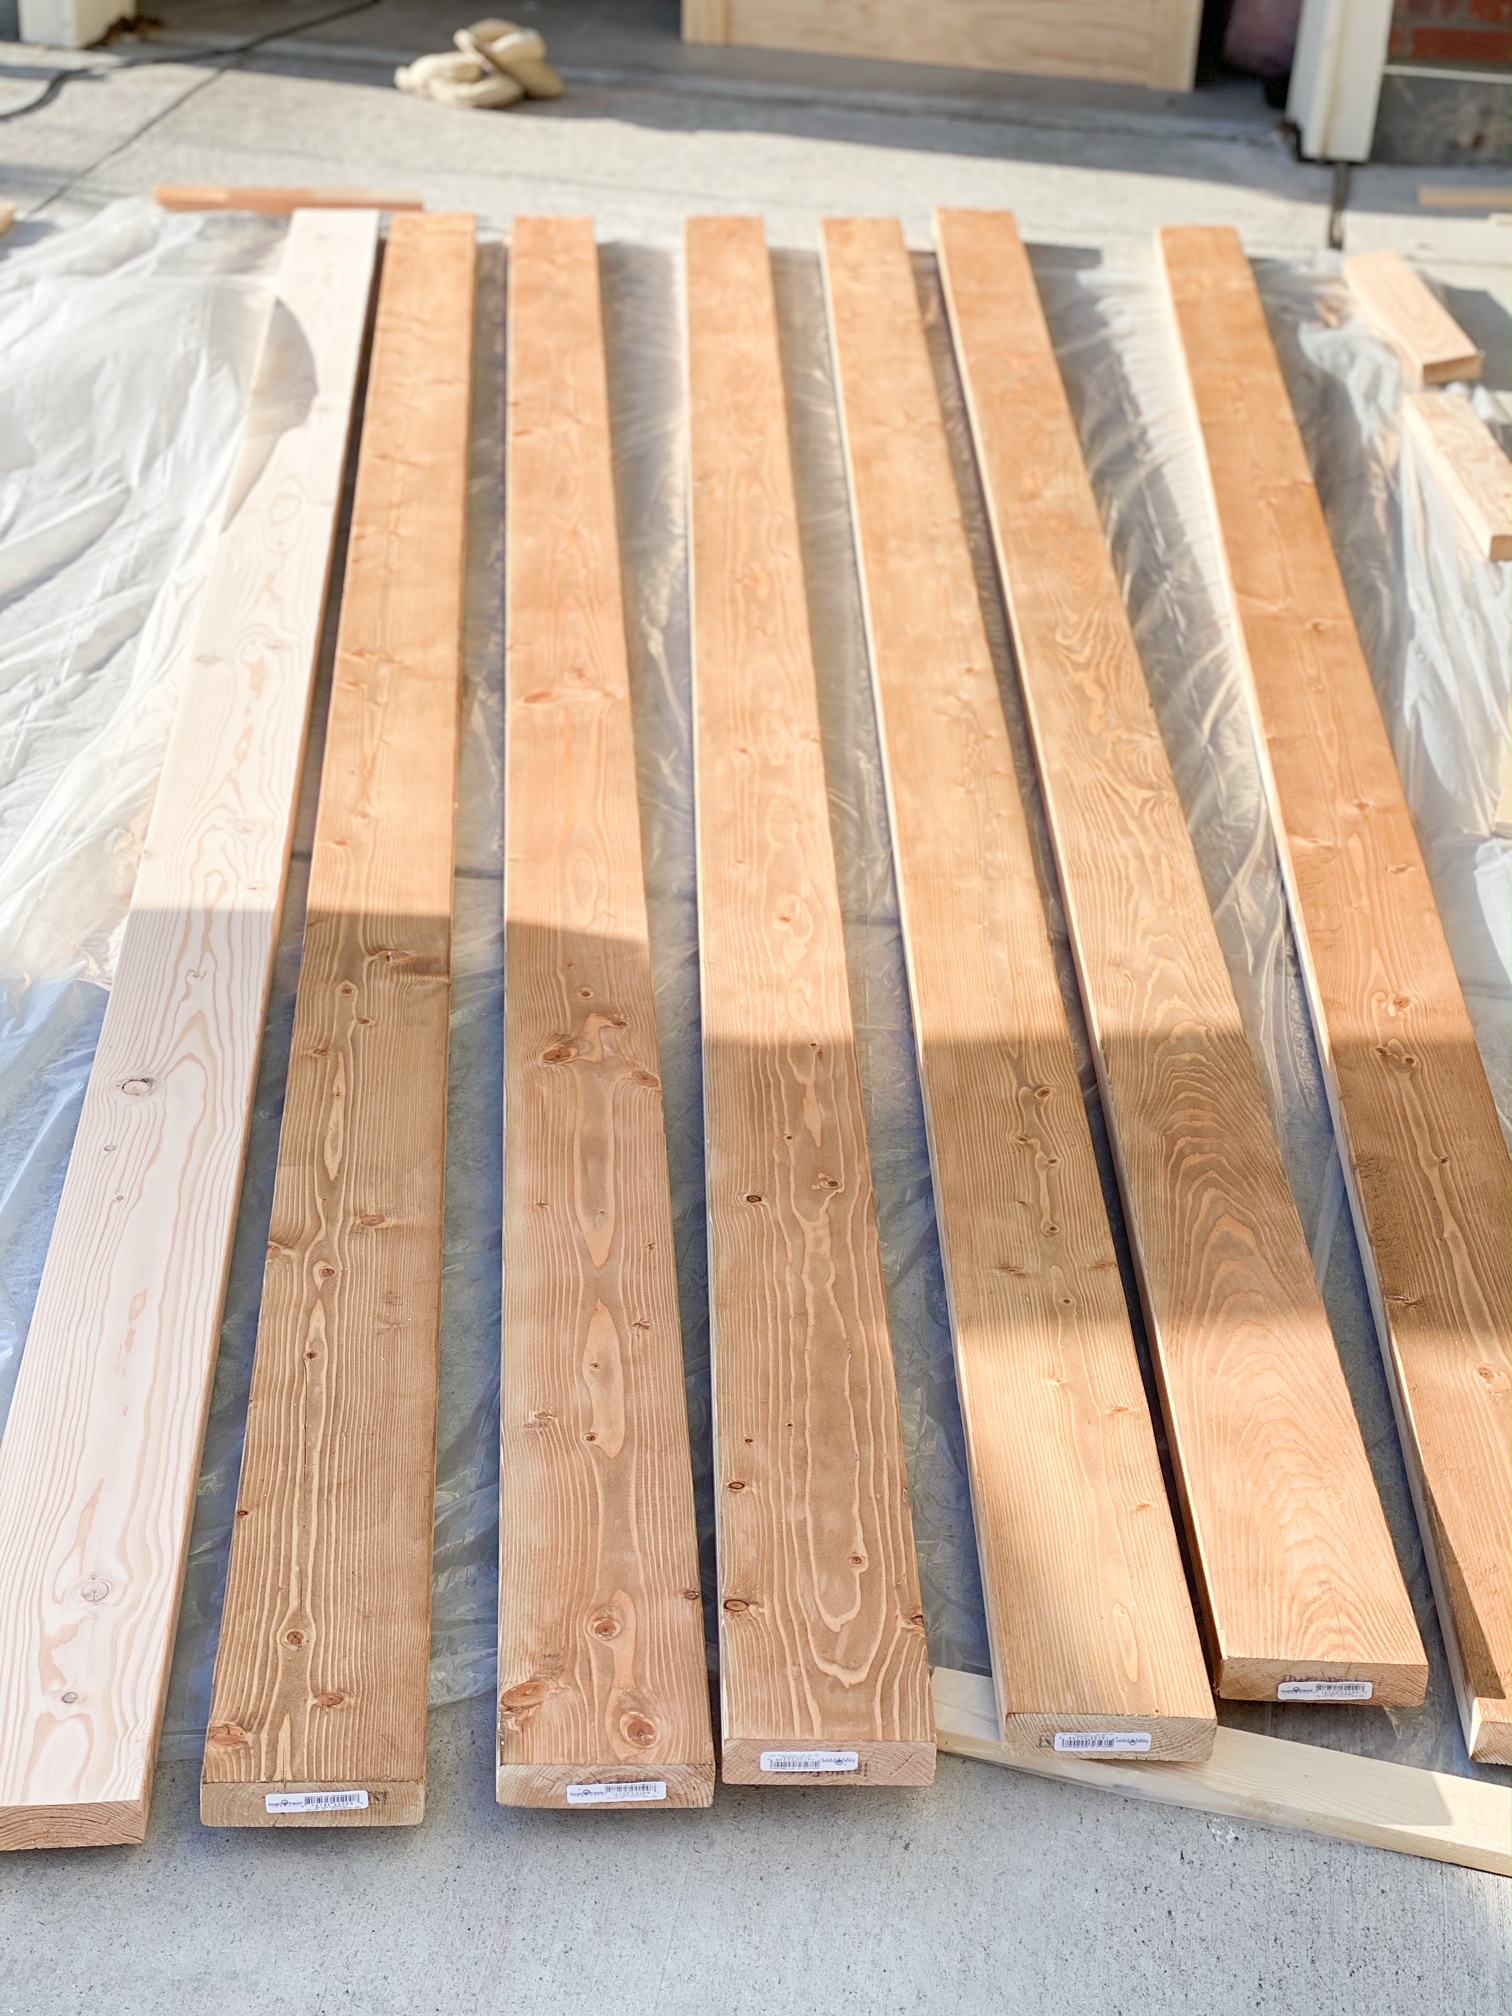
- 2×8 lumber (ours were 2x8x12, but the length will vary based on how long you need)
- 2×4 lumber (for the ends, these can be left off)
- Early American stain
- Sander
- Miter Saw
- 4 inch outdoor screws (we chose the bronze color so they would blend in with the wood)
- Compact driver
- Jig saw (if you need to cut for lighting)
Instructions:
- Start by sanding and staining your lumber. It is super important to sand first because it helps get the red tone out of the lumber. Unless you like a red undertone, then it is not as necessary.
- Find the ceiling studs and mark with a pencil where they are.
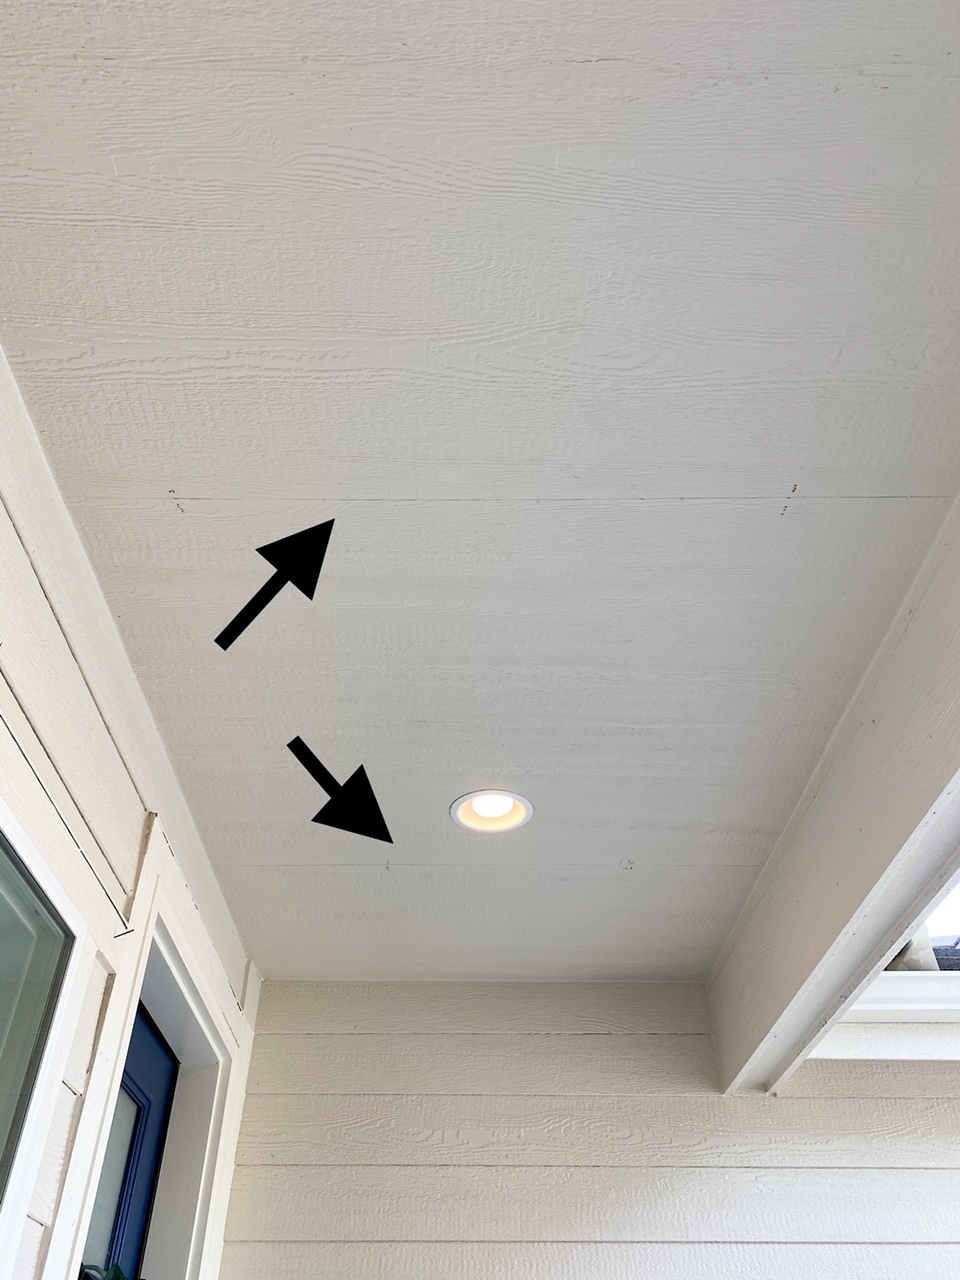
- We hung 2×4’s up on the ends. We did this because our 12 foot boards weren’t quite long enough, so this filled in the space while also creating a border. But you do not have to do this step!

- Predrill holes where the screws will be going into your board (this prevents the board from splitting). You will need to measure so that they line up with the studs.
- We would measure each section and cut the board to fit perfectly between the two 2×4’s.
- Then we hung them by drilling the screws through the predrilled holes and then screw them into the studs.
- Repeat steps above for every board.
- You will only do this step if you are cutting around lighting: When we came to the canned lighting we used a piece of paper and outlined how big the circle was. We then created a cardboard cut out to use as a guide when cutting the circle out of the wood.
- We used a jigsaw for this.
That is it! Honestly such a simple project and took us 1 day to complete. Obviously it will take longer if you have a bigger porch, but still a simple project that makes a huge impact!
If you didn’t check out Rachel’s post on How To Stage A Home you can find it here! She gave such great advice for making your house look like a model home when selling! Also, make sure you are following us on Instagram for daily updates, home decor and DIY! I hope you have a great rest of your week!
See our Disclosure here.
[…] Front Porch DIY Wood Ceiling […]