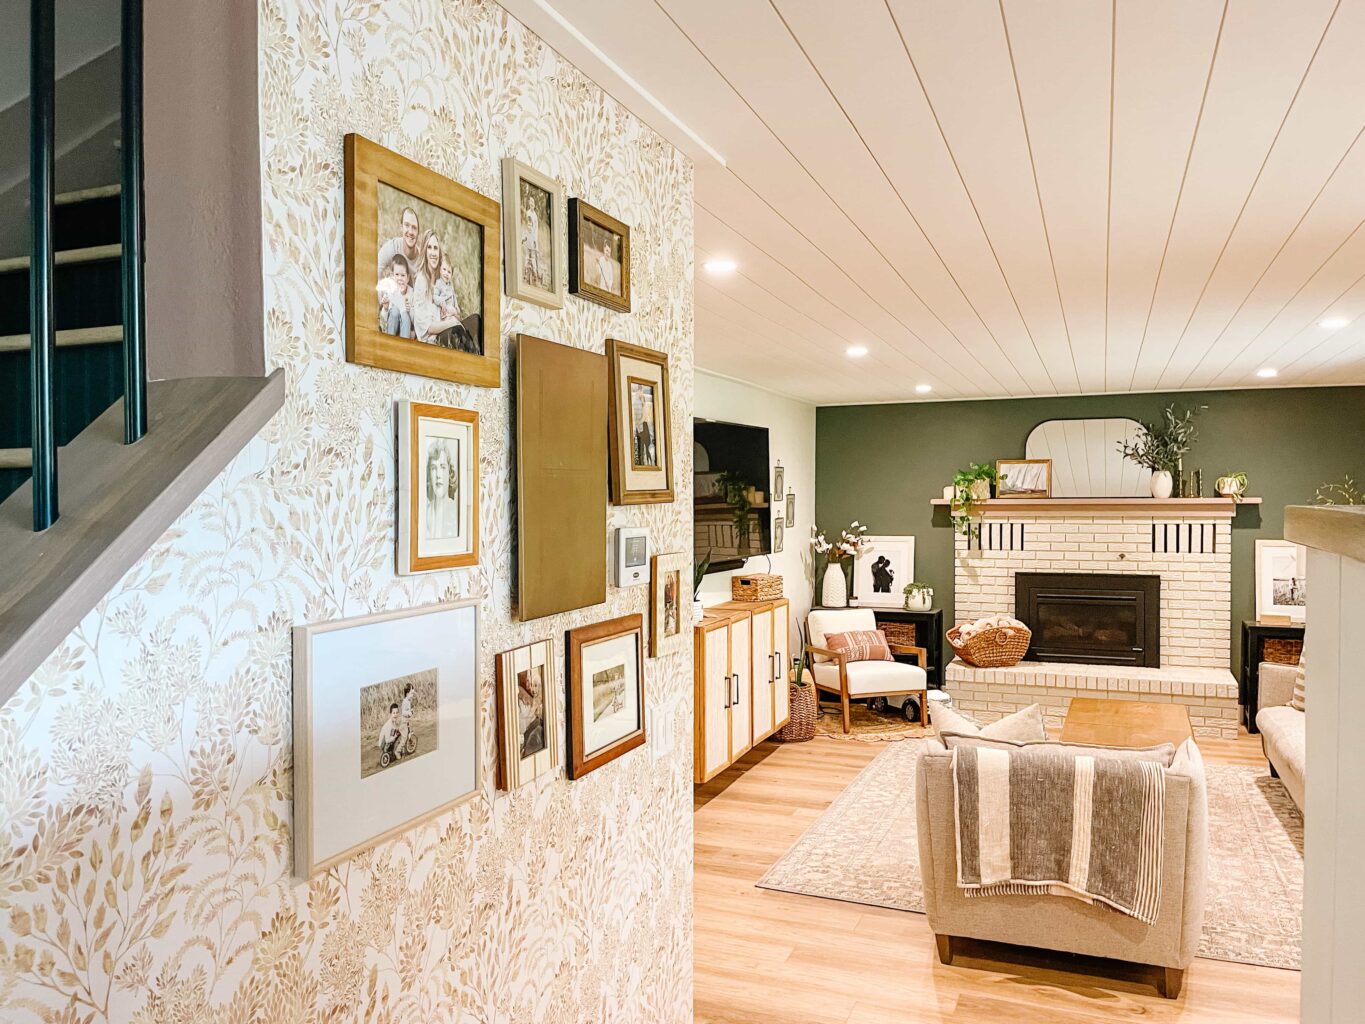
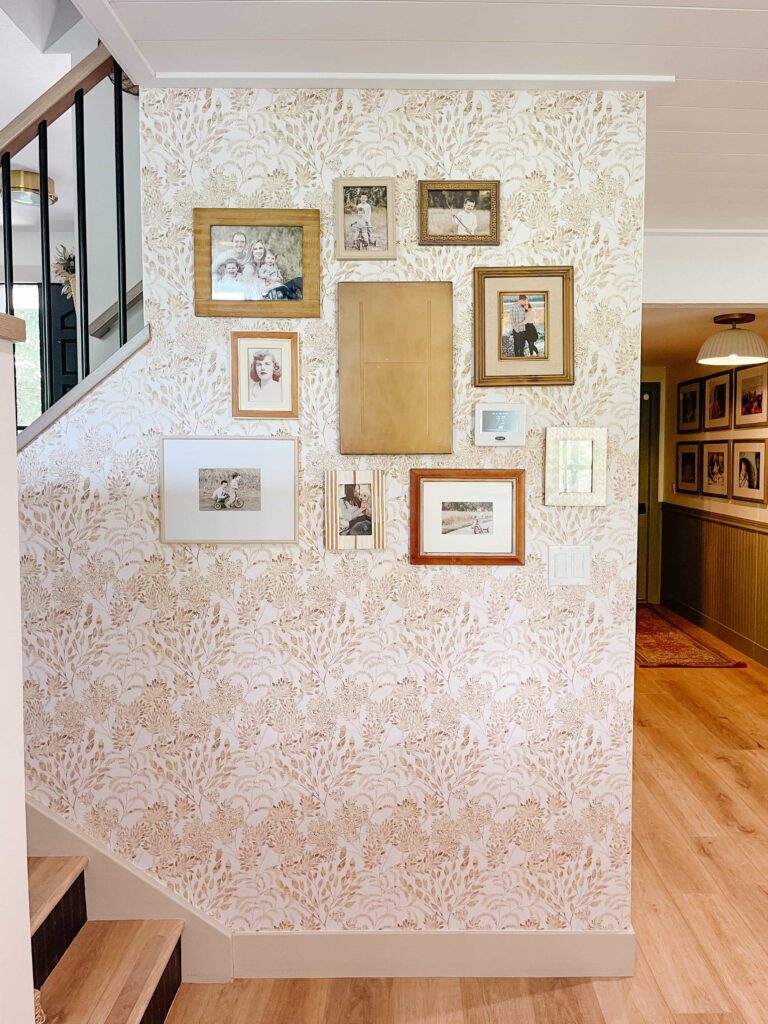
See how we added a cute wallpaper accent wall near our stairs and tips on how to install non-pasted wallpaper!
I’ve been on a mission to add charm and character to our 1970’s fixer-upper, and wallpaper has proven to be a super easy and fun way to achieve just that. When we first moved in a few years ago, we painted everything a warm white color (Sherwin Williams Alabaster) … it felt good to start with a clean slate while I was deciding what to add to each room.
After living with mainly white walls for a while, I’ve been slowly introducing more color and pattern into each room. I’ve always loved colorful and eclectic homes…I honestly don’t know why I thought an all white house would work for me, haha! My husband hasn’t been thrilled about re-painting the walls we just painted a couple of years ago, but it’s ultimately an easy transformation and i’d rather create a home I love than live with white walls just because they were recently painted!
So, this past weekend, we installed Tempaper’s new non-pasted wallpaper for the first time, and it was a game-changer! What I love about the non-pasted wallpaper was how well it worked on our textured walls, something I’ve struggled with when using peel and stick wallpaper before. The texture didn’t interfere with the application process, and the non-pasted wallpaper adhered seamlessly, creating a beautiful finish. The process was surprisingly easy, and I’m loving the result!
In this blog post, I’ll share my experience with installing Tempaper’s new non-pasted wallpaper for the first time, the pros and cons of non-pasted wallpaper vs. peel and stick wallpaper, tips I learned along the way, and why it’s becoming my new favorite DIY project!
Shop Non-Pasted Wallpaper:

Pros and Cons of Non-Pasted Wallpaper
Here are a few Pros I noticed about the Non-Pasted Wallpaper:
- Nice soft texture and feel – the non-pasted wallpaper feels more like fabric and less like glossy paper (like peel and stick wallpaper can feel)
- Thicker material – the non-pasted wallpaper is thicker than other peel and stick wallpaper I’ve used, making it easy to work with when installing and it hides any wall texture better.
- Better for Textured Walls – because you are applying the paste yourself, it is easier to control how much you can add. By using a good amount of paste on the walls, we were able to make sure it got into every grove on our textured walls, helping the paper stick to the walls better. I’m really surprised by how well it stuck to our textured walls!
- Easier to adjust while installing – the thicker paper makes it easier to hold and place on the wall, and because you are adding paste to the wall, you are able to slide the panels into place while the paste is still wet, making it easier to straighten and adjust. With peel and stick wallpaper, it sticks to the wall right away so you have to completely peel it off to readjust it.
- Long Lasting – because it is a thicker, more durable material, and is easier to create a strong bond to the wall with the paste, I think the non-pasted wallpaper will last much longer than peel and stick wallpaper.
And a few Cons to the Non-Pasted Wallpaper:
- Messier to Install – it is definitely a messier application process vs. installing peel and stick wallpaper. I wasn’t expecting the glue to be so messy but it was pretty thin, so it dripped off the roller and brush easily and splattered while I was rolling it onto the wall.
- More Expensive – the non-pasted wallpaper itself is often time more expensive than peel and stick wallpaper, and then you have to buy all of the installation supplies.
- More Time Consuming Installation – it definitely took us longer to install the non-pasted wallpaper than it would have to install peel and stick wallpaper … but this was our first time doing it so I’m sure it would go faster the next time, and overall it was pretty easy.
How to Install Non-Pasted Wallpaper
Step 1 – Prep your Surface
It is important to prep the wall space before you begin hanging the non-pasted wallpaper. Make sure your wall is clean, and free of any nails or big imperfections. I just used a damp microfiber cloth to wipe our wall down. You can also use spackle to fill any holes, and sand down any bumps or imperfections on the wall.
Most people recommend only hanging wallpaper on a smooth surface, but our walls are textured! Because this was our first time installing non-pasted wallpaper, I wanted to test out how it worked with our textured walls before committing to smoothing them down. I’m so happy that it stuck to the textured walls because it saved so much time and would have been a lot of work to smooth them out.
Step 2 – Cut Wallpaper Pieces
Measure your wall height and cut your wallpaper pieces first so you have them ready to go once you start applying the paste. Make sure to cut them longer than the wall height so you have a few inches to spare at the top and bottom. Also pay attention to the pattern repeat to make sure all of the pieces line up.
Step 3 – Mark Plumb Line
It’s important to draw a plumb line, which will act as a guide for your panel. Walls are never perfectly straight and level so you don’t want to line up the edge of the wallpaper with the the edge of the wall or ceiling…you need to draw a straight vertical line to work from.
Measure from the corner of the wall the width of the wallpaper minus ½ inch. Mark this spot with a pencil. Next, place your level at the mark and create a straight, vertical line. This is your plumb line. You will create a plumb line every time you reach a corner or start a new wall.
Or, you can use a laser level to mark a line on the wall to start at, which is what we did.
Step 4 – Paste the Wall
Using a paint roller, apply wallpaper paste to the wall or surface. You want to roll the paste on slowly (so it doesn’t splatter all over you) and evenly. Work quickly in small areas so it doesn’t dry out too fast! Roll paste slightly wider than the panel size to make sure you get all of the edges.
Step 5 – Hang First Panel
Start at the top and align the edge of the panel with your plumb line. You should be able to slide it into place before the paste is dry.
Step 6 – Smooth it Out
Working from top to bottom, use a straight edge tool or squeegee to smooth out the panel. Make sure there are no trapped air bubbles and all of the edges are sticking. If you notice any edges are not sticking, you can use your finger to apply some more paste to that area.
Repeat until all of your panels are hung! It can be helpful to slightly overlap the panels.
You can use a seam roller to smooth out the edges as well.
Step 7 – Trim Edges
Use your straight edge tool and a precision knife to trim away any excess wallpaper at the bottom and top of your panel, and at any corners where it might overhang.
Step 8 – Wipe the Wall
Wipe away any paste residue on your wallpaper, trim, and floor with a damp sponge and clean water.
I love how it turned out!!
What I Would Do Differently Next Time
We used the “paste-the-wall” method, and I found it hard to get enough paste on the wall without it dripping everywhere (maybe our paste was too thin?). It was also hard to hand the whole panel before the paste dried.
Next time I will try to paste the paper as well. I did that on the final small piece for our wall and it was much easier and stuck really well!
Also make sure to pay down a drop cloth and have a towel handy before you begin – this was much messier than I thought it was going to be!
I also think the straight edge tool I used to smooth out the paper was too sharp/hard because it tore the paper a tiny bit in some areas, so just be careful when you are doing that step!
Final Thoughts on Non-Pasted Wallpaper
Overall, our first time installing non-pasted wallpaper went really well! I’m shocked by how well it stuck to our textured walls! I was a little nervous to try this out because I had only ever installed peel and stick wallpaper before, but it was much easier than I thought it would be! The only con was that it was a little messy, but the paste is water based so it was easy to clean up!
I’ll definitely be installing non-pasted wallpaper again! Make sure to check out Tempaper’s new non-pasted wallpaper collection! There are so many beautiful prints and colors and the quality was great!
Shop All Tempaper Non-Pasted Wallpaper:
This post shared tips on how to install non-pasted wallpaper and our cute new small accent wall using Tempaper’s new non-pasted wallpaper collection!
This post was sponsored by Tempaper. All thoughts and opinions are my own. See my disclosure here.
Leave a Reply