I’m SO in love with how this DIY Chalk Paint Table makeover turned out! And the basket wall! This is now my favorite wall in our house! Painting the table was a little time consuming, but an easy DIY project.
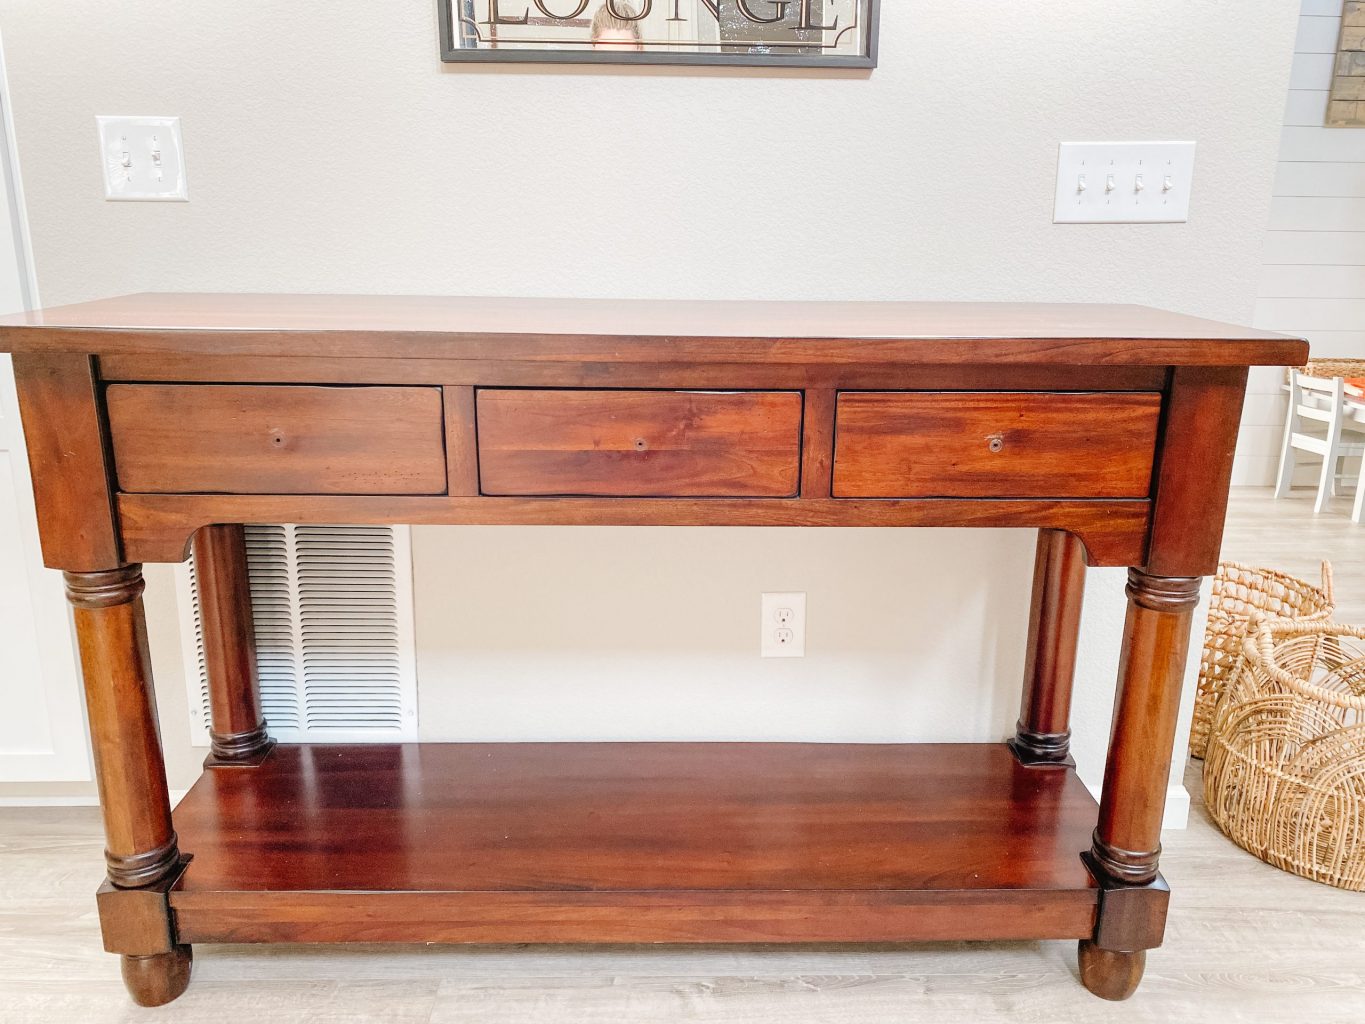
The table that was here was a little small for the space, and wasn’t ever really my favorite, so I started to look around at thrift stores and online for a bigger replacement. I ended up finding this one on our neighborhood Nextdoor page and loved it immediately! It was originally from Potterybarn, was in great condition, and I was able to get it for a great price. It is a perfect size for this wall, and I love the drawers and the open bottom shelf (more space for baskets!). I kind of felt bad about painting over all of the wood, because it was really pretty, but the color was a little too red compared to the other wood tones in our house, and I wanted to brighten up the room a little bit.
The vintage wall baskets are from Etsy and I love the texture and warmth they add! I just love how it all turned out!
DIY Chalk Paint Table Makeover :
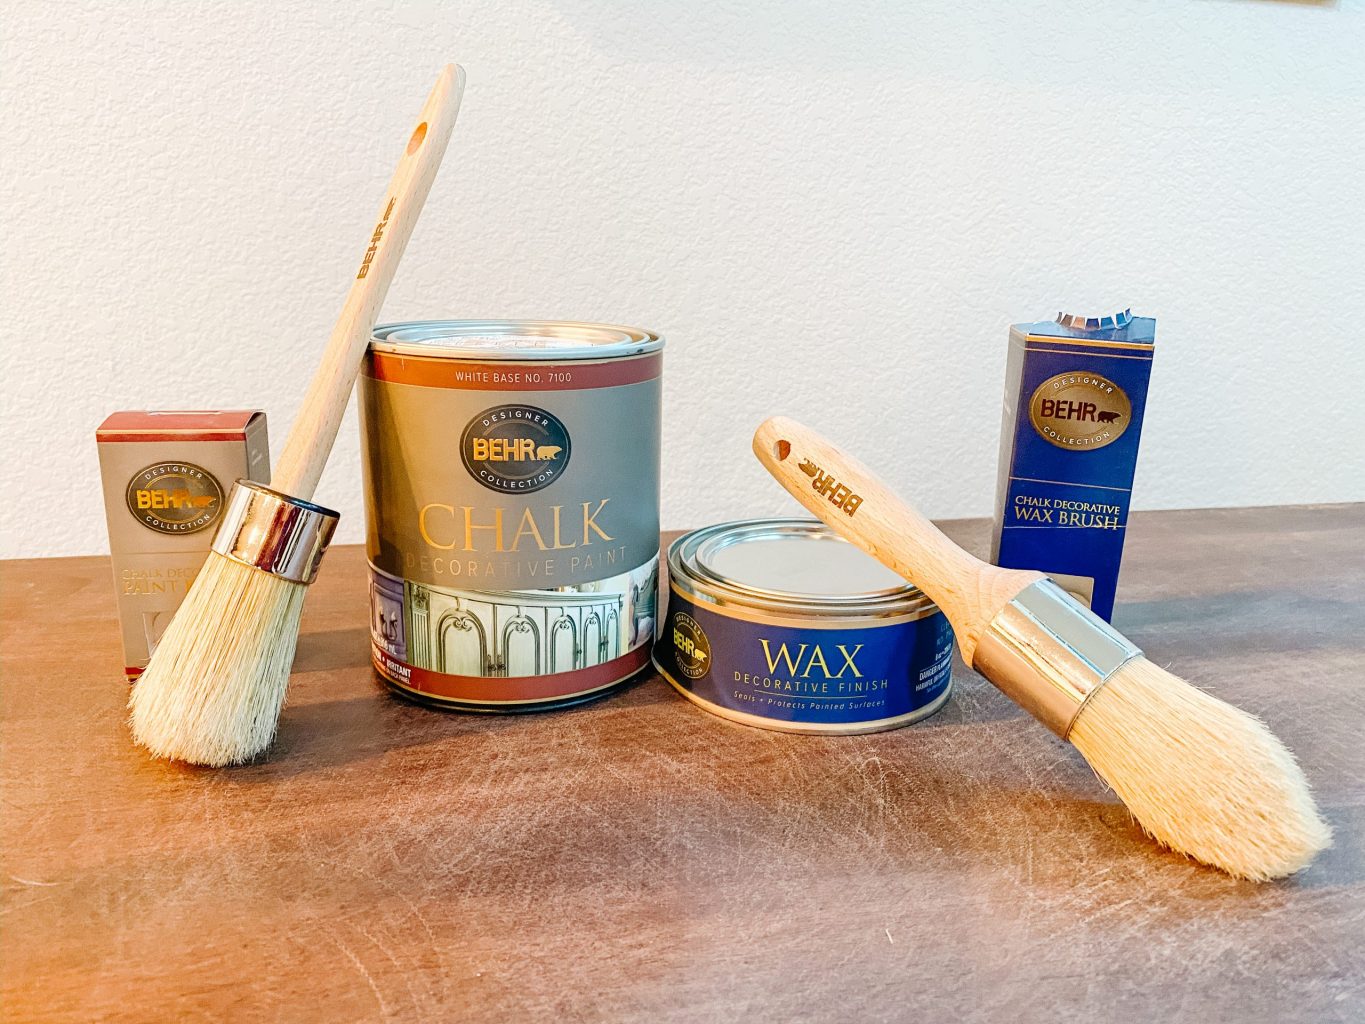
Materials Used:
- Electric Hand Sander
- Painter Tripods
- Behr Chalk Paint – Farmhouse White
- Paint Brush
- 80 – 150 Grit Sandpaper
- Behr Wax – Clear
- Wax Brush
- Buffing Rag

Step 1 – Sand Table
I could have skipped this step, but when I started this project I wasn’t sure if I wanted to leave the top of the table as stained wood or not. I started to sand it down to see how hard it would be to remove the finish, but it was taking a lot of effort so I decided to just paint the whole thing, haha!

Step 2 – Paint Table
It took 3 coats of paint to cover the table because the original stain was pretty dark. I went through almost a whole quart of paint for this project.
Step 3 – Distress Table
After the paint dried I used sand paper to add distressing to the table around the corners, edges, and a few spots on the tops and legs. I absolutely LOVE the texture and depth it adds to the table! The distressing makes it so much more interesting and custom looking and is such an easy step to add!
Step 4 – Wax and Buff
After distressing we added a clear wax to the table to protect the finish from scuffs and scratches. Let the wax dry for a bit and then buff it out with a cloth rag to remove the excess wax and create a smooth finish!
Ta-Da!!!! I am soooo thrilled with how this table turned out! I feel like I could sell it now for 3-4 times what I paid for it..but I won’t be selling it because I love it too much, haha! BUT I 100% recommend finding a used furniture piece to refinish rather than buying something new from a store! We went through this same process with our Dining Table and Buffet Table in our Dining Room and I love those pieces so much too! If you can find a nice, solid wood piece that you love, it is worth it!
Vintage Wall Baskets:
I’ve been wanting some wall baskets for a while and finally took the leap and purchased these off of Etsy! I LOVE the warmth and texture they add! Here are a few tips for hanging them:
Layout on the floor before hanging
By laying them out on the floor first you can get a better idea of how they work together, and you have a plan so you are not as likely to make a bunch on holes in the wall!
Tie fishing line to create a loop on the back
This way you have a loop to hang on the nails. You can also usually nail straight through the baskets but then you risk damaging them and can see the head of the nail through them. I left a short tail on the loop so I could hold it out while hanging them onto the nail.
Final layout!
It ended up looking a little different than the floor layout because I adjusted it a bit as I went. I tried to get the baskets close together, but not on top of each other, and it was HARD to get them in the exact place I wanted! For this reason, it would have been easier to nail through the baskets without using the loop, but I didn’t want to damage the baskets!
I love how this DIY chalk paint table turned out so much, and it was a pretty easy and inexpensive transformation! Hope this all helped and inspired you to paint some furniture of your own! Let me know in the comments if you have any questions about the sources or the process!
For more DIY fun check out the wood shelves I made for our Dining Room!
See our Disclosure here.
Love the work you have done. It looks great.
Thank you so much!