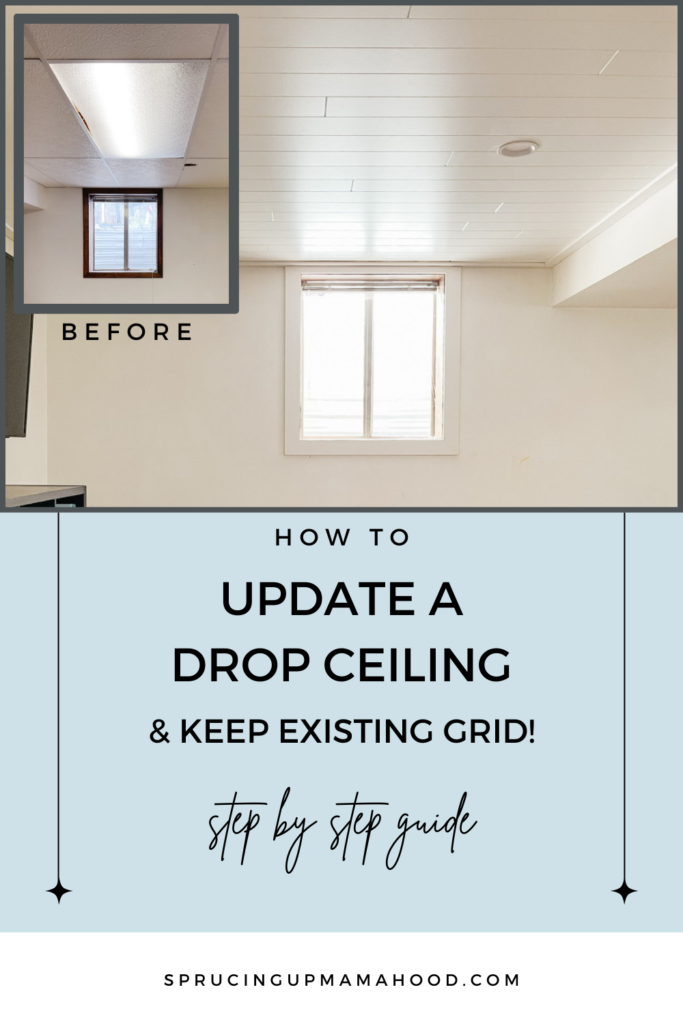
See how we gave our old drop ceilings an easy update with wood planks!
Happy 2024! We have been working hard on our basement playroom remodel over the past few weeks! The goal was to finish it by Christmas, which didn’t totally happen, but we have made some great progress! One of the major projects we finished was updating our old dropped ceiling! I’m so impressed by how it turned out! Below you can find all the details on this easy way to update a drop ceiling.
Follow along on INSTAGRAM to see more of our Basement Playroom Update!
Check out the full Basement Remodel Design Plan and Inspiration HERE!
Drop Ceiling – BEFORE
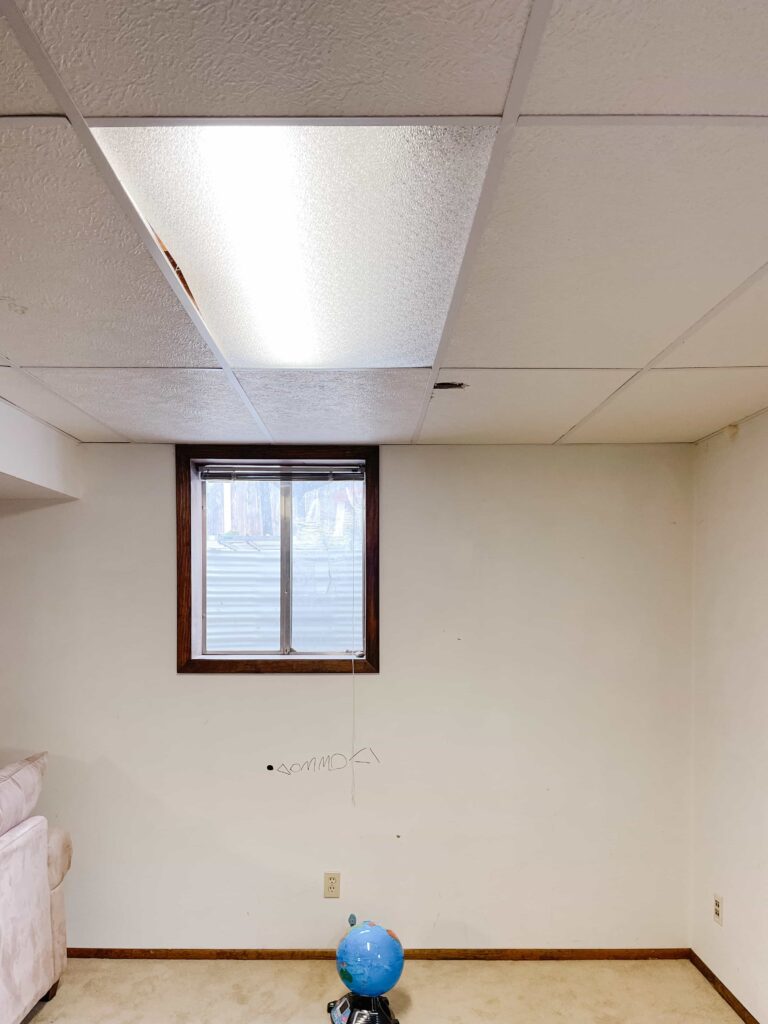
I’m thankful that our basement was finished when we moved into our 1970’s fixer upper, but it was probably done back in the 70’s, and was in need of an update! The old drop ceilings were definitely an eye sore (although kind of nice to have during our Kitchen remodel on the floor above).
While it was high on my list to update or replace them, I knew that removing them and installing drywall instead would be costly, time consuming, and MESSY! The drywall repairs were my least favorite part of our Kitchen remodel and I really didn’t want to go that route again!
Armstrong Ceilings to the Rescue!!!
While I was looking online for ideas on how to easily update our drop ceiling, I came across Armstrong Ceilings. They came up with a genius product, the EASY UP clips, that allows you to install beautiful tongue & groove planks to the existing drop ceiling grid.
I was SO EXCITED to find this product! I love the look of wood plank ceilings (we have shiplap ceilings in our Family Room that I LOVE!), and this installation method meant that we didn’t need to remove the existing grid or add any additional framing!
Here’s a BEFORE & AFTER of our basement ceiling – such a huge difference!

Below I’ll explain how to use the Armstrong Ceilings Woodhaven Planks and Easy Up Clips to update your existing drop ceilings.
How To Update A Drop Ceiling
CLICK HERE more details and a video tutorial on how to install the Armstrong Ceiling Woodhaven Planks with your existing drop ceiling grid!
Materials Needed:
- Armstrong Woodhaven Planks
- Armstrong Easy Up Clips
- Table Saw
- Miter Saw
- Cordless Drill / Impact Driver
- Screws
- Moulding
- Nail Gun
- Tape Measure
- Laser Level / String Line
Step 1: Remove Old Ceiling Panels
Remove the drop ceiling panels but keep the existing 15/16″ ceiling grid.
Step 2: Install First Plank at Edge of Room
Determine your plank direction. If you have a 2′ x 4′ ceiling grid, you must run the planks parallel to the main beams. If your existing grid is 2′ x 2′ you can choose either direction.
You’ll need to trim the tongue edge off, length wise, of your first plank that will run along the wall.
Leave a 3/4″ gap along the starting wall. Use a snap string or laser level to make sure the first plank is straight.
Lift the first plank into place and insert an Easy Up Clip into the Groove side of the plank.
Attach the non-supported cut edge of the plank with screws going into the wall moulding/grid. These screws will later be covered by the new moulding after the planks are installed.
Step 3: Add Easy Up Clips
An Easy Up clip will be inserted everywhere a piece of grid intersects the planks.
Note: If an Easy Up clip can’t be installed because of a grid intersection, attach the plank with the Woodhaven clips and screws included in the carton to the face of the grid.
Step 4: Continue Working Across the Room
Stagger the joints as you move across the room, and use a miter saw to trim the planks as needed.
Note: We added recessed lights to our ceilings, so stopped to measure, mark, and cut holes into the planks everywhere a light was added.
Step 5: Add Moulding
Use moulding to cover the edges of the planks around the room. You can use crown moulding, or a smaller trim piece. I wanted a simple looks so we used a 1×2 piece of trim.
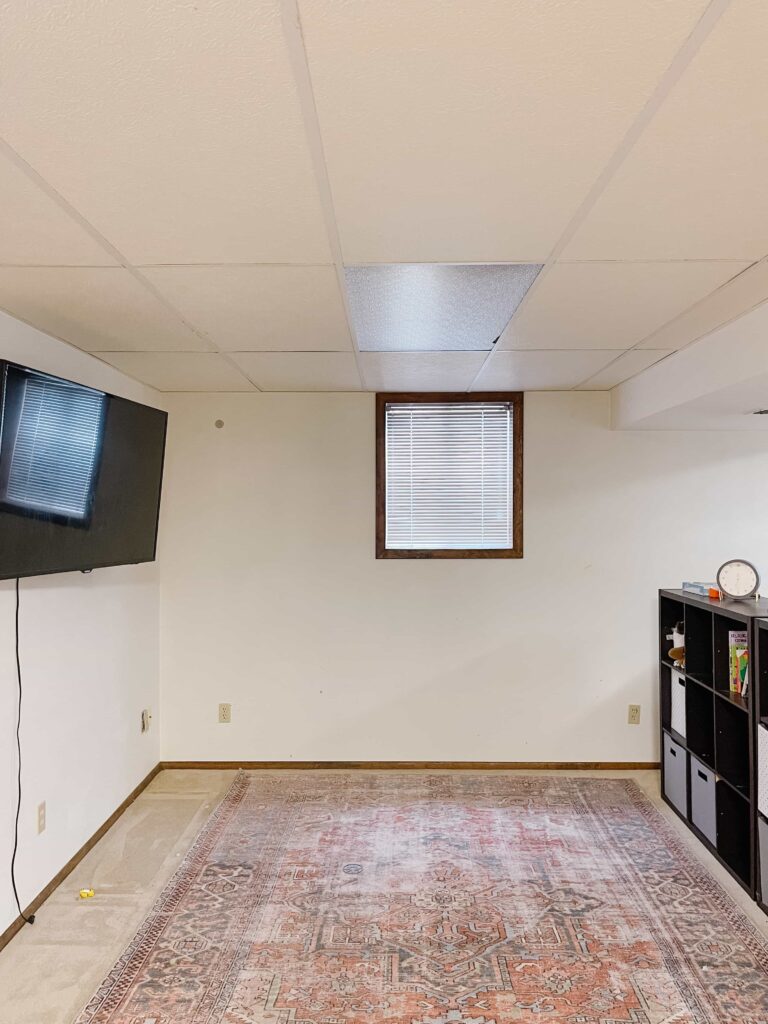
Updated Drop Ceiling – Final Look
That’s it!! I was so shocked by how fast and easy these ceiling planks were to install!
We do still need to caulk the seems at the ceiling moulding and paint the trim, once I decide on a trim color!
I LOVE how our updated dropped ceilings turned out!! Even though we aren’t completely done with our basement remodel yet, it already feels so much brighter and cleaner down there! The new ceilings have made such a huge difference!
I’m truly so thrilled that I came across this product. Our drop ceiling update was a much easier project than I thought it was going to be.
There are many different styles and colors to choose from, including beadboard planks, whitewash finishes, and rustic pine! Check out the Armstrong Ceiling website to see all of the options. They also have many helpful installation videos and examples to make it super easy.
If you are looking to update your existing dropped ceiling I highly recommend looking into the Armstrong Easy Up system and Woodhaven planks.
Remember to check back as we continue to update our basement playroom and to see the final space!
This post shared how to easily update a drop ceiling with Armstrong Ceiling Woodhaven panels.
Thank you to Armstrong Ceilings for sponsoring this post! This post contains affiliate links; see Disclosure here.
What a beautiful update! what is the name of the color/style of Armstrong plank you used? thanks!
Hi, we used the Woodhaven planks in Painted White
can you still easily access above the ceiling panels?
You’d have to remove the trim around the ceiling and then remove the planks…so it’s doable but not easy. I guess easier than drywall though.
How did you update the fluorescent lights with can lights? Thanks!
Hi! My husband was able to re-wire the existing lights and switch them to the recessed cans…I’m sorry I’m not exactly sure on the details!