Does your old metal storm door need a makeover? Check out how we updated our glass storm door below!!

Today I’m sharing how we gave our old 1970’s metal and glass storm door an affordable makeover! You won’t believe this is the same door! See below to find out How to Update an Old Metal Storm Door.
When we bought our 1970’s tri-level fixer upper house last year, one of the first things I noticed was how outdated the front door was! It really hadn’t been touched since the 70’s. Since we moved in, the old wooden front door has gone through a couple of changes, but we hadn’t touched the metal and glass storm door at all.
I actually planned on replacing it with a new one because I thought it was far too outdated and old to even try to update…but my husband was the one that convinced me otherwise! Really all the credit for this transformation should go to him!

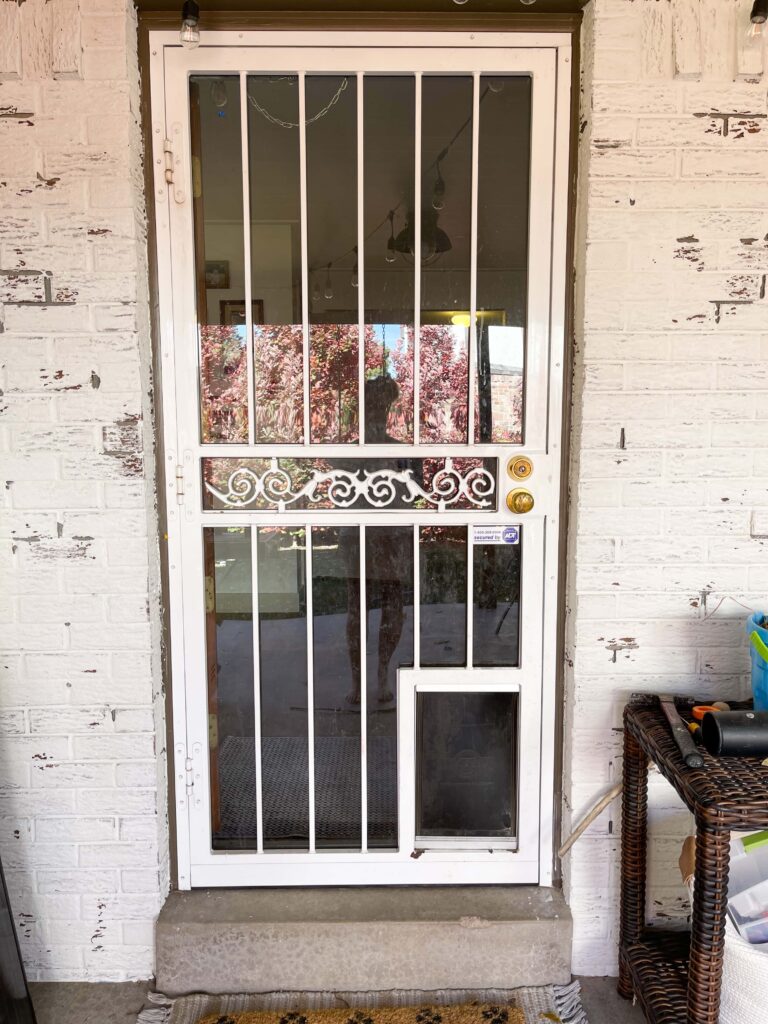
BEFORE – PATIO 
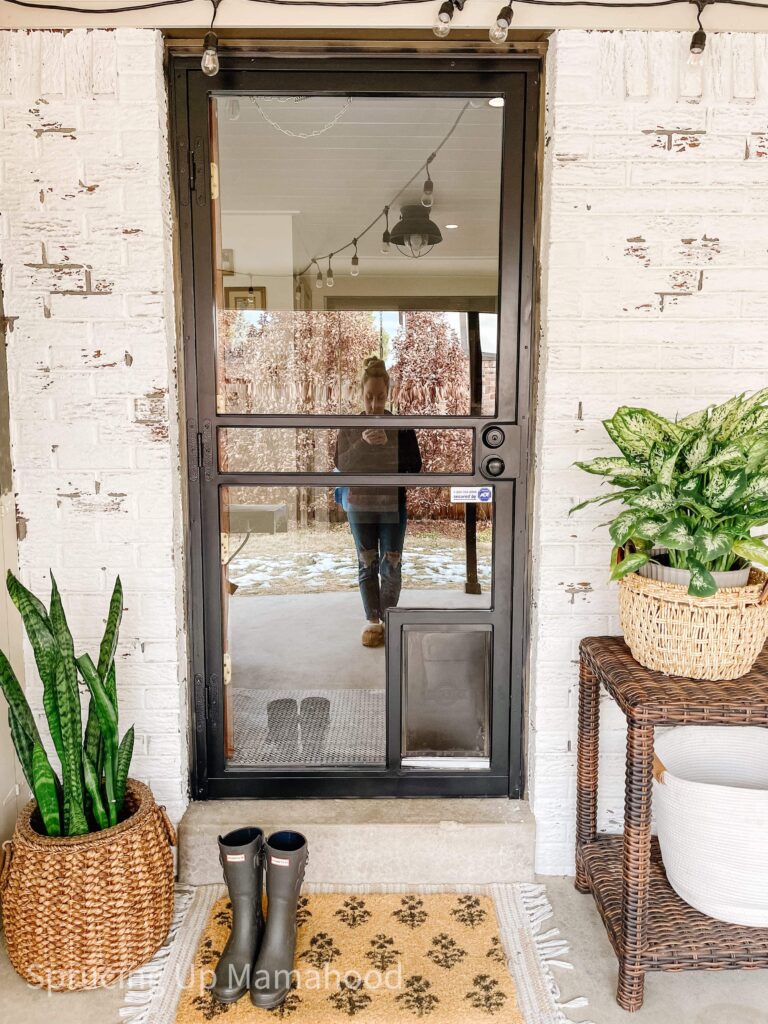
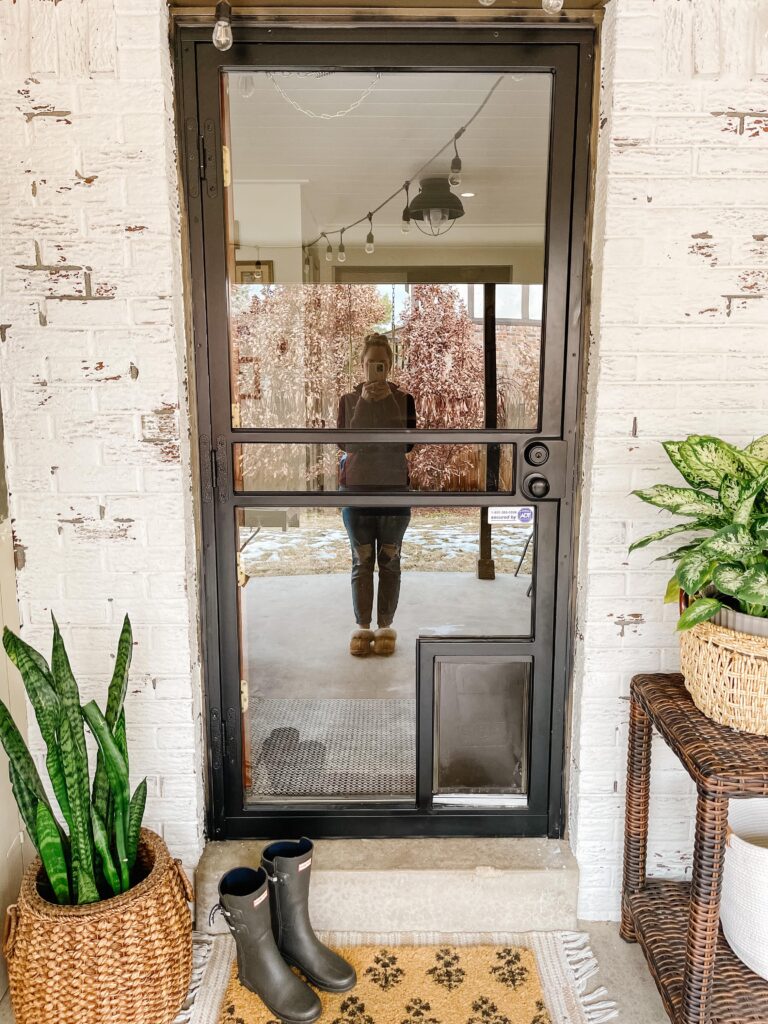
AFTER – PATIO
This post contains affiliate links; see our Disclosure here.
Why our Old Storm Door Needed a Makeover:
I’ve seen people paint their old storm doors to update them, but the part that I disliked the most about our’s were the old metal bars and the metal scroll details. I really didn’t think we could do much about that part. I wanted a clean and modern look with mainly glass.
We thought about getting rid of the storm door all together, but I really loved the bright natural light that it brought in. The front of our house is South facing so it really makes a difference to have more natural light come in through the front storm door.
The new storm door options that I was considering purchasing were around $300 – $400…so not terrible, but every little bit adds up when you are renovating an entire house. You really have to look closely at where you spend money and where you try to save it.
But, the front door is an important area to update and make right. It is really your guest’s first impression of your home and the first thing people see. This area is also especially important when you are listing your house to sell – you want potential buyers to walk in with a good impression.
After my husband had the idea to update the old metal storm door, we decided to try it to see if it would work. Worst case was we didn’t like it and we would then buy a new door.

BEFORE – FRONT DOOR 
AFTER – FRONT DOOR
Here’s what we did to update our old metal storm door…
How to Update an Old Metal Storm Door:
Materials & Tools Needed:
- Black Spray Paint
- Microfiber Cloth
- Sawhorse Stands
- Drop Cloth
- 4.5″ Angle Grinder
- 2X 4.5″ Cutoff Wheels
- 60 grit 4.5″ sanding disc
- 120 grit 4.5″ sanding disc

Step 1 – Remove Door and Disassemble
Depending on your style of door, you may be able to leave the door frame attached to the house and just remove the actual door by pulling the hinge pins. If you have a more modern security storm door, you may need to remove the entire frame.
Remove the glass panels and all the hardware for mounting them from the door and set aside so they are protected.
Remove the door knob as well. You do not want to try and paint the doorknob in place on the door because it is hard to get the backside of the knob without getting too close with spray can.
Step 2 – Remove Metal Bars
Use the angle grinder and 4.5″ cutoff wheel to remove the decorative metal bars. This step is very important to cut as close to the frame as possible without hitting it. Any material you leave proud of the surface is going to be sanded off later which takes a long time if you leave too much material.
Make sure to wear safety glasses! Sparks will fly! You can catch a lot of the spark dust in a plastic bin if you are strategic with the cutting angle of the grinder.
Step 3 – Sand and Smooth

Use the the angle grinder with 60 grit sanding disc to remove the heavy amount of remaining material and make the cut flush with the frame bars. Then use the 120 grit disc to blend the area. If you like, you can move on to finer grits of sandpaper with a standard palm sander. We felt like it looked good enough after the 120 grit disc so we just went with it.
Step 4 – Clean the Door Frame

Use a leaf blower to blow off the door frame to remove all dust and scrape metal pieces. Then use a microfiber cloth to make sure it is totally dust free.
Step 5 – Spray Paint Door

We used this satin black spray paint + primer combo. You could use this primer spray paint to prime the surface first, especially if the metal is has a heavy gloss coat. Our’s has held up perfectly without the primer.
Do 2-3 very light pass coats with the spray paint to prevent it from dripping or getting too thick. Wait until it is dry to the touch before applying another coat. It should only take 10-15 minutes between coats. You can just do all 3 coats on one side before flipping, but should wait 24 hours for the paint on the first side to cure before flipping or it might stick and peel off the first side.
Step 6 – Spray Paint Door Frame

Use the same satin black spray paint + primer to spray paint the door frame that is attached to the house. We used a piece of cardboard while spray painting to protect the areas that we did not want the paint to get on. You could also mask the whole area with plastic, but we did not need to worry about fully masking because we intend on painting the exterior of the house in the coming months.
Step 7 – Spray Paint Door Knob
Use the same satin black spray paint + primer to spray paint the door knob. Again it’s important to do a few very light coats. Do not worry about fully covering the knob with each coat, just do not put too much on in any one coat because once it starts dripping it becomes much harder to fix.
Step 8 – Reassemble and Install the Door

That’s it!! This really was a very simple project and I can’t believe how much better this old Storm Door looks! You cant see the marks where we cut off the metal bars unless you look very closely. We could have continued sanding to make it a truly seamless look, but we are still really happy with the results. It looks so similar to one that we almost purchased, and we saved hundreds of dollars, because we have 2 storm doors that we were able to update this way.
I love that we were able to up-cycle these doors as well and save them from going into a landfill! It’s always so nice when you can use what you have instead of buying more.

Love this transformation!
Thank you so much!
This is so creative! I absolutely love how it turned out – transformed the entire entrance 😍
Thanks so much! It really made a big difference!
It looks so good!
Thank you Kara!
Such a simple change makes a huge difference! Love it!
Thank you! They look so much better!
WOW, WOW, WOW!!! It looks so much better! Love the way it turned out😍
Thank you so much!
I didn’t even know what a storm door was before and now I’m OBSESSEDDDD with this look! 😍
haha so happy to introduce you to the wonderful world of storm doors!
love this!
Thank you!
Great transformation!!!
Thanks Michaela!
This looks so good. You have inspired me. My back screen door is original from the 70s and is baby poop brown lol. It’s been on the list to replace but just not a top priority. I’m going to try to give it a facelift once the warmer weather shows back up!
Oh I’m so glad this is helpful! Let me know if you have any questions!
Turned out great! However, technically those bars that were removed weren’t for decoration but security. That wasn’t a normal storm door but a security storm door. If fitted with a double keyed deadbolt, it makes it much harder for someone to get in through.
Yes that’s true!
Exactly what I was looking to do. Sweet. Thanks for the inspiration!
of course!