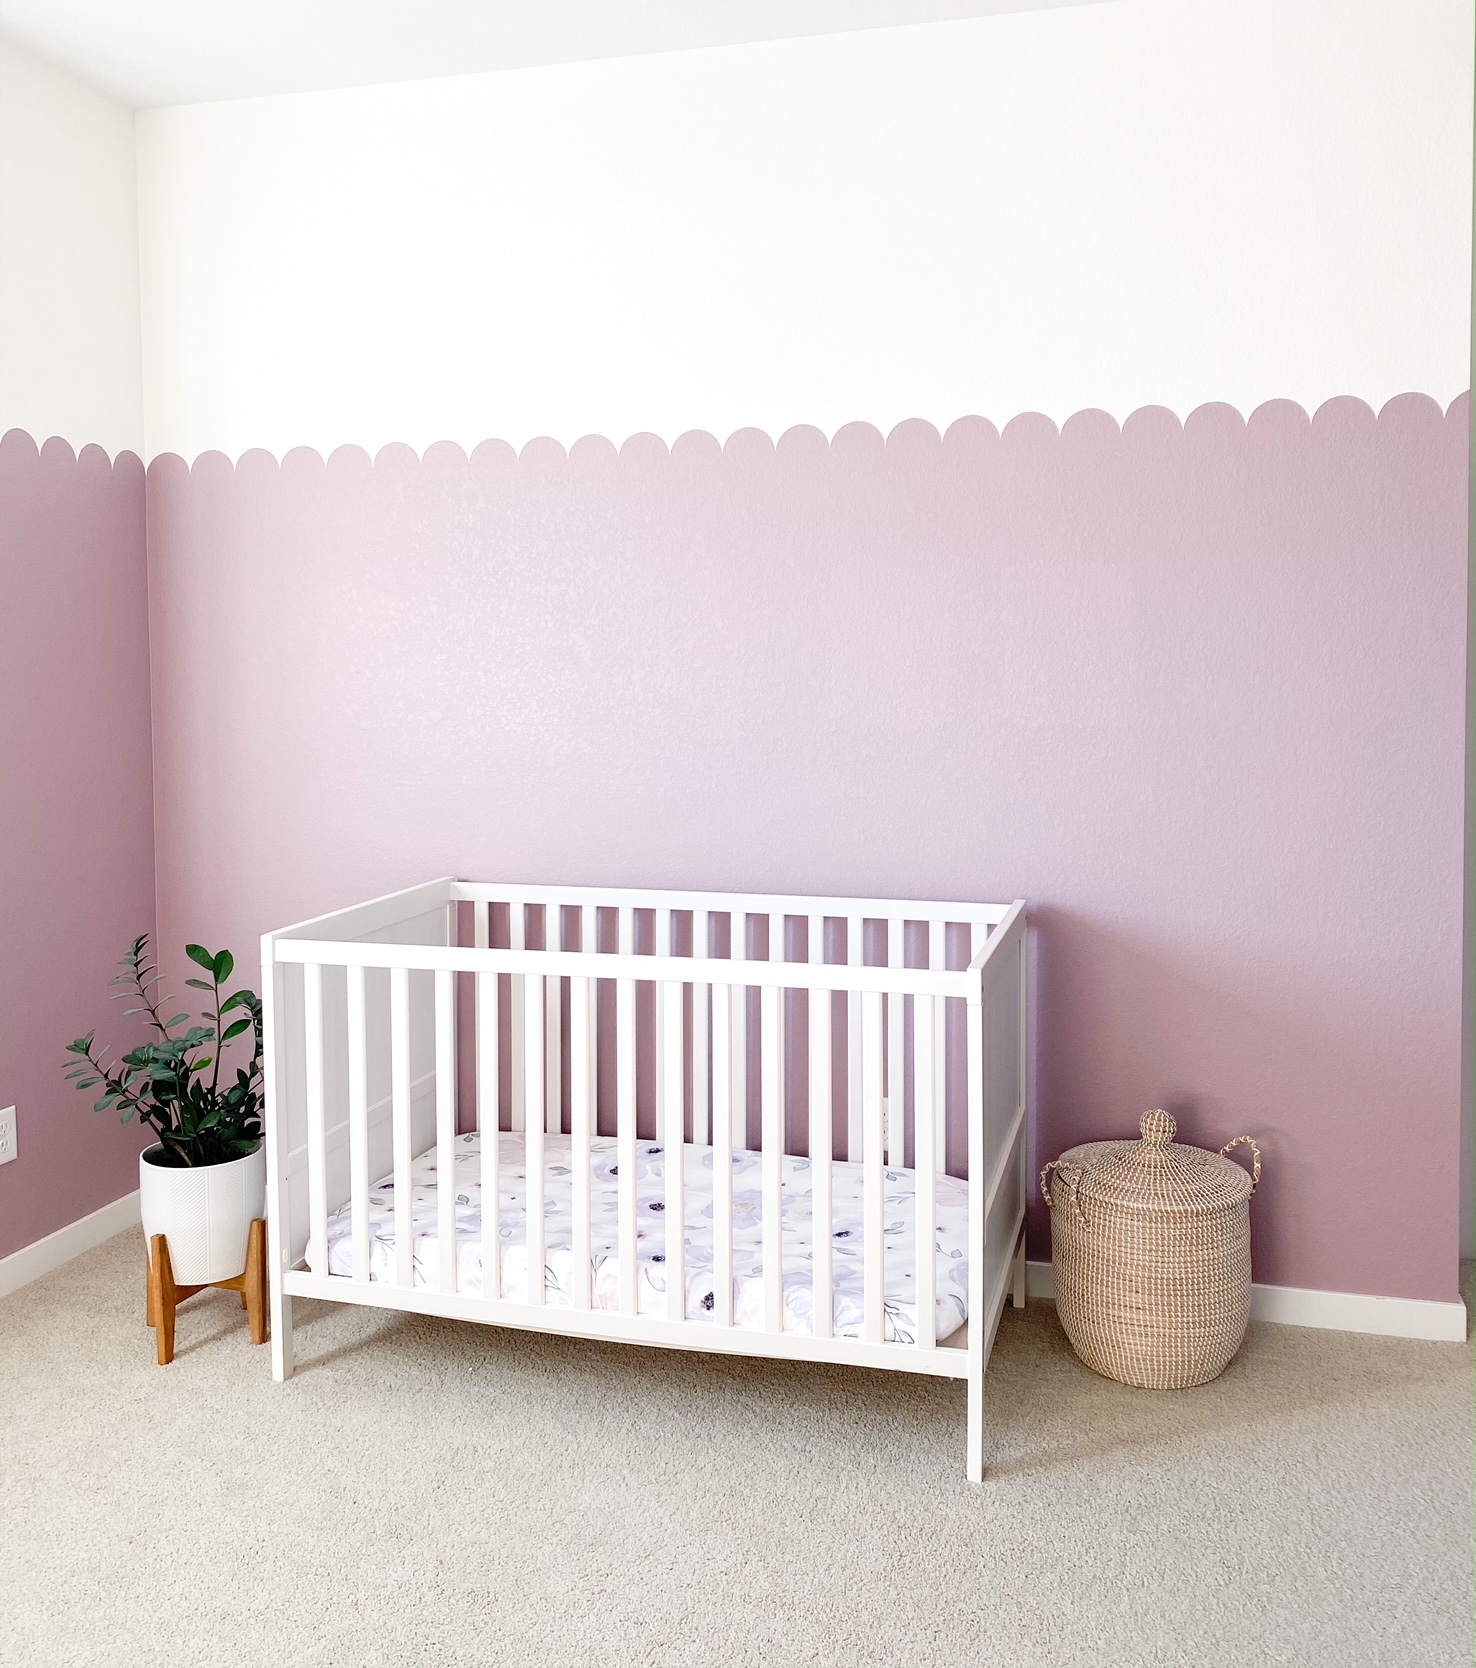
Happy Friday! I am so excited to finally be sharing how we did the scalloped wall in baby girls nursery!
I posted to our Instagram a quick “reel” that showed a video of how we did it. But I have been excited to get a tutorial up on our blog as well and share all the the details (including paint color)!
This scalloped wall was actually much easier than we were anticipating! We had thought painting the scallops would be super time consuming but they ended up only taking a few hours for the entire room!
The final product was definitely worth the time spent! Plus, this project is super inexpensive. All we had to buy was 2 gallons of paint, that’s it!
This post contains affiliate links; see our Disclosure here.
What You Will Need:
- Paint (for both top and bottom colors)
- Blue painters tape
- Paint roller
- Paint brush
- Laser Level
- Small paint brush (ours was about 1 cm wide)
- Something that is a circle you can trace (we used a lid to our tupperware)
I am sorry in advance for not having a lot of progress pictures. With being pregnant my husband did this project for me. So I wasn’t in the room taking step by step pictures like I would normally be.
Colorblock Wall
First, you are going to paint the top half of the wall whatever color you decide to go with! We went with Chantilly Lace by Sherwin Williams. Let that dry completely before moving to the next step.
Next, you are going to use a laser level to get a horizontal line on all the walls. Using a level like this allows you to line up the blue tape on the laser line so it’s all level and even on all walls (this is the level we have! It is super inexpensive and works perfectly)!
Make sure your tape is pushed down well. Then paint the tape with your top color so that when you go to paint your bottom color none of the paint leaks through the tape.
Painting with the top color first will make for a perfectly straight line! (For more colorblocking tips check out Rachel’s blog post on the colorblock wall in her son’s room).
Then, after the top paint color is dry on the tape, you will paint the bottom part of your wall! The bottom color we used is Roaring Twenties by Behr!
After the paint is totally dry you can take the tape off. You should get a near perfect line!
Scallops
Then it’s time for the scallops part of the scalloped wall! We used a tupperware lid to draw the half circles!
We first found center on the lid and used tape to mark it off. That way we could line up the tape edge with the paint line to ensure we were getting a perfect half circle for every scallop.
We started in the middle of the wall you see right when you walk into the nursery and worked our way out and around the room! We just used a pencil to trace.
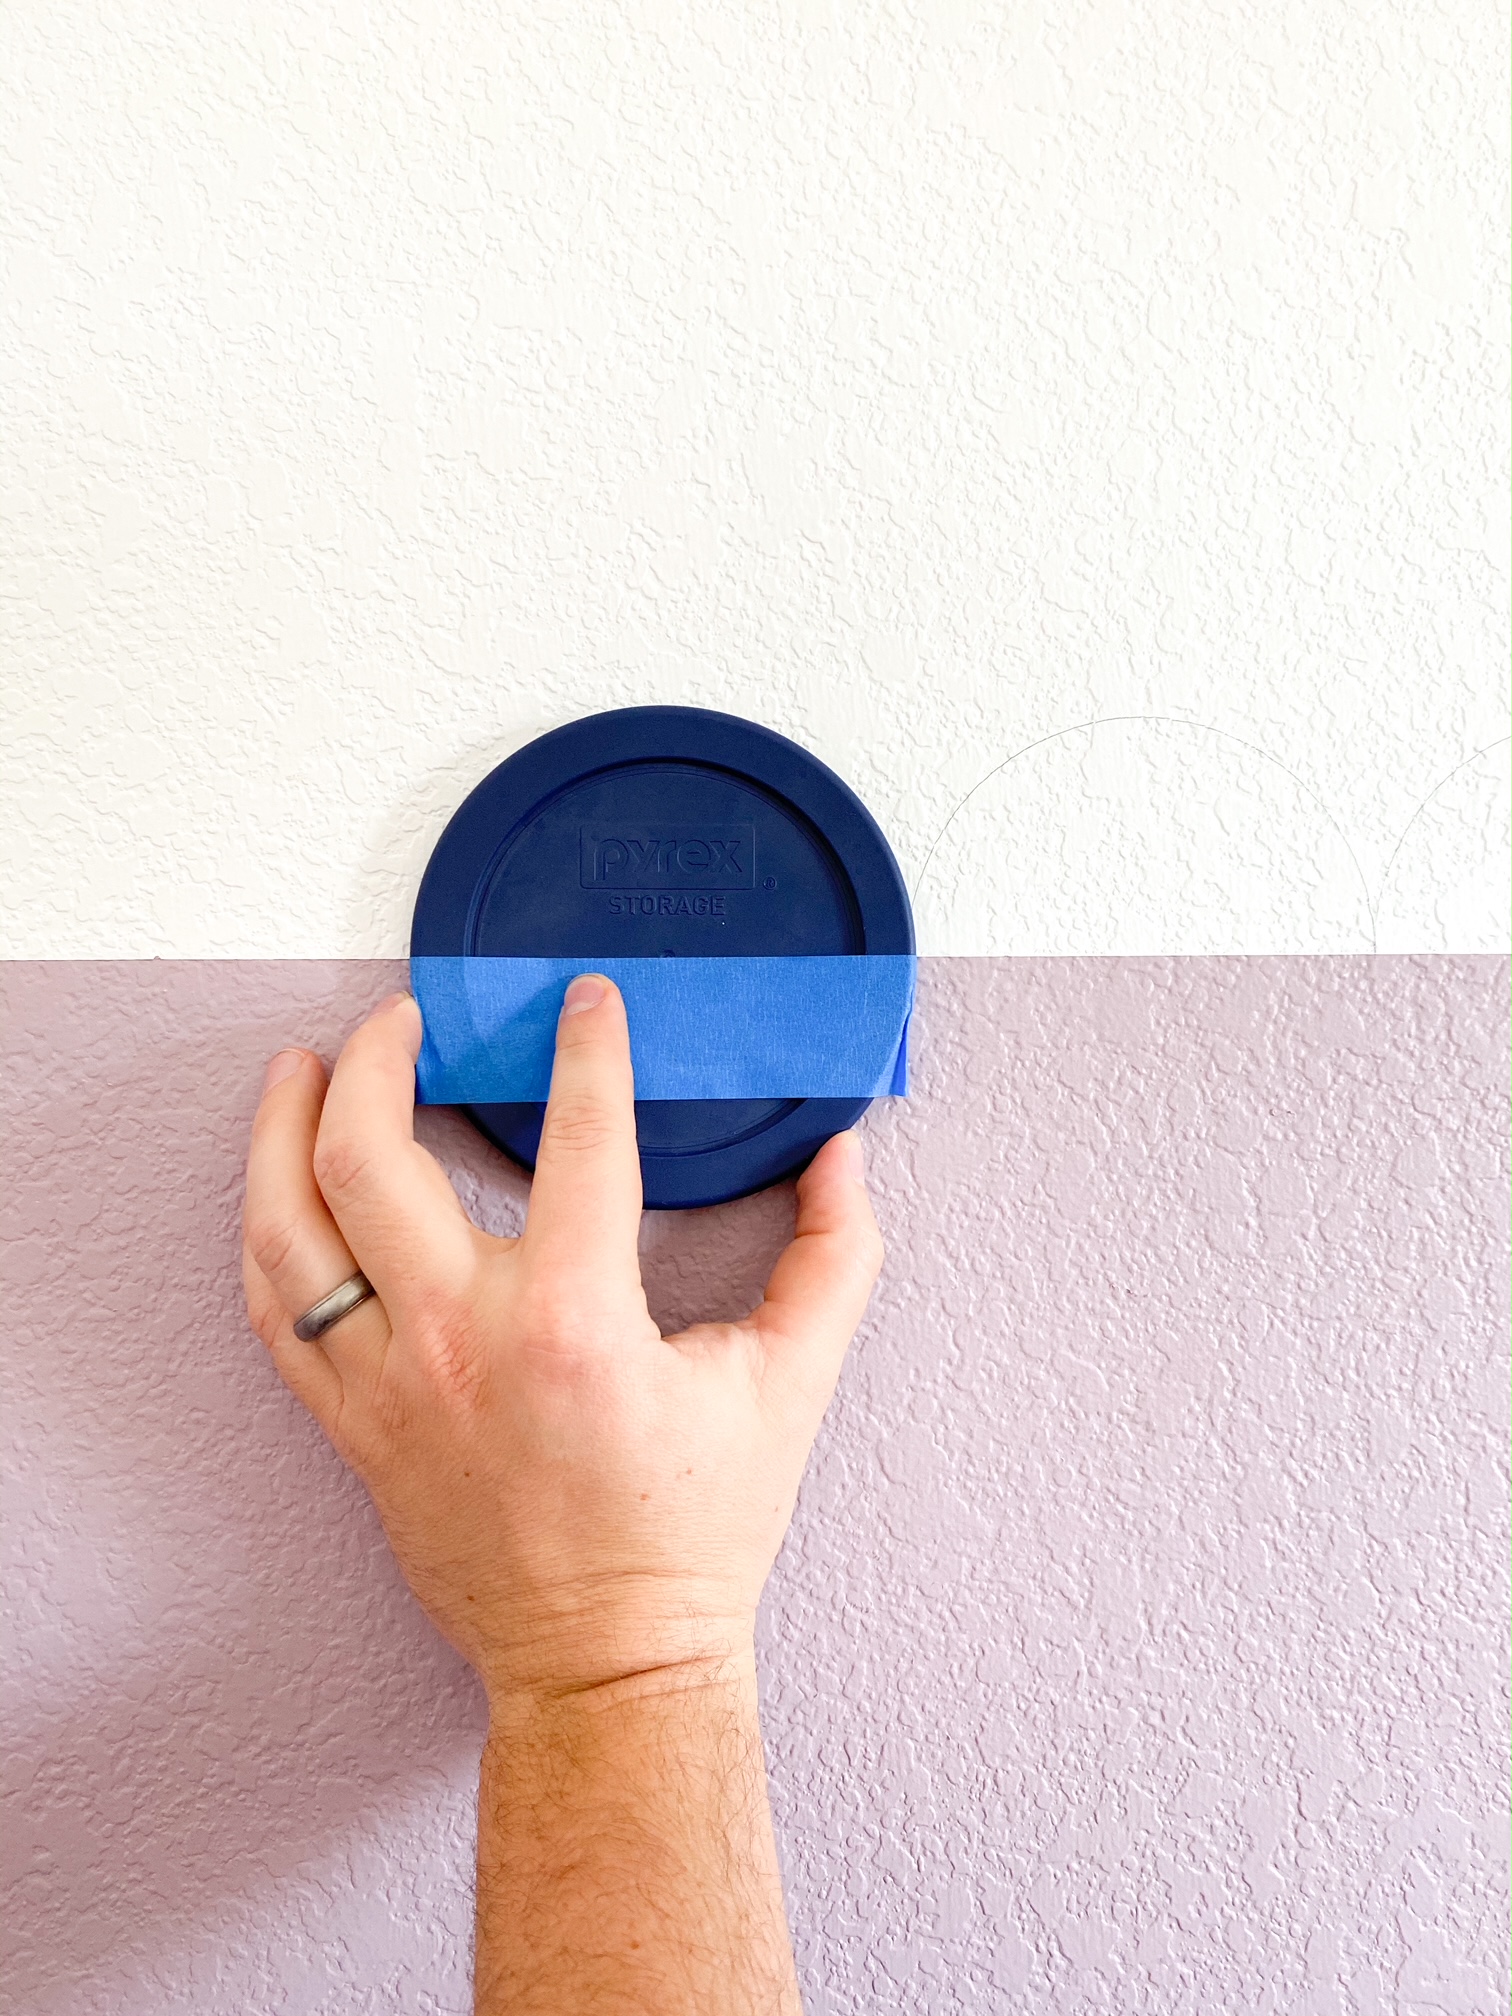
When you get to a corner or edge when you can’t use your circle to trace, you can either freehand with the pencil. Or you can trace the half circle on paper and use that to trace around corners and edges.
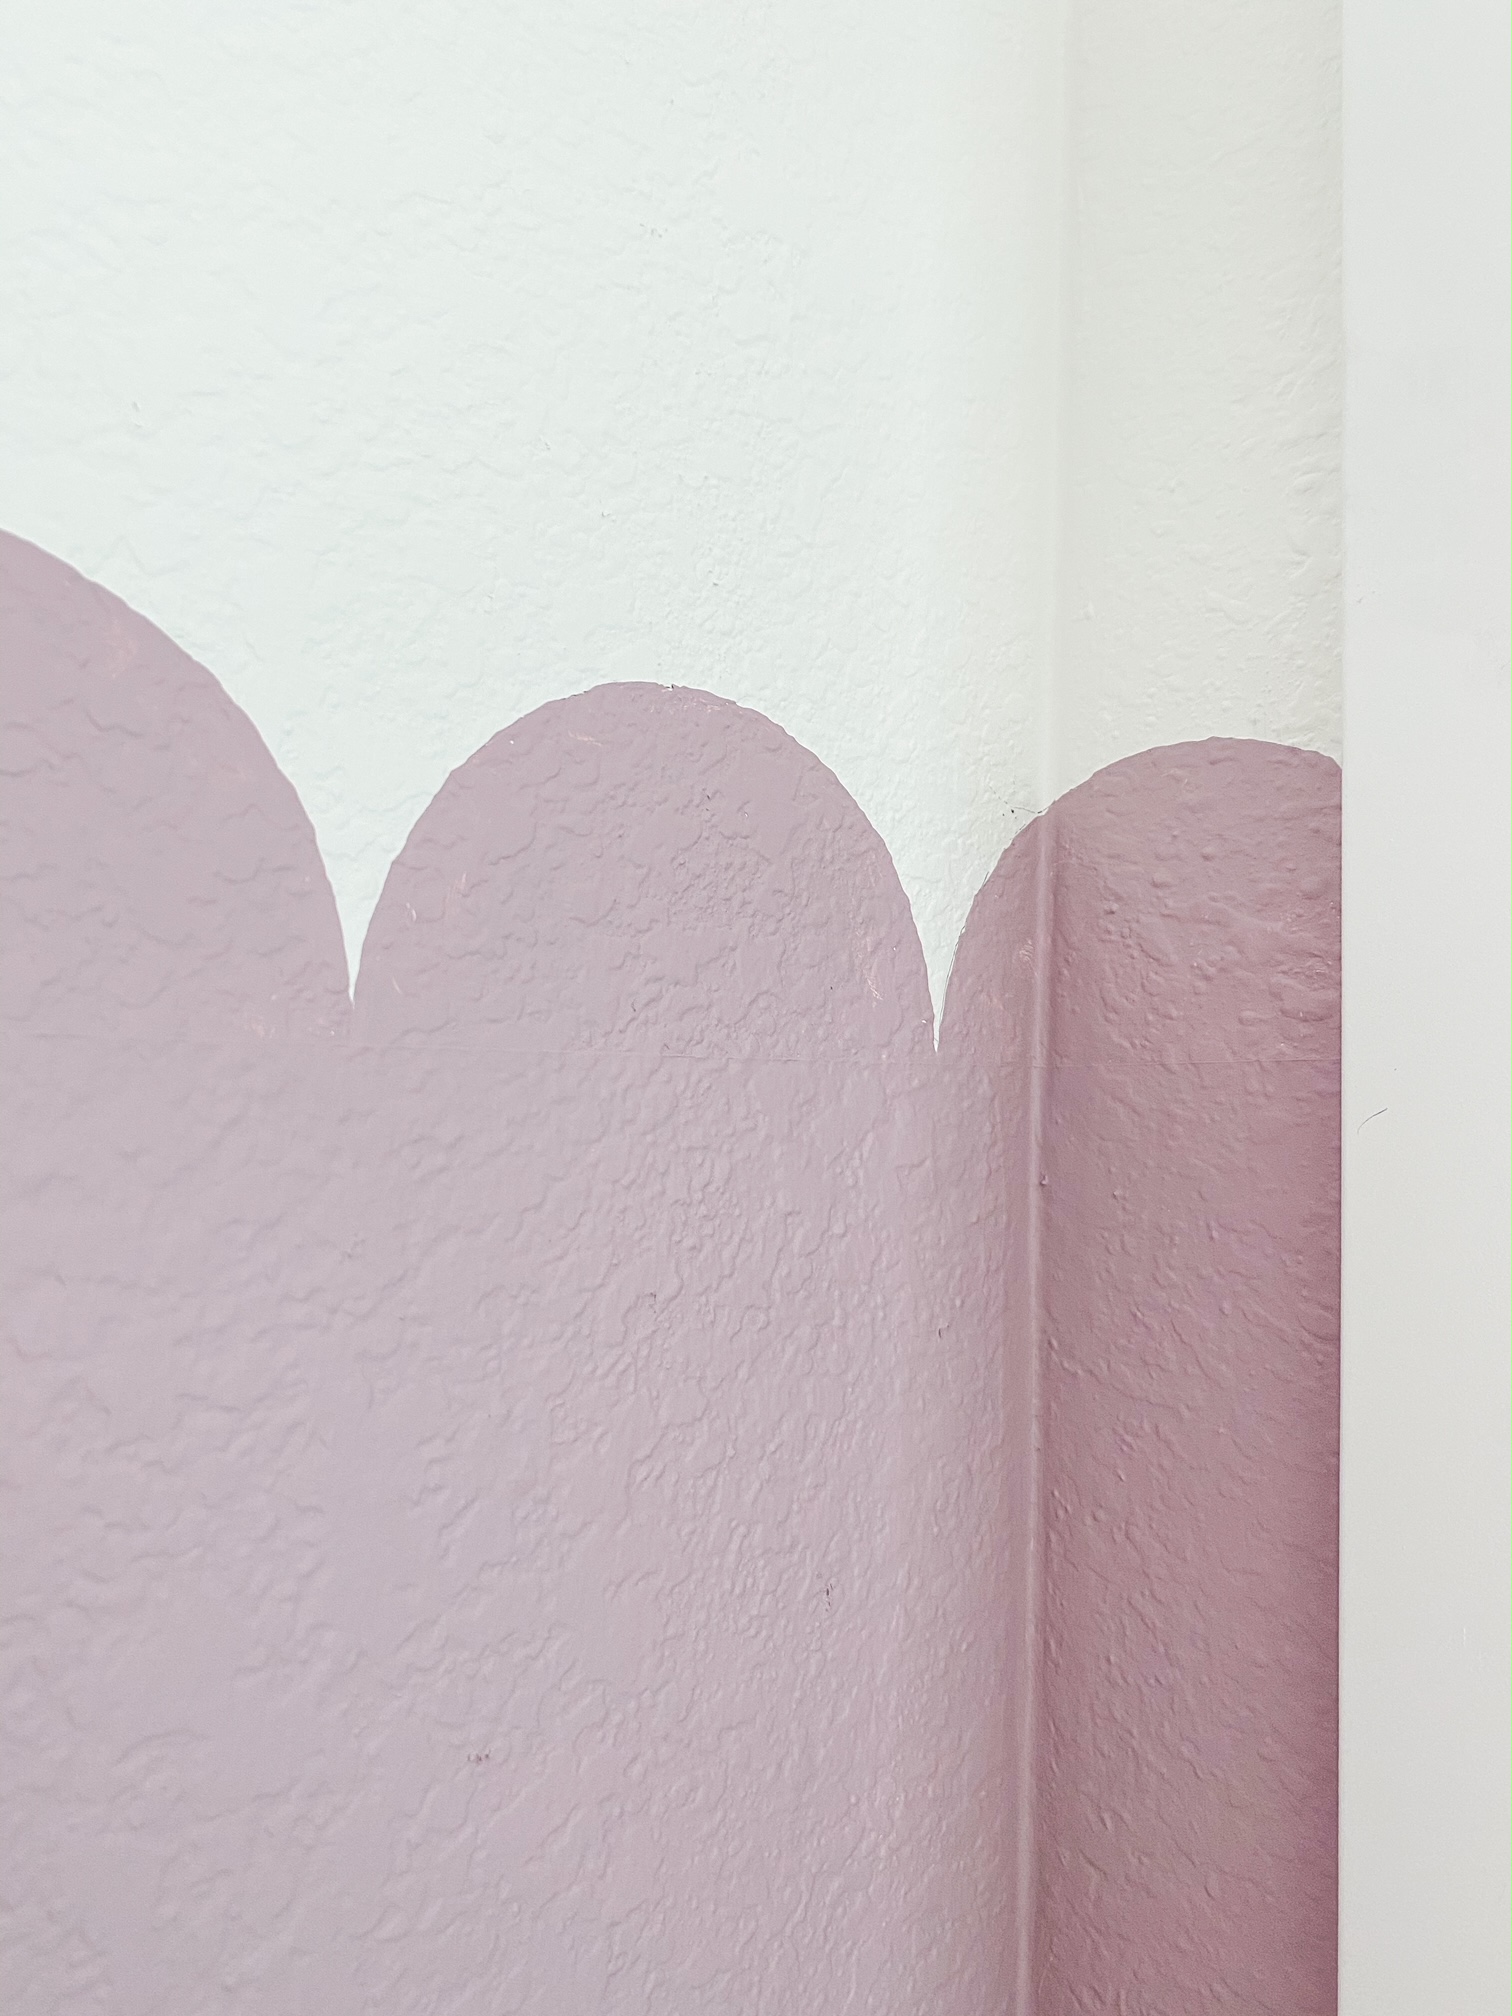
After all the tracing was done we took the small paint brush and painted along the half circle pencil lines. We went around the room and did all the half circles then we came back and used the larger paint brush to fill in the half circles.

At first we were filling the half circles in with the small brush too but quickly realized that it would be easier to fill them in with a larger brush!
Honestly, it was super easy. You do have to be careful when painting along the pencil line, so be patient! But it’s not hard work!
That’s it! We really assumed that tracing the circles and filling them in would take an entire day. But it honestly took a total of 4 hours at the most! We did the entire room so I think that is pretty good!
We also finished a DIY Ikea dresser for this room! I will be writing my blog post about that here in 2 weeks! So stay tuned for that! I promise it is one you won’t want to miss! Hope you have a wonderful Thanksgiving week!
What type of paint did you get for the paint? Satin?