Sharing all about How to Make a DIY Concrete Dining Table and how you can learn from our mistakes!
Why we Decided to Make a Custom Concrete Dining Table
When we remodeled our Kitchen last year, our small breakfast nook area was also part of the whole remodel plan. We removed the formal Dining Room when we expanded the Kitchen, so for seating we were left with the barstools at the Kitchen island, and the breakfast nook.
The existing breakfast nook area was pretty small. It was hard to fit much more than a table for 4, and even then it was tight. Also because we added a coffee bar area where a pantry cabinet used to be in that space, we needed room to walk past the table to it.
So, it made sense to build-in banquette seating here to make the most of the space we had! Building in the beach seating allowed us to move the table over to create a walkway to the coffee bar. It also allowed us to fit a larger table with more seating space.
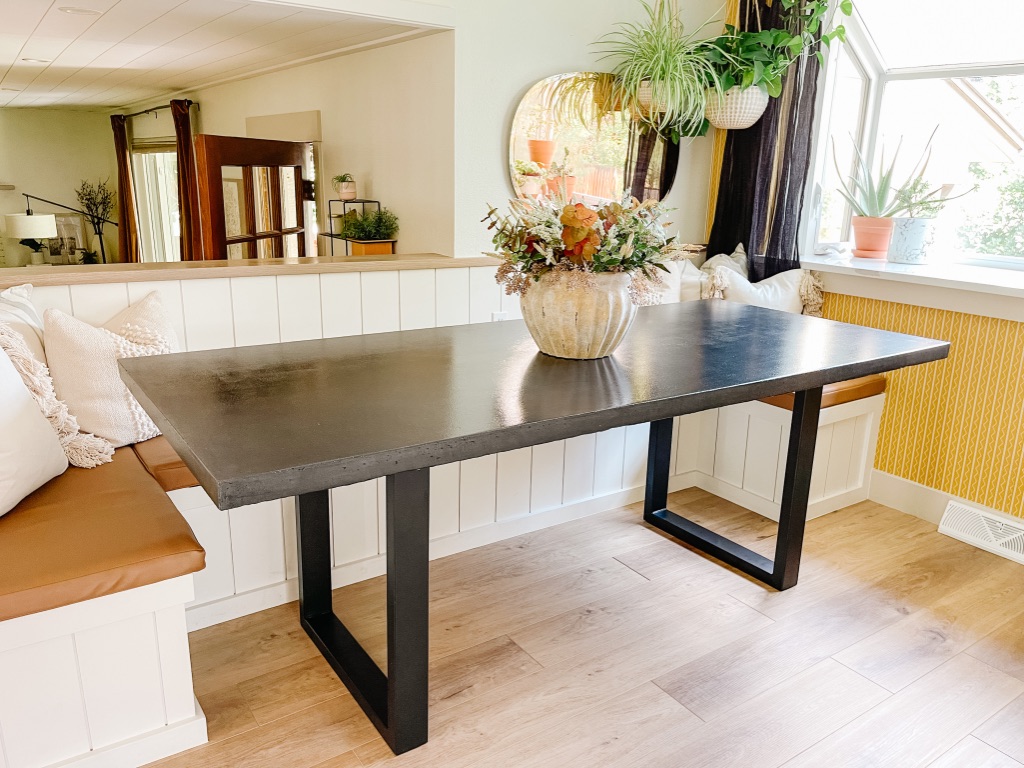
However, because we built the banquette seating into the existing space, it required a custom table size. A concrete table felt like the perfect solution because we could easily make it the exact size we needed!
I also love how durable concrete dining tables are; perfect for our family!
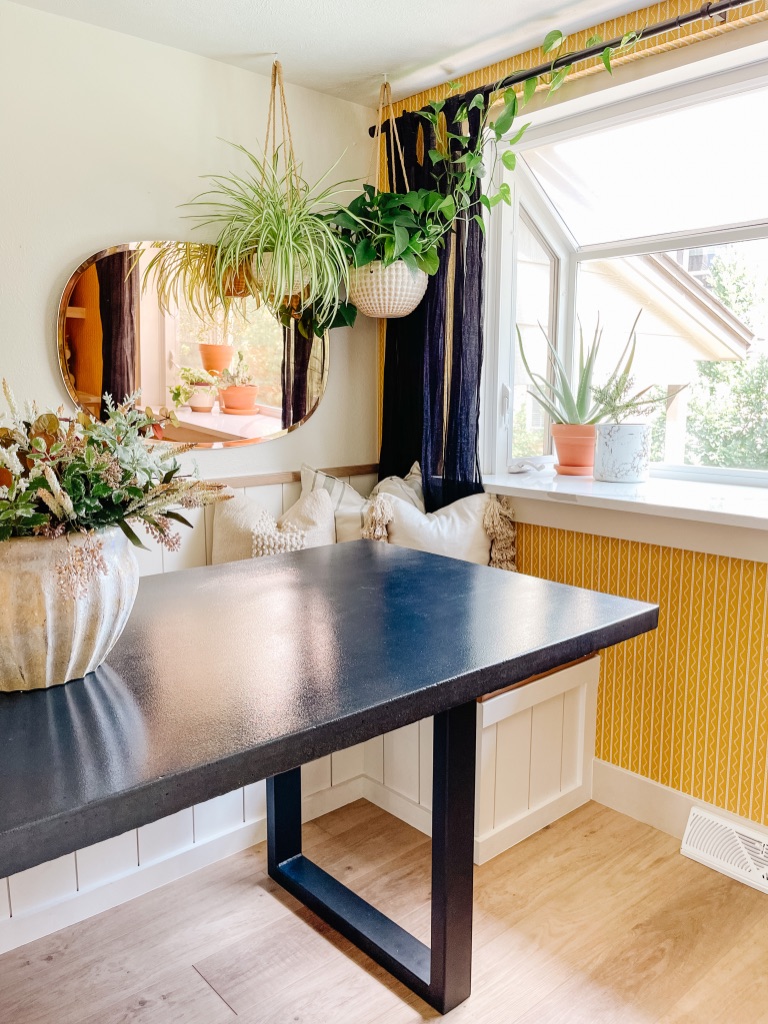
Another reason concrete felt perfect, was because it introduced another texture into this space. We have so much wood around, with the built-in bench, floors, cabinets…so the black concrete adds the perfect amount of contrast.
How to Make a Concrete Dining Table
If you are looking into making your own Concrete Dining Table, I highly suggest ordering the supplies listed below from Concrete Countertop Solutions! They have so many helpful tools and their mixes and sealers are the highest quality!
They also have a very detailed tutorial video showing the whole process. It is for how to make a concrete countertop, but most of the same steps apply to making a free-standing table!
Keeping reading for the full tutorial below, and see how to avoid making the big mistake we did that set us back a week while making our concrete table!
This post contains affiliate links. See our Disclosure here.

Supplies Needed:
- Pre-Cast Form Package
- Sheet of Melamine (slightly larger than your overall table top size)
- 5/8″ drywall screws
- Silicone Caulk
- Quikrete Sand/Topping Mix
- Z Liqui-Crete Add Mixture
- Color Pack – Black (also available in gunmetal or bright white)
- Fiber Mesh Reinforcement
- 3/8″ Rebar or Remesh Sheet and Rebar Tie
- Magnesium Float
- Orbital Sander
- Sand Paper
- Z Counter-Patch
- Z Aqua-Thane G40 Sealer (to darken)
- Z Aqua-Thane M35 Sealer (matte)
- Metal Legs
Step 1 – Build Frame & Caulk Seams

Building our frame was very easy because we went with this pre-cast form package from Concrete Countertop Solutions. The package includes twelve 8 foot pieces (96 linear feet) of reusable Pre-Cast forms, approximately 4 mm thick x 2 ” x 1.5″.
You can use these forms to create a mold for your tabletop (or if you are making a concrete countertop off site). They can be used to create 1.5″ or 2″ molds that can either be screwed down or held with their two way Polyester Mounting Tape.
We chose to make our table 2″ thick.
We screwed the form edges directly into the melamine sheet, leaving space for the exact size of our dining table top.
Make sure your frame is on a level and strong surface. The concrete is VERY heavy and you don’t want the melamine board to warp or bend once you add the concrete into the form.
Our support shown in the above photo was later found to not be enough. Once the weight of the concrete was added, the melamine board sagged in the middle. We had to pound in supports under the center to level the table. Place a third saw horse in the middle or several 2X4 boards under your mold to help support the mold.
Once you have built the form, add a silicone caulk line to the seams of your mold. Use your finger to smooth the bead. This will help very slightly round out the corners and edges of your table so they aren’t so sharp. This also helps them to not chip or break as easily. It is important to create a smooth even transition from the silicone to the melamine/plastic border. Imperfections and rough transition will stand out in the finished mold. Trying to sand out these imperfections is not recommended for reasons explained later in this post.
Step 2 – Mix Concrete
We used a wheelbarrow to mix our Z Liqui-Crete concrete additive and stain mixture (shown in picture above), then we mixed the concrete into that. For the mixture we used this Quikrete Sand/Topping mix from Home Depot, and Z Liqui-Crete add mixture and a black stain powder from Concrete Countertop Solutions. Follow the directions on the bag to see how much water to add (and wear a mask!)
The Z Liqui-Crete add mixture contains a proprietary blend of specially formulated additives and ultra fine acrylic fibers that will transform a 60 lb. bag of standard concrete sand mix into a high strength flowable concrete mix. making it stronger and easy to smooth.
For every 60 lb. bag of Quikrete Sand/Topping mix you use, you will need one box of Z Liqui-Crete and one box of stain powder. If you use a wheelbarrow, only mix one bag at a time and ensure you thoroughly mix the water and stain with a shovel or else you will have streaks of stain in your mix.
For our table, which is 36″ x 83″ x 2″ we used about 3-4 bags of concrete mix.
Step 3 – Pour Concrete into Frame & Reinforce
Once the concrete was mixed, we poured half into the frame (used a shovel) and then added some reinforcement materials. At this stage, it really helps to stir the concrete on the table to release as many bubbles as possible and ensure a seamless transition from mold to concrete. This is critital to achieving a seamless table top out of your mold.
This was going to be a long table, with no support (legs) at the center of the table and long overhanging edges past the supports so we wanted to make sure that it would be strong enough. We did not want to risk it cracking or breaking.
We added two different materials to strength it. The first was the Fiber Mesh Reinforcement from Concrete Countertop Solutions. We cut a piece slightly smaller than the size of the table top and laid it down flat on top of the concrete.
The second reinforcement was a few pieces of 3/8″ Rebar. Tie the rebar together with the Rebar Tie. You could also use a sheet of Remesh cut to the size of your table.
Once the reinforcements were in place we poured the remaining half of the concrete mixture on the top. We made sure that the mesh and rebar was not too close to the surface so it would not leave visible impressions once the table was dry.
TIP!! Make sure you do not get concrete on top of the screw holes when you are filling the form! We did and it was so hard to remove the screws!
Step 4 – Level
Once you have all of the concrete mixture in the form, use a board with a straight edge (like a 2×4) to level the concrete. Working in a saw-like motion helps. Go back over it 1-2 times to make sure it is level and any holes are filled in.
Step 5 – Vibrate & Smooth
This is a very important step to make sure the bottom face of the concrete mold is smooth by releasing any air bubbles trapped inside. Any air bubbles near the surface of the mold will appear as holes in the final table top once lightly sand before final coating. We used a rubber mallet and a hammer and hit the table for 30-45 minutes (I know this sounds like a lot, but again, this step is very very important). We also used a palm sander to create a vibration around all the sides and bottom to try and remove even the smallest of bubbles.
After thoroughly vibrating, go back over the top (which will be the bottom) with a concrete trowel or this Magnesium Float to smooth it out. This will technically be the bottom of the table so it doesn’t need to be perfectly smooth, but you will want it smooth and level so it can sit on top of your base.
Step 6 – Wait to Cure
Wait for the concrete to dry before removing it from the mold. This will take about 3-4 days.
Step 7 – Remove Frame
Remove the screws and gently take off the edges of the frame. You can use a screwdriver to pry it off if needed but watch the concrete!
Step 8 – Sand
Start by lightly sanding the corners and edges with a sanding block.
We did not do a great job of troweling the bottom side of the concrete so we ended up using an angle grinder to break the sharp edges on the bottom side of the table.
Flip the concrete slab over. Be very careful not to scratch any of the show surfaces of the concrete while flipping the concrete. For our table, it was a struggle for 3 men to flip the table smoothly without scratching.
Use an orbital sander (or sand by hand in “figure 8” motions) to smooth the top. Work your way from a 220 grit to 600 grit sandpaper. The more you sand, the more aggregate you will expose, so that is up to you! Be careful! Too much sanding will reveal bubbles that are just under the surface. Minimal sanding is recommended.
Step 9 – Fill Holes
If you have any small holes along the edge or on the top that you want to fill, you can use this Counter Patch product. Mix to make a slurry-type mixture and use your finger or a putty knife to apply. Use a damp sponge to clean up any excess. Once dry (about 1-6 Hours) sand the areas smooth.
Step 10 – Wipe Clean
Once you are done sanding, use a damp microfiber cloth to wipe down the surface. Make sure you clean it really well! Once dry, use a dry microfiber cloth to capture any remaining dust particles. You want the tablet to be totally clean before applying the sealer.
This is where we messed up, and I’ll explain more down below!
Step 11 – Seal
For our concrete dining table top, we technically used two different types of sealers, but really only needed one.
Because we wanted our table to be black, we used this Z Aqua-Thane G40 Sealer, because it darkens the color by giving it a “wet” look. This made our table color go from a dark gray, to more of a black. We used a foam roller to apply the sealer.
Once that was dry, we used this Z Aqua-Thane M35 Sealer to give it a matte top coat. I’m not sure what went wrong here, but when this sealer dried we were left with a ton of tiny little air bubbles on the table. So, we ended up lightly sanding that down and re-applying the Z Aqua-Thane G40 Sealer. Our Concrete Dining Table Top now has more of a glossy finish, but I preferred that over the little air bubbles. Again, I have no idea what went wrong here.
Step 12 – Install Top on Base
Once the sealers were dry our DIY Concrete Table Top was finished and could be installed on the base!
We bought these simple black metal legs from Amazon and they are perfect! They are modern and simple, and support the table without totally getting in the way.
Amazon had many versions of table bases that would work!
Step 13 – Move Inside!
This was a hard step because the table is soooo freaking heavy! It probably weighs at least 400lbs!! We had to wait until we could get 6 guys over here to help carry it inside, and that was a struggle!
How We Messed Up our DIY Concrete Dining Table Top
After we applied the first round of sealer there were very noticeable stripes down the whole table. We realized what happened after the fact –
After performing all the sanding, we wiped the table down with a cloth rag and bucket but did not thoroughly remove all the sanding dust. You need to be able to wipe the table with a paper towel that stays white before applying the coating or any bit will show through. In our case, we did the final wipe with the rag in the direction you see in the photo above.
We had to completely sand the sealer off the table and start over. This took forrrrevvvvverrrr! And this also exposed more holes and aggregate than we wanted. I really hope this doesn’t happen to anyone else!!
I think because we chose a very dark color, that also showed every little color variation more. If the table was a light gray or white it would not have been as noticeable.
We do want to try again one day to see if we can do better the next time! I’ll keep you updated if we do.
Final DIY Concrete Table Top Thoughts
Even with all of the challenges we went through with this DIY Concrete Dining Table, I would still highly recommend it if you are looking for a beautiful, durable, and custom Dining Table!
We’ve had our concrete table for about 10 months now, and it has been amazing! The sealers really work so well. We’ve had no issues with stains, or etching, which can be so common with concrete tables and countertops. We actually made concrete countertops for the Kitchen in our first house, and had such a hard time keeping them clean because we didn’t use a good sealer. I wish I would have known about these sealers back then!
Also we have two young and crazy boys (ages 5 and 2) and they haven’t been able to damage this table at all, which I think is so impressive. It really is the best Dining Table material for a family!
This was also a pretty affordable way to make a large, custom dining table. In the end it probably cost us about $800 to make, which I think is good for a table this size. Because of the shape of our built-in banquette seating, we really needed a custom sized table, and I think making this table out of wood would have been harder and more expensive, and less durable.
I think the only con is how heavy it is, because I can’t move it at all. It will definitely be staying with this house if we decide to move!
Overall though we really love how it turned out!
DIY Built-In Banquette Seating
I also wanted to mention our built-in banquette style seating here. We decided to build the banquette seating here to save space in our small breakfast nook area, and to fit as many people at the table as possible. A free standing table with chairs here would have taken up much more room.
You can find the whole built-in banquette tutorial HERE!
I love this whole space! And I love the durability factor of the table, plus it is so unique (to me anyways).
thank you! it really is so durable!
I love how this table turned out. So perfect for this space!
Thank you so much! It definitely fits this space perfectly!
I love how this table looks in the space, Rachel! I’be always loved the look of concrete, and you make the process look approachable. I’m just curious how heavy that table top slab would be?
Thank you so much! It’s probably about 400lbs!!
I think it looks so good– and not as complicated as you would think!
Thank you! Yeah pretty simple!
It’s beautiful and you guys did an amazing job! I can only imagine how heavy and hard it was to move. I wouldn’t have been able to watch it being moved. 🤦🏻♀️
Thanks so much!! This table is never moving from this spot haha.
This table looks perfect in your space! Love it!
Thanks so much! We love this table!
did you usescrews or some kind of ancor to attach the legs and just impact drill them in?
I’m nervous about tackling this project and then cracking the slab at the finish line.
I’ve been wanting to do this for so long! Thanks for the sep by step. Next is convincing my hubby that we can do this!!
You can totally do it!!
I had never thought about doing a diy concrete table until now. It looks so good and a great idea for little kids and the damage they can do to wood tables 🙂
Thank you! And yes it is great for our kids! Very durable!
Concrete being so durable makes me feel like I need everything concrete… boys are destructive! At least mine is.
Yes! I’m still worried about buying a nice wooden coffee table. My boys are crazy too! And they haven’t been able to damage this table at all!
Awesome, a concrete table like this would look really good outside as well!
Yes it would look great outside! You know…I actually might need to do that haha.
How did you attach the base? Looks great!
Thanks! We used concrete anchor screws.There are 8 screws connecting the base on each side.
What size is your table top?
The table top is 36″ x 83″ x 2″
disregard! you already answered this