This post shares how to build a simple fireplace mantel!
This post contains affiliate links; see our Disclosure here.
I hope y’all had a wonderful week! We have been busy at our house working on projects nonstop! I am 18 weeks pregnant now and trying to get all the house projects done while I still have the energy.
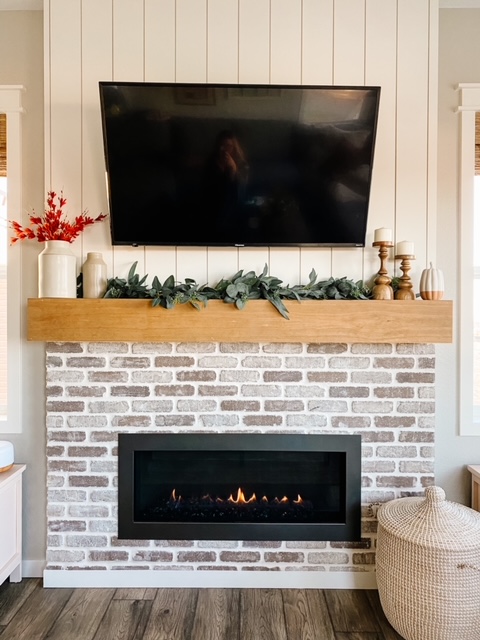
The biggest projects we have been working on are getting my daughters room completed (yes, it’s been incomplete since we moved in over 2 years ago) and working on our fireplace wall! This past weekend we made a simple DIY fireplace mantel. I am so excited to share with you this DIY because it is so easy but yet completely transforms the space!
This sasy DIY fireplace mantel is made very similar to our DIY Faux Wood Beams we did a while back. To check out that blog post click here! Our beams add so much to our house and I knew adding this mantel would too!
Simple DIY Fireplace Mantel
What You’ll Need:
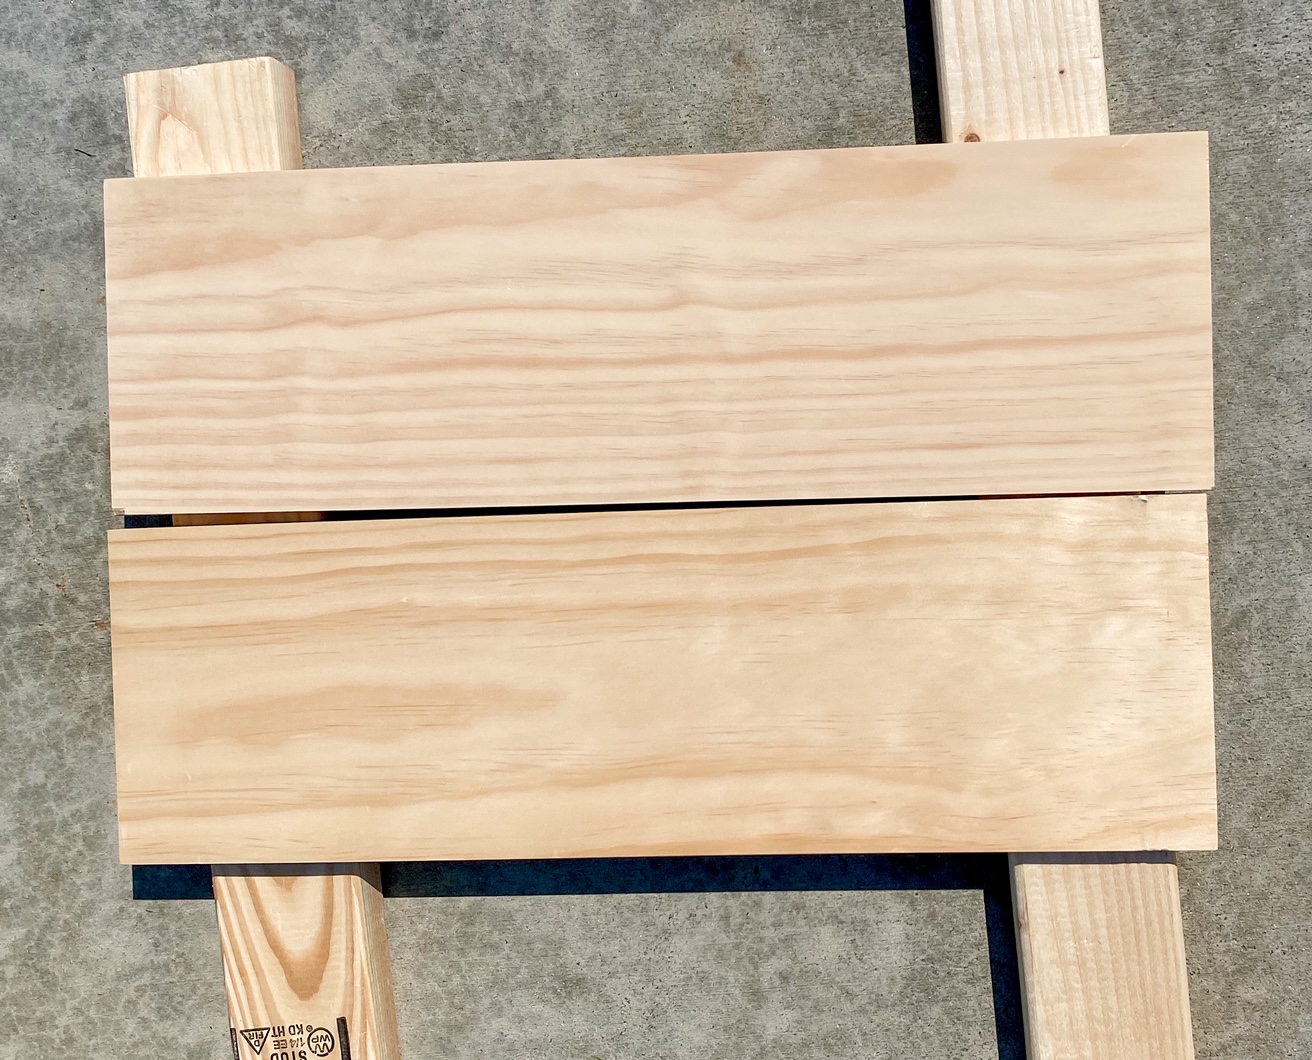
- 3 pieces of 1×8 pine board (cut to the length you want your mantel to be. Ours are 71.25 inches long)
- 2 pieces of 1×8 pine board (cut to fit into the sides of the mantel, ours are 7.25 x 5.75 inches)
- Nail Gun
- Miter Saw (we love this saw, it has been with us through many projects!)
- Sander (we used 320 grit)
- 2 inch Finishing Nails
- Stain (I used golden oak and weathered oak)
- Old T-Shirt for applying stain
- Cleat for hanging mantel (we used our old mantle as a cleat, you can also use 2×4’s)
- Spackling for nail holes
Steps To Make An Easy DIY Fireplace Mantel:
First, we started by sanding the boards.
This is a super important step that you don’t want to pass up! It takes the top yellow layer off the boards and leaves you with much nicer boards to stain so that a yellow undertone doesn’t come through the stain!
Then, you are going to stain your boards.
You can totally do this part after you put them together too. But we did it before.
Well actually we only did part of the staining before – haha! That is because once we installed it I realized the stain I chose (golden oak) was too yellow for my house and I needed to add more grey.
So after installing I put 1 coat of weather oak on top and it turned out perfect!
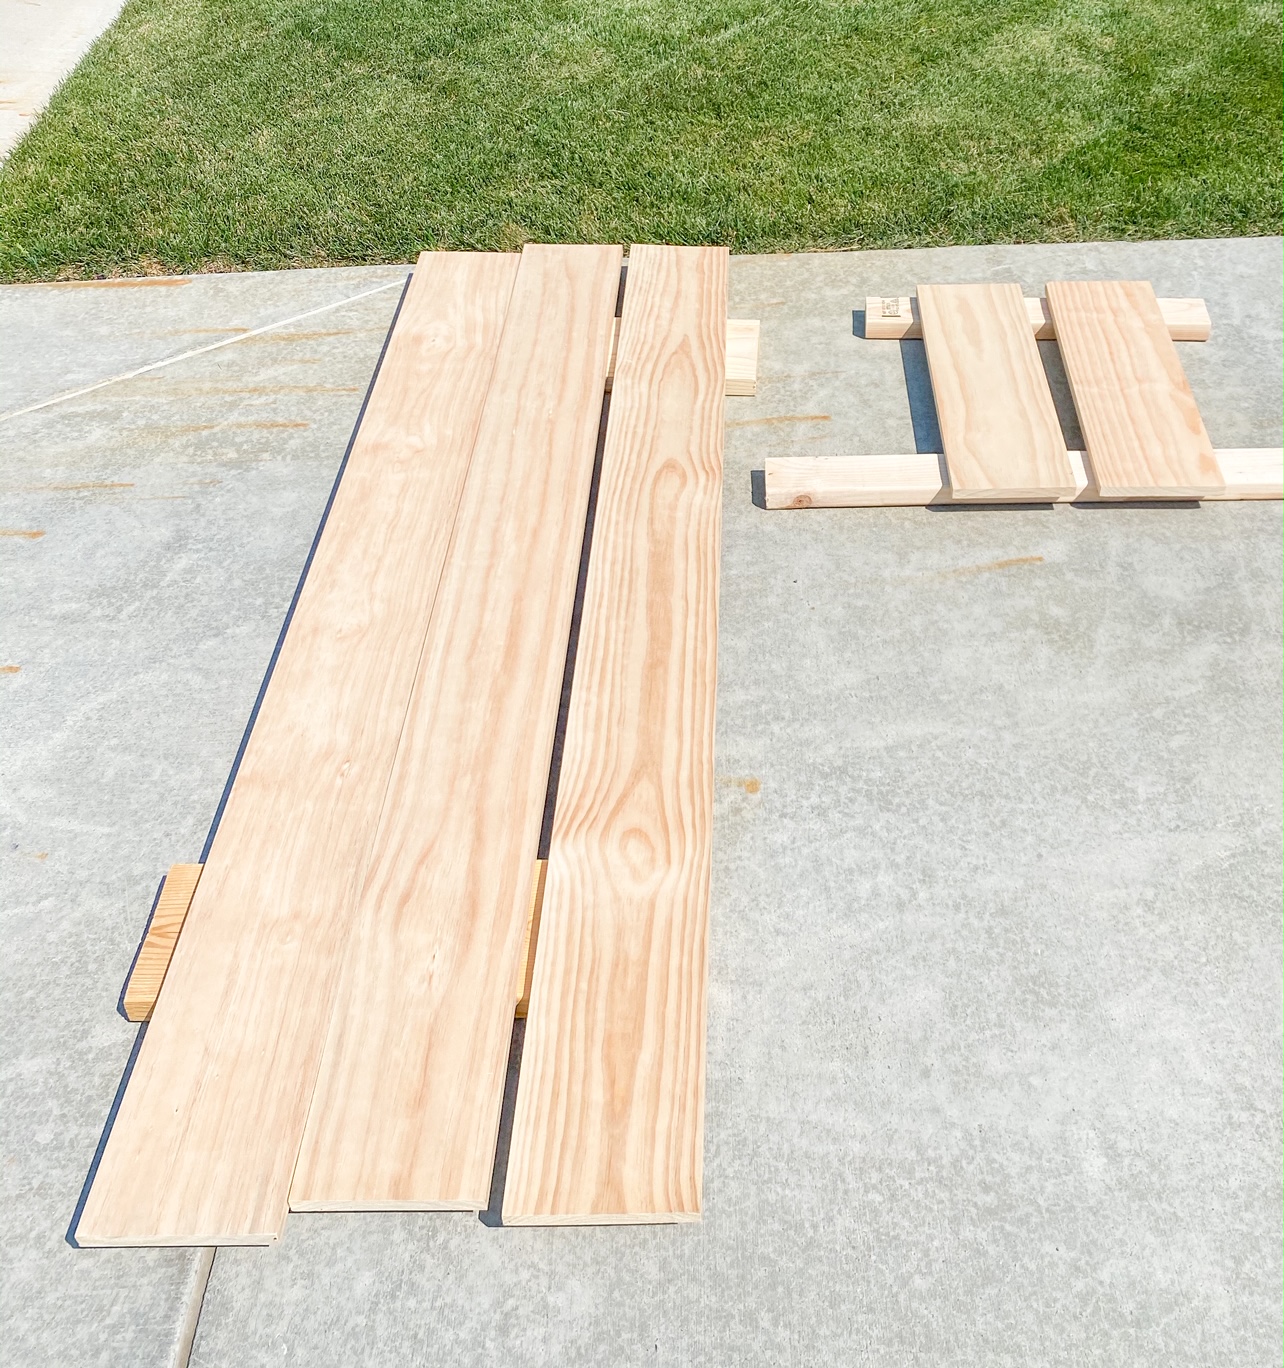
Next, you will put the boards together to create your mantel!
You are going to make a box with your boards. Start with the 3 long 1×8 boards and nail them together to look like the picture below.
You will be nailing into what will end up being the front of your mantel. That is okay because you can spackle the nail holes and put stain over them once it is installed!
If you do not want the nail holes showing at all, you will have to cut your boards at 45 degree angles and nail in from the top and bottom. We just chose to go the east route.

After you get those three boards together you will nail the end pieces in to create a box (pictured below)!
This one will be nailed in on the top and bottom boards of the mantel. The less nail holes to patch on the front piece the better!
Last, you are going to hang your mantel!
We used our old mantel as a cleat.
However, you could easily screw in a 2×4 (making sure your screws are in the studs) and attach the mantel to that. Just make sure the 2×4 is straight and level!
You can see that all we did to attach the mantel to the cleat was slide the mantel onto the cleat and nail into the cleat from the top of the mantel. It was super easy to install!
As you can see, the side does not look perfect. You can see the edges of the top, front and bottom boards. If this drives you crazy you can always cut all the boards at a 45 degree angle so that it looks seamless!
This is totally up to you and what your preference is! Making 45 degree angles is more challenging and we wanted to do a simple DIY fireplace mantel so again, we chose the easier route!
Overall, I am super happy with how it turned out since the main focal point is the front of the mantel so I don’t even notice the sides!
Final Look
I am over the moon excited for how well this simple DIY fireplace mantel turned out!!
This was just step 1 in the fireplace wall makeover! I will be sharing all the other things we are adding (including shiplap above the mantel) in 2 weeks! So make sure to subscribe to our blog so you don’t miss that blog post! Have a great weekend!
To view the final fireplace makeover head over to this post here!
Shop This Post:
More fireplace inspiration posts you’ll love:
- Kaylee’s Final Fireplace Makeover
- Simple Fall Fireplace
- Rachel’s Beautiful Shiplap Fireplace Wall
- Brick Fireplace Makeover
This post gives step by step directions on how to build a simple fireplace mantel!
It looks amazing!!! Love the wood!
We are redoing a similar fireplace and are installing a reclaimed beam with a “Frame” TV above it. Can’t really decide how high the mantle should be hung. Yours looks perfect! COuld you please share the measurement from the top of your mantle/beam to the floor? Thanks!
Hi! I’ll try to get that measurement for you! Please DM me on Instagram to remind me if you haven’t heard back soon!