Learn How to Make this Simple and Affordable DIY Wood Slat Trellis for your Garden or Exterior Wall!
This DIY Simple Slatted Wood Trellis is the perfect project for any DIY beginner! Really…I typically let my husband handle these types of things but I was able to do most of the work for this!
If you are looking for an easy DIY project for your home’s backyard or exterior wall, keep reading below for the full tutorial!

Why we Built This DIY Wood Slat Trellis
A little back story – When we moved into our house last year, the previous owners took two trellises that were out front with them. So we have been meaning to buy some to replace them with because we had vines planted that needed them.
But, when we went to the hardware stores to look for trellis options, they were all so expensive! Especially the black metal ones. The wood options were less expensive but I didn’t love the look, shape or size of most of them.
So we decided to make our own! Once we started planning, I immediately thought of the wood slat privacy wall that was part of our pergola at our last house! I loved the look of that wall so much. We moved shortly after building it too so I didn’t have much time to enjoy it.
We decided it was the perfect design for our DIY Wood Trellis – simple and modern.
I always thought about hanging small planters or pots from the wood slat privacy wall too, so that is exactly what I planned for these wood trellises!
How to Make a Simple DIY Slatted Wood Trellis
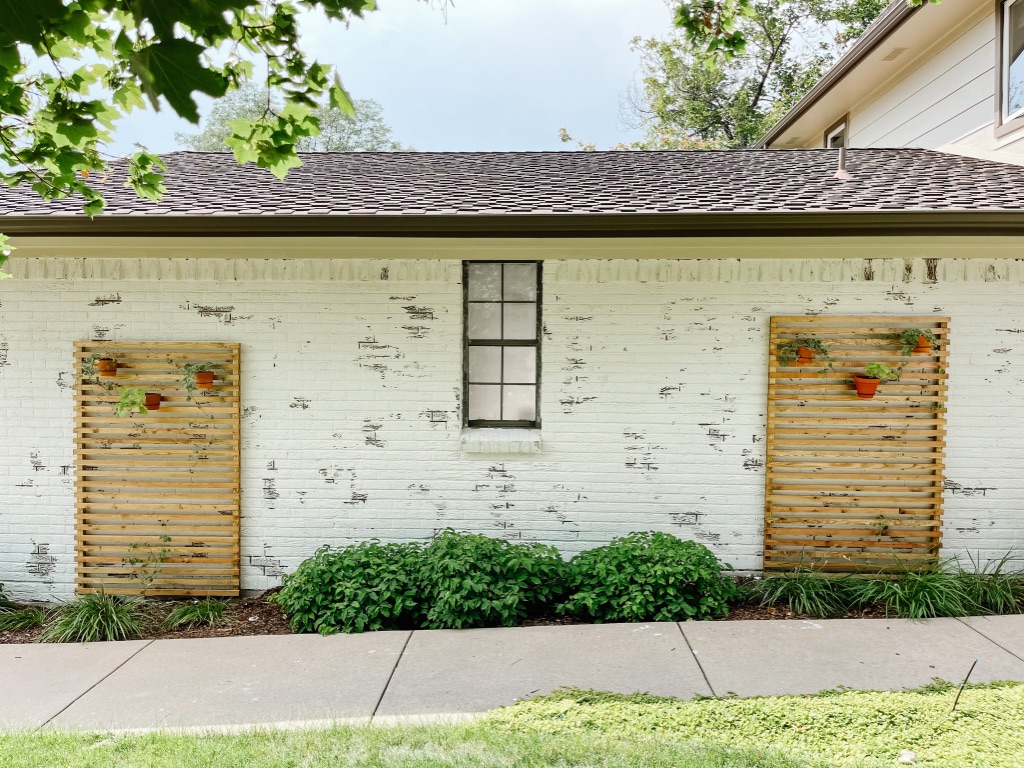
We designed these simple DIY Slatted Wood Trellises to be functional, and beautiful. They are located on a large wall right near our front entrance, so they needed to look good! They are kind of a statement piece.
I wanted them to be able to hold some vines that we have planted in the ground here, as well as some small hanging pots for plants.
We love how they add some interest to this large exterior wall on our house. When we added the German Schmear Brick (which I’ll have a blog post about soon) I felt like we needed something here to break up all of the white. These wood trellises look perfect against the texture of the white brick!
Again, they were very simple to make! See the step by step instructions below!

Slatted Wood Trellis Materials:
- (2) 2″x2″x8′ boards
- (12) 1″x2″x8′ boards (cut in half)
- Saw
- Wood Stain – Varathane Golden Oak
- Exterior Clear Coat
- Rag or Stain Brush
- Nail Gun
- Nails
- Impact Driver / Drill
- Concrete / Brick Screws (if needed)
- Hanging Pot Holders
- Terracotta Pots
I want to mention that we used common pine boards for this project. Mainly because we couldn’t find the sizes that we needed in Cedar at Home Depot. Also because Cedar is so expensive right now with the crazy lumber prices and we wanted this to be an affordable project. We’re hoping that the stain will help seal and protect the wood. I’ll give an update if they don’t hold up well.
Step 1 – Determine Size
The nice part about making your own trellis is that the size can be completely custom to what works best for you! Because we bought 8′ long boards, we decided to make the width of each trellis about 4′.
The overall size of our slatted wood trellis is 46″W x 70″H
Step 2 – Cut Wood Planks to Size
We used 2″ x 2″ x 8′ boards for the vertical supports, and 1″ x 2″ x 8′ (cut in half) for the horizontal slats.
We measured and marked each piece with a pencil to make sure each board was cut to the same exact length.
You will see that we included a 1/2″ overhang on each end of the horizontal slats. It would have been harder and more time consuming to make each horizontal piece exactly flush with the vertical boards, so this allowed for some wiggle room.
You can use a table saw or a miter saw (like we did) to cut each piece.
Step 3 – Stain Wood
We stained the wood before assembling the trellises. This was the most time consuming part because we had so many boards to stain, but it is an easy step.
The stain used is Varathane Golden Oak. My favorite way to apply stain is to just use a piece of an old tee shirt. That way you can wipe off any excess stain right away so it is not too dark.
Step 4 – Assemble Trellis
Start by measuring and marking where each horizontal slat will go. We spaced ours ~2″ apart (the size of the horizontal slats). We used a straight edge, and a piece of the 1″x2″ board, and used a nail to make a light line.
Next we drilled a hole at the top and bottom of each vertical board. We used a drill bit for the hole and then used a slightly larger drill bit to make the top of the hole slightly wider so the head of the screw could recess into the board. These holes will be for the concrete screws that attach the trellis to the wall.
Make sure to drill the holes in a spot where there will be a horizontal slat on top of it (to cover it up).
Use a nail gun to attach the horizontal slats to the vertical boards. It’s helpful to have two people to attach the top and bottom slats to start, to make sure the vertical boards are perpendicular to the horizontal slats.
We used a straight edge tool to line up each horizontal slat and made sure to leave the 1/2″ overhang on each side. Again we used a nail gun to attach each piece (a couple nails on each side).
Step 5 – Attach to Wall
Because we were placing our trellises against a brick wall was used concrete screws to attach them to it.
First pre-drill the hole for screw. We used a standard drill and it was hard. A hammer drill would have made this easier.
Then use the screws to attach each vertical board to the wall.
Once attached we covered the holes with another horizontal slat (used a nail gun again to attach).
Vines and Pots Used for DIY Wood Trellis
The vines that we already had planted here are clematis which work well for trellises.
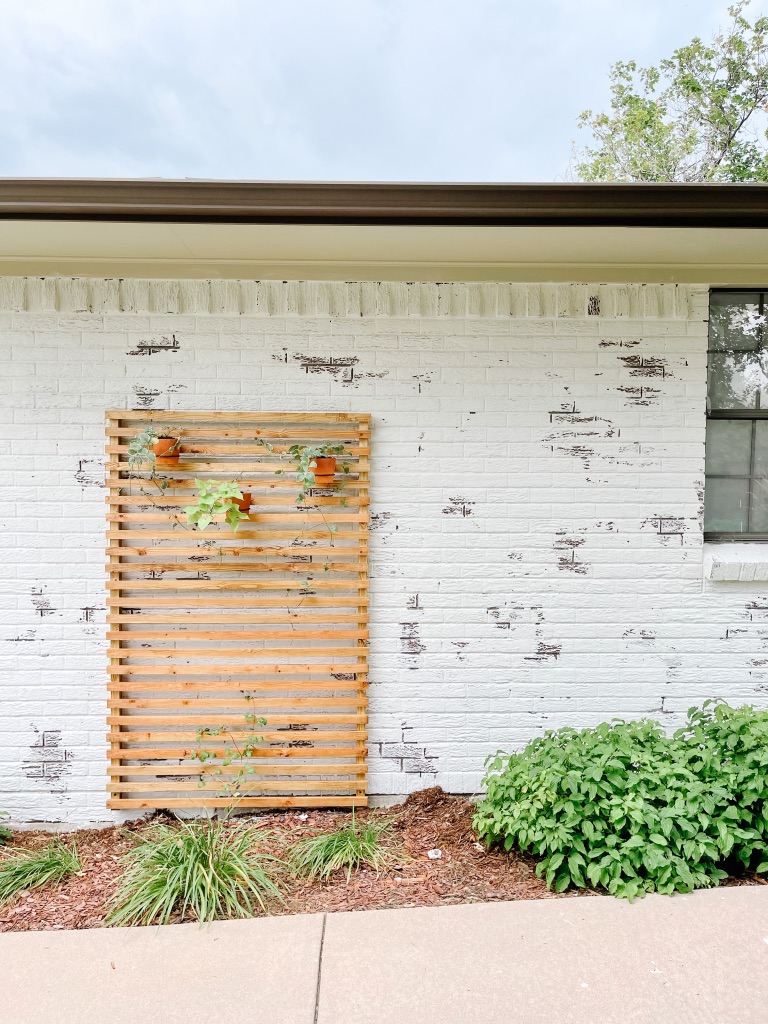
I also wanted to hang a few hanging planters on the trellises so purchased a few wall planter hangers to use with some basic 4″ – 6″ terracotta pots. Love how they look and add more greenery to the top while we are waiting for the bottom vines to fill in!
The plants in the pots are vinca and sweet potato vines.
Final Thoughts on this Simple DIY Wood Slat Trellis
I LOVE how these wood slat trellises turned out! The design is simple and modern, perfect against the texture of the German Schmear white brick! I love the size of them as well and how they really add so much character to this wall by our home’s entry.
We spent about $90 total on supplies for both trellises, so they cost about $45 each to build. (Not including the hanging planters or plants.) That is much more affordable than the options we saw at the local hardware stores, and these are so much bigger.
This Wood Slat Trellis project was a very simple DIY that any beginner could take on!
This post was all about how to make a simple DIY Wood Slat Trellis for your home’s exterior wall or garden!
I love it! They came out great 😊 the stain color is *chefs kisses*
Ha thank you so much!
They look so good!
Thanks Chelsey!
They look so pretty with the rustic white walls behind them. You guys did a great job and thanks for sharing. My husband is getting annoyed with me because every time you ladies do a project I ask him to help me with something. 🤷🏻♀️
Thank you! I love the white and wood mix too! haha uh oh
I love how this turned out! The cute little pots are my fave!
Thank you! I love those too! Looking forward to adding flowers next Spring!
I always love the photos you do along the way it makes it way more doable and less daunting!
That’s good to hear!
This turned out so cute!!
Thanks so much!
Wow, looks amazing. Thanks for the detailed tutorial!
Thank you!
I love how much character this adds! Looks so good!
Thank you! I love them so much!
This project made such a big impact!! Love the clean lines of the trellises-so modern!!
Thanks so much! I really love how they added so much to this wall.
Turned out so good! Might be my next project in the near future!
Thank you! I love how they turned out!
OMG I’m saving this for when I have a garden! This is so much prettier than the lattice and chicken wire thing my mom rigged up when I was a kid. (*cringe*)
hahaha! I totally know what you’re talking about! Definitely save this! It was so simple and pretty!
LOVE!!! How often will you need to restrain the wood? Any suggestions/tips? I would love to add this to our house but worry I wouldn’t manage upkeep well. 😅
Thank you! I’ll have to do an update next year because I’m not sure how long it will hold up for. If you use Cedar it would last for much longer…we just didn’t want to spend that much on these and lumber is so expensive right now. But you don’t even have to stain cedar if you don’t want to!
Ohh looks so good! Great post!
Thanks so much!