See how we gave our Kid’s Bathroom a quick, budget-friendly, easy update with new peel and stick wallpaper!
This post contains affiliate links; see full Disclosure here.
My favorite types of DIY home projects are quick, easy, and affordable … and it’s definitely a plus if I can work on it throughout the day while my kids are occupied. If I want to add some color or pattern to a space, peel and stick wallpaper is one of my top go-to’s, and there are soooo many fun options out there! Over the weekend I decided to work on a quick and easy bathroom update by swapping out the peel and stick wallpaper in our upstairs bathroom and I am loving the change!
In this blog post, I’ll share our easy bathroom update with peel and stick wallpaper that I accomplished in one weekend! Whether you’re a parent looking for a kid-friendly bathroom revamp or just searching for a pocket-friendly and fun way to spruce up your space, you’ve come to the right place.
Easy Bathroom Update with Peel and Stick Wallpaper
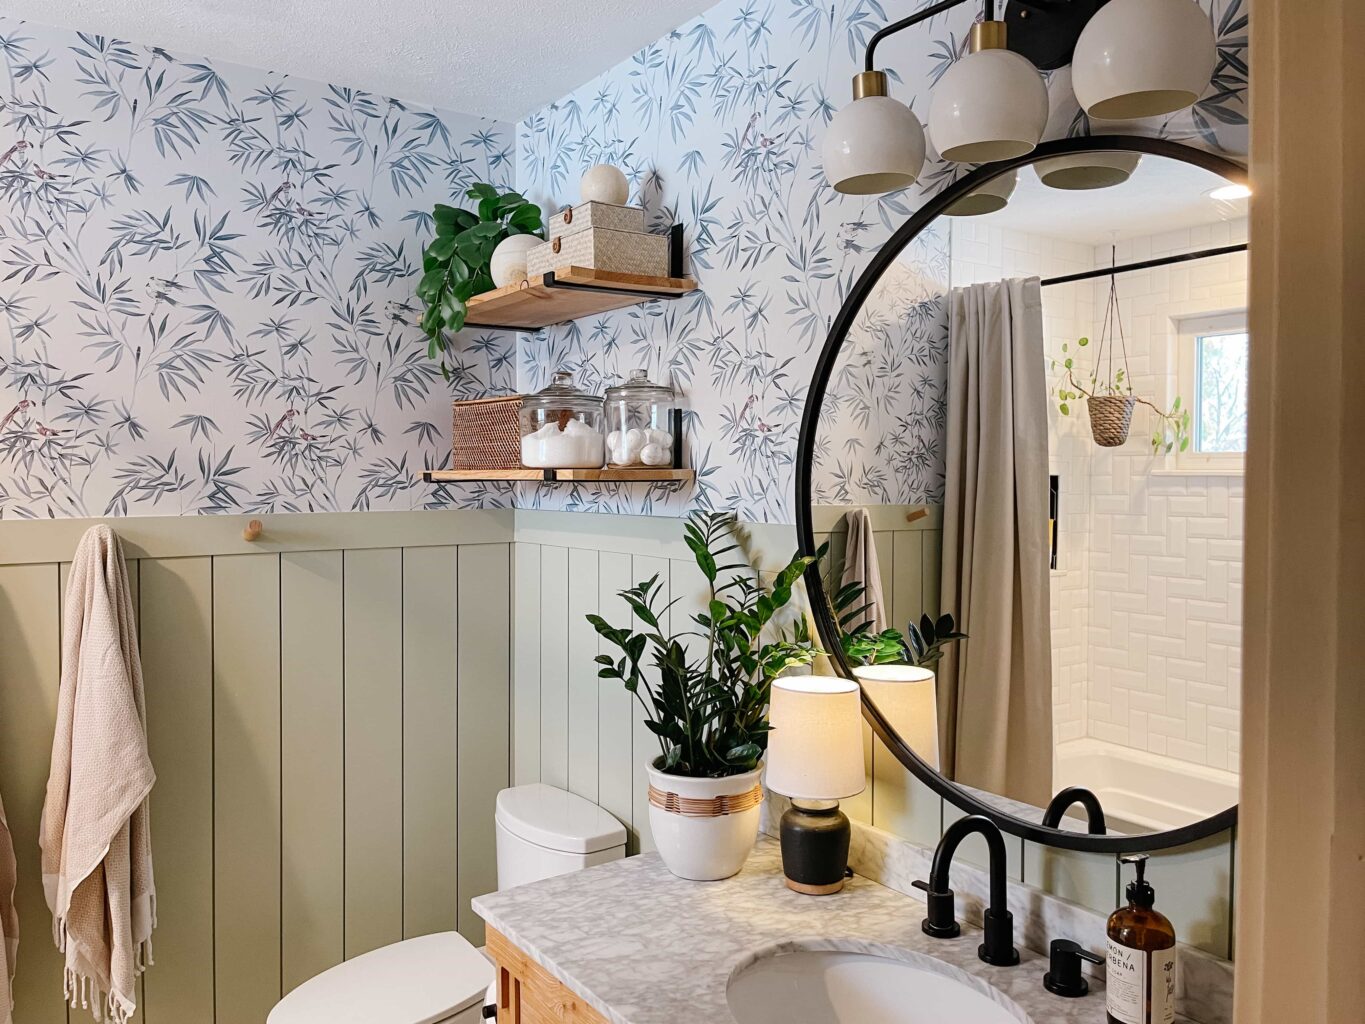
Here’s a look at the before and after of this easy bathroom update! The only things that changed are the peel and stick wallpaper and the shower curtain.
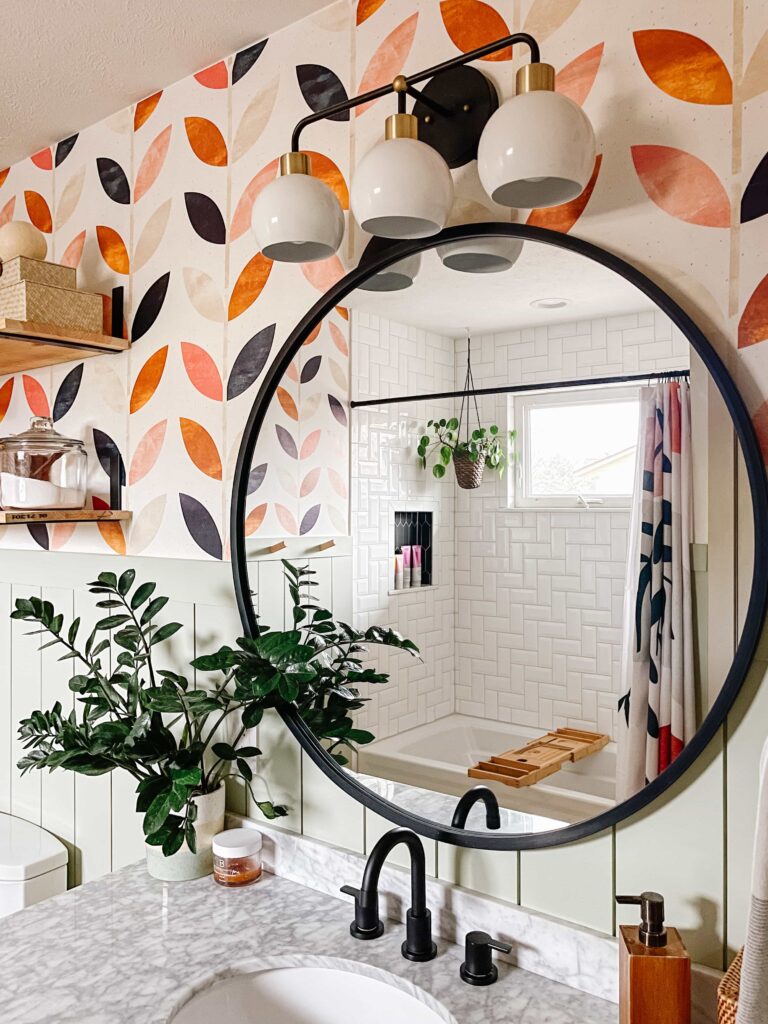
I love how this bathroom turned out when we remodeled it 3 years ago, but I was ready for a change! But with 3 kids (including one 7 month old baby) I don’t have a ton of time on my hands to work on DIY projects right now. So this bathroom update needed to be easy, quick, and something I could work on as I had time … making swapping out the peel and stick wallpaper the perfect option!
1970’s Bathroom – Before

When we moved into our ’70s fixer-upper 3 years ago, this bathroom remodel on the upper floor was our first project. We decided to keep the layout as is, making life easier and the whole thing way quicker than our major Kitchen Remodel. This is the biggest bathroom in the house and the one that our kids’s use, so creating a nice, functional and clean space was a top priority.
I love bathroom design, and adding color and pattern to a smaller enclosed room can be unexpected and fun! I knew that I wanted to add some color into this bathroom and make it a fun room for the kid’s, but I also know how I like to switch things up from time to time, so it made sense to start with a neutral base. The white floor and wall tiles and the white oak vanity kept things simple. This way, I could easily add in color and pattern with other finishes and accessories.
For more info on our bathroom remodel: 1970’s Bathroom Remodel
Pros to Choosing Peel and Stick Wallpaper:
Using peel and stick wallpaper has several advantages that make it a popular choice for DIY enthusiasts and homeowners looking to enhance their living spaces. Here are some of the pros of using peel and stick wallpaper:
- Ease of Application: One of the biggest benefits of peel and stick wallpaper is its simplicity. You don’t need any special tools or expertise to install it. Just peel off the backing and stick it to your wall, making it a beginner-friendly DIY project.
- No Mess: Unlike traditional wallpaper that requires paste and can be messy, peel and stick wallpaper is clean and leaves no residue behind. There’s no need to deal with sticky adhesives or water-activated paste.
- Removable and Repositionable: Peel and stick wallpaper is designed to be easily removed without damaging the wall. This makes it an excellent choice for renters or anyone who likes to change their decor frequently. You can also reposition it during installation if you make a mistake.
- Endless Variety: Peel and stick wallpaper comes in a wide array of designs, colors, and patterns. Whether you prefer classic, modern, or bold designs, you’ll find something to suit your style. It’s a versatile option for adding character to any room.
- Cost-Effective: It’s a cost-effective way to update a room, especially when compared to other wall coverings, like tile, or a full paint job. You can achieve a stylish look on a budget.
- Quick Transformation: Peel and stick wallpaper is perfect for those who want to see a dramatic change in their space quickly. It’s a fast way to refresh a room over a weekend or even in a day.
- Durable and Washable: Many peel and stick wallpapers are made from durable, washable materials, making them suitable for high-traffic areas, such as kitchens and bathrooms.
- Customization: You can easily cut peel and stick wallpaper to fit your specific needs and creative vision. This allows for customization and adaptation to your room’s dimensions.
- Great for Accent Walls: Peel and stick wallpaper is perfect for creating eye-catching accent walls or unique focal points in a room.
- Minimal Surface Preparation: In most cases, you won’t need to spend much time preparing your walls before applying peel and stick wallpaper. It can be installed over smooth, clean surfaces without much effort.
- Ideal for Temporary Decor Changes: Whether you’re looking to update a nursery for your growing child or want to add a seasonal touch to your home, peel and stick wallpaper offers a temporary and hassle-free solution.
Incorporating peel and stick wallpaper into your home decor projects can help you achieve a stylish, personalized look with minimal effort and cost. It’s a versatile option that allows you to unleash your creativity and transform your living spaces with ease.
Tips for Hanging Peel and Stick Wallpaper
What You’ll Need:
Equipment / Tools:
- Tape Measurer
- Scissors
- Level (I LOVE our Laser Level)
- Plastic Smoothing Tool (love this felt edge one)
- Utility Knife with Extra Blades
- Metal Ruler
- Ladder / Step Stool
- Cloth / Sponge
Materials:
- Peel and Stick Wallpaper
- Cleaning Solution
1. Prepare the Surface
Make sure your wall is clean and smooth. Use a cloth to wash the surface of the walls to make sure they are free from dust, grease or anything that may affect the wallpaper’s adhesive. You can lightly sand down any small bumps to make sure the surface is smooth.
Note: I have installed peel and stick wallpaper on textured walls before and it works, but it varies based on the wall texture you have.
In our case – when I removed the old peel and stick wallpaper, some of the old paint peeled up with it. I had forgotten that we didn’t completely finish these walls as we knew we would be installing wallpaper, so there was no need to spend the time and effort to apply multiple layers of plaster and texture and paint them. We simply smoothed the seams using drywall tape and filled in the nail holes. We then used a primer to seal the unfinished drywall.
This is a very important step! Do not apply wallpaper directly to unfinished drywall. Always apply a primer to seal the unfinished drywall – this prevents moisture from soaking into the drywall, which could cause mold, and allows the peel and stick wallpaper to stick better and be more easily removed.
Make sure to follow the manufacturer’s recommendations and wait the specified paint drying and curing time before applying the wallpaper.
2. Create a Guide Line
You’ll need to mark a straight, level line to line your first piece up with. DO NOT go off of the ceiling or floor/trim…they are never perfectly level and you will end up with crooked wallpaper. You can use a level and mark on the wall with a pencil, or use a chalk line, or invest in a laser level! I LOVE our laser level and have used it so many times since buying it (when hanging picture frames, hanging shelves, installing beadboard or board and batten…). The laser level is really easy to use and I moved it around the room to make sure each piece was straight.
3. Pre-Cut Your Pieces
I think it’s easier to pre-cut the wallpaper for the height you need; especially if it’s a shorter area like in our bathroom. I just measure the height of the space with a tape measurer, and then use scissors to cut the wallpaper with the backing still attached.
You could use a utility knife but the cut doesn’t need to be perfect since you’ll be trimming the edges later.
Make sure to add a few inches to the overall height so you have a little extra wiggle room at the top and bottom! Also keep the pattern repeat in mind so that each piece lines up when hung.
4. Hang Wallpaper
I like to start at the left side of the room and work my way around.
I always start by peeling of a small amount of the backing at the top of the piece, and try to line the piece up straight with the guide line. Make sure to leave a slight overhang at the ceiling to avoid any gaps due to an uneven ceiling. Same with the bottom – there will be some left overhanging the baseboard that you can later trim. Then once the piece is level and in place I’ll work my way down while peeling off the rest of the backing.
Next I’ll use a straight edge tool (it helps to have felt on the edge so you aren’t scratching the wallpaper) to smooth out the piece. Work from the middle and out to the sides to get all of the air bubbles out.
Tip: If you have any air bubbles that are really hard to get out you can use a needle to make a small pin prick in the wallpaper to release the trapped air.
Continue around the room with the subsequent pieces. I like to very slightly overlap each piece. Make sure to pay attention to lining up the pattern.
5. Trim Edges
Once all of your wallpaper pieces are hung, you can trim the edges at the ceiling, the baseboards, and around any obstructions, like a door, window, counter, cupboard, or electrical outlet.
Use a straight edge tool (like a metal ruler) and a sharp utility knife. You’ll want to replace the blade often so it stays sharp to make clean cuts.
Easy Bathroom Update – Final look
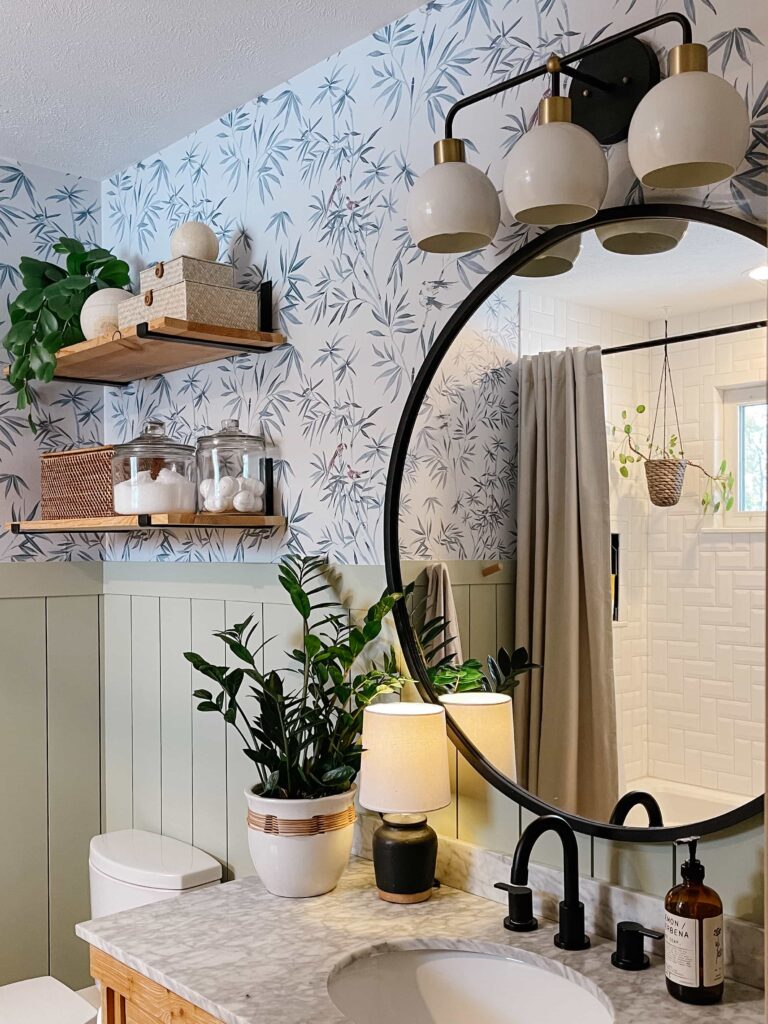
I’m absolutely thrilled with the way the peel and stick wallpaper has transformed our bathroom. It’s incredible how a simple change can have such a significant impact. The new wallpaper has completely altered the vibe of the space, giving it a serene, spa-like ambiance that I adore. Plus, the calming blue hues have made it a hit with my kids, too.
What’s even better is that this entire project, from removing the old wallpaper to hanging the new one, took me just about three hours, spread out over two days during nap times. It’s a testament to how an easy bathroom update can make a world of difference in a short amount of time, leaving us with a refreshed and tranquil space we all enjoy.
Shower Curtain Upgrade
One little hack that I feel like made a huge difference in this easy bathroom update, was swapping the shower curtain with two longer window curtain panels!
The old shower curtain was a standard 72″ long and felt a little short. The new curtain panels are 84″ long and feel much better! The taller height helps the room feel taller as well (the ceilings in here are 8′ high).
I used this pair of inexpensive blackout drapes for the new shower curtains. The loops on the back worked perfectly with our existing shower curtain rod.
To make the curtains waterproof, I pinned on a waterproof fabric shower curtain liner to the back of the curtains with these drapery pins. You can easily poke the sharp end through the back of the curtains, and then loop the liner onto the other end of the pin. Pinch the pin closed to secure the liner.
I added one curtain panel to each side of the shower. I love how the curtains frame the shower opening, just like curtains at a window! It really elevates the look in the bathroom and helps the shower and ceilings feel taller.
You can use this method to transform any curtains into shower curtains! Just make sure there is a spot to pin the liner to (loops at the back like mine, or double layered curtains would work well so you can pin the liner at any height). You can also find extra long shower curtain liners if you need something longer to reach the tub or floor.
This post was sponsored by Tempaper. All thoughts and opinions are my own. See my disclosure here.
This looks so good!! Love the change!
Thank you!