Learn How To Make a Simple DIY Sandbox with Slatted Wood Roof for your Backyard with these Sandbox Plans!
Below I’m sharing all about how we made a DIY Sandbox with a Slatted Roof for my kids in our backyard! This was an easy, 1-DAY PROJECT, and we absolutely love how it turned out!!
I have two boys and they LOVE to play outside together! Even in the rain and snow – you can catch them running around in our backyard. I think it’s the best thing ever too because they are getting some energy out, soaking up that Vitamin D through the sunshine, and it gives me some quiet time to myself!
That being said, I’ve been on a mission to update the yard space on the side of our house to include a kid-friendly play area – which has to include a BIG sandbox! I remember my Dad building me and my brother a sandbox when we were younger, and we loved it! So this DIY Sandbox Project has been on my list for a while.
Also, with my son’s birthday around the corner, we knew this would be the perfect birthday present for him!
This post contains affiliate links; see our Disclosure here.
Find out how we made this Simple DIY Sandbox With Slatted Roof below!!
Why we Built a DIY Sandbox with a Slatted Roof
When my boys were younger, we got them one of those basic, small, plastic sandboxes, which definitely served it’s purpose for a while. But now that they are older (and bigger) there just wasn’t enough room for them to play in it together; which caused fights – which caused my quiet time to be cut short.
So, when designing this sandbox, I knew we had to make it big enough for my 2 boys (and some friends) to play in all together.
I also knew that we needed to add some sort of roof, to block the leaves from falling in, and also shade them from the sun.
For the design of this DIY Sandbox we drew some inspiration from the PERGOLA we built at our last house. (I have a detailed blog post all about the PERGOLA HERE if you are interested!)
I loved the look of the slatted wood privacy wall, and we thought that would be the perfect solution for the roof design for this DIY Sandbox.
Not only does the slatted roof provide shade, like a pergola, but it was also less expensive to build than a solid roof (less lumber), and I think it looks better!
The Hardest Part of this Project –
The hardest part about this DIY Sandbox project was determining which type of lumber to use, and what sizes. Because lumber is so expensive right now, we called around to get a few quotes and thought about how we could make this an affordable project.
We ended up purchasing the lumber from a local lumber yard, instead of a chain like Home Depot, and I’m so glad we did! The lumber yard had more options of wood species to choose from. The prices were also actually LESS than Home Depot’s prices for similar boards, and the quality was much better! The boards were straighter and had less knots.
Originally, we were going to go with cedar, or pressure treated lumber boards, because they hold up better outside. But, after pricing it out, those wood species would have been way too expensive. $500 worth of wood is a little bit much for a 3 year old’s birthday present!
So, after talking to someone at the lumber yard, we went with less expensive Douglas Fir boards! I was a little worried about them holding up outside in the rain and snow, but we were told that they would last at least 5 years, no problem. That was totally fine with me because 1) we don’t even know how long we will be in this house, and 2) my kids will be 10 by then so might not even be interested in the sandbox anymore.
And the main deciding factor – the Douglas Fir boards were about HALF the price of the cedar boards!! Sold.
The other thing we played around with were the sizes of the planks. We ended up ordering 12″ wide x 2″ thick boards for the base of the sandbox house because they were deep enough to hold a good amount of sand, and thick enough to last over time and not warp or split.
We almost ordered 4″ x 4″ boards for the four posts, but those were also very expensive, so we went with 2″ x 4″ boards and they worked out great!
It was important to us to keep this project as affordable as we could, while also building a quality product, and I really think we accomplished that goal! This was an easy project, but the cost of the lumber, and the sand, can add up quickly!
How to Build a Simple DIY Sandbox With Slatted Roof
MATERIALS needed for DIY Sandbox With Slatted Roof:
- (4) 2″ x 12″ x 8′ Fir Boards
- (6) 2″ x 4″ x 8′ Fir Boards
- (18) 1″ x 4″ x 8′ Fir Boards
- (40) 50 lb. bags of play sand
- 3″ Exterior Screws
- 1″ Exterior Screws
- Varathane Classic Black Wood Stain
- Landscape Fabric
TOOLS:
- Miter Saw
- Circle Saw or Table Saw
- Impact Driver
- Staple Gun
Step 1: Level Ground

Use a metal rake to push away any mulch or debris, and try to level the dirt as best as you can. It doesn’t have to be perfect but it helps to to prep the area!
Step 2: Build the Base
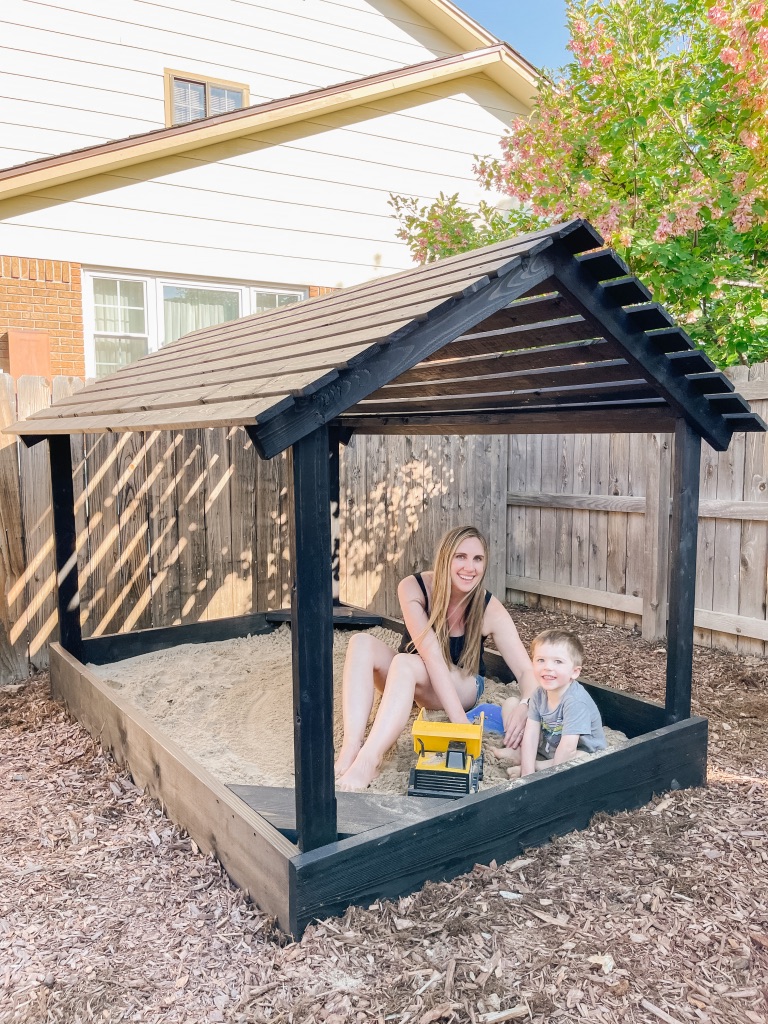
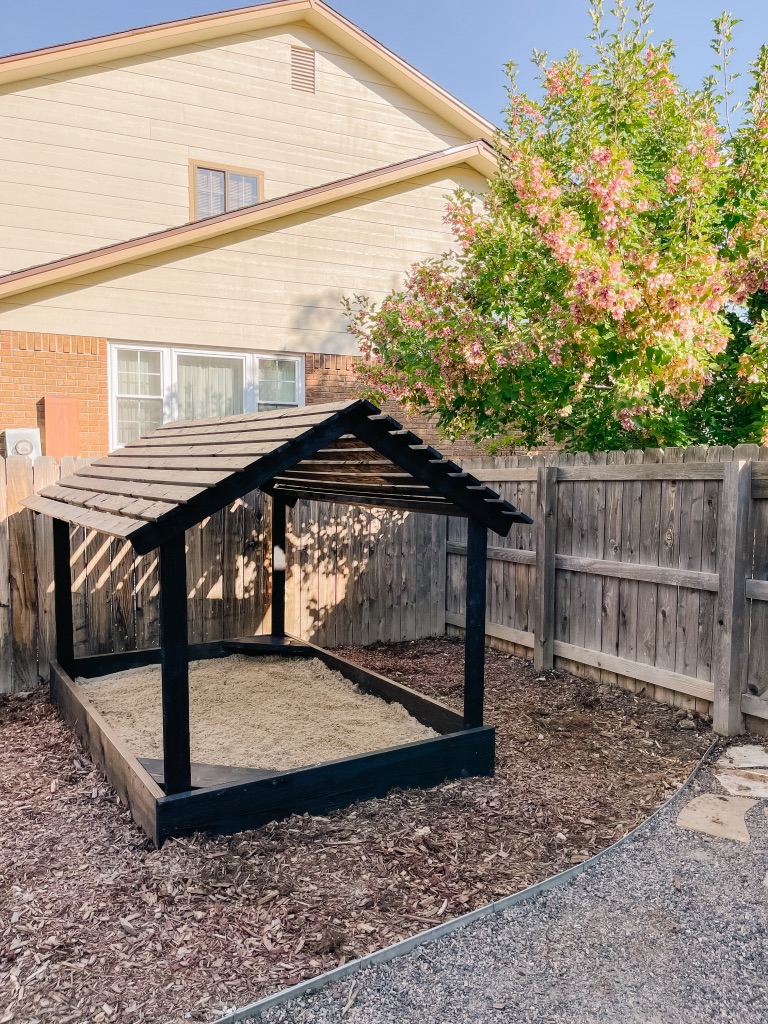
We used 2″ x 12″ x 8′ long boards to build the base, and used screws to attach the boards. The overall size of our base is 5′ x 8′.
Step 3: Add Seats
We used leftover pieces of the 2″ x 12″ boards to build seats at the corners. We wanted a seat at each corner but ran out of wood, haha! Oh well.
Step 4: Add the Posts
Attached the 2″ x 4″ boards to each corner. We cut two 8′ long boards in half for these beams, so they are about 4′ high.
Step 5: Build the Roof Structure
We then used a 2″ x 4″ board to connect the posts, and build the pitched support for the roof.
Step 6: Add Wood Slats to Roof
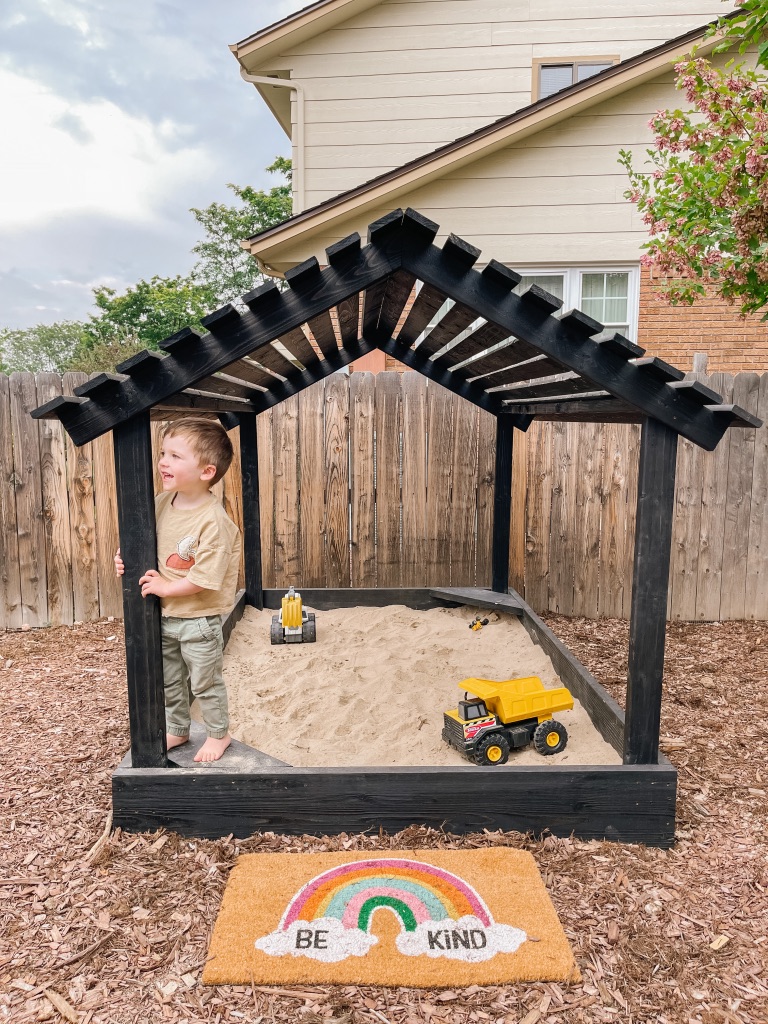
We used 1″ x 4″ boards for the slatted wood roof. We used the 1″ wood block to space each wood slat before screwing them in.
Step 7: Add Landscaping Fabric to Bottom
Staple a landscaping fabric to the bottom to protect the sand from and dirt, grass, or weeds from coming up. My kids have definitely dug to the bottom of the sandbox before so this was necessary!
Step 8: Add Sand
This was the hardest part – carrying 40 BAGS of sand from the car to the sandbox! They were heavy!! We used a wheelbarrow and that helped. This sandbox also took much more sand than I thought we were going to need! It was an expensive part of this project because we made the sandbox so big, but worth it. Our sandbox is 5′ x 8′ x 12″ deep and we used 40 50lb. bags to fill it about 2/3 of the way up.
Step 9: Stain
I actually worked on staining this as we went because it was about to rain and we wanted to get this done…you could do this step first before you put everything together (but you would have to let it dry/cure for a day or two) or you could stain the wood at the end.
The stain used was Varathane Classic Black.
I had a feeling our kids would like this sandbox, but I really can’t believe just how much they use it! I find them playing in it together every day! Roman even got this excavator toy to dig with that he loves!
I love how this DIY Sandbox turned out! I think it is so cute. It is simple and classic and doesn’t stand out in our backyard. I think this is one of my favorite DIY projects we have completed!
Tell me what you think below! Is this something that you would add to your backyard?
That looks so fun for kids!
They love it so much!
Hi how much did the entire thing cost ?
Hi! I think it was about $400 for the lumber and the sand.
Love this design! How has the stain held up since you finished it? Has it faded alot and do you need to restain each year?
Thank you so much! The stain has held up well everywhere but the base where my kids have hit the wood with toys…but the wood slats on the roof still look great!
How much of an overhang did you use for the roof slats?
Theres about a 4″ overhang
What is the angle you used for the roof rafters?
I think 45*
What are the dimensions of the sandbox?
The overall size is 5′ x 8′ x 12″ deep
You said it’s 5×8, did you just keep the on sides 8 foot or did you cut them down a hair? Bc I’m trying to figure out how your 1x4x8s have 4 inch over hang…
Trying to build this myself bc this looks amazing, great job!
I think we trimmed a few inches off each edge. Thanks!
Did you use a cover and/or any mosquito net afterwards? Thank you.
Hi! No we haven’t used a cover but we might add one this year. We don’t get a ton of mosquitos where we live.
Hi, love the design.
Any idea how the roof boards hold up against snow?
Thanks.
We had to reinforce them with an extra board this winter. I’ll post an updated photo soon!
What did you use to cover the sandbox when not in use?
We haven’t covered it, but we clean and refill/replace the sand in the spring.