Craft charming DIY Gingerbread House Decor on a budget with our easy DIY guide.
It’s Thanksgiving week and officially time to start pulling out the Christmas Decor! I love this time of year and making the house feel cozy and festive! I’ve already started to add Christmas decor to a few small areas in our home and I’m planning to get the rest out this week so the house is fully decorated by next weekend. I used to wait until after Thanksgiving to decorate for Christmas, but now I like to slowly start in mid-November so the house is finished by the end of the month…it takes time to figure out where I want everything each year! This way I can relax and enjoy the holiday season through December.
While I love adding touches of Christmas all throughout our home, Christmas decor can get expensive, especially if you like to add some of the newest trends each year. This year I’ve noticed a ton of Gingerbread House decor in stores and all of the options are sooo cute! Some are very expensive though. I wasn’t about to spend a few hundred dollars on a Gingerbread House Village, so I decided to try to make my own, and I’m very impressed by how they turned out!
Below I’m sharing how I made my Easy DIY Gingerbread House Decor to add to my Christmas Decor this year! This was a very simple project and the supplies were so affordable. I think they look just as good as some of the more expensive options and they were a fraction of the price. I also love that they will last for years to come unlike gingerbread cookie houses.
How to Make Easy DIY Gingerbread Houses
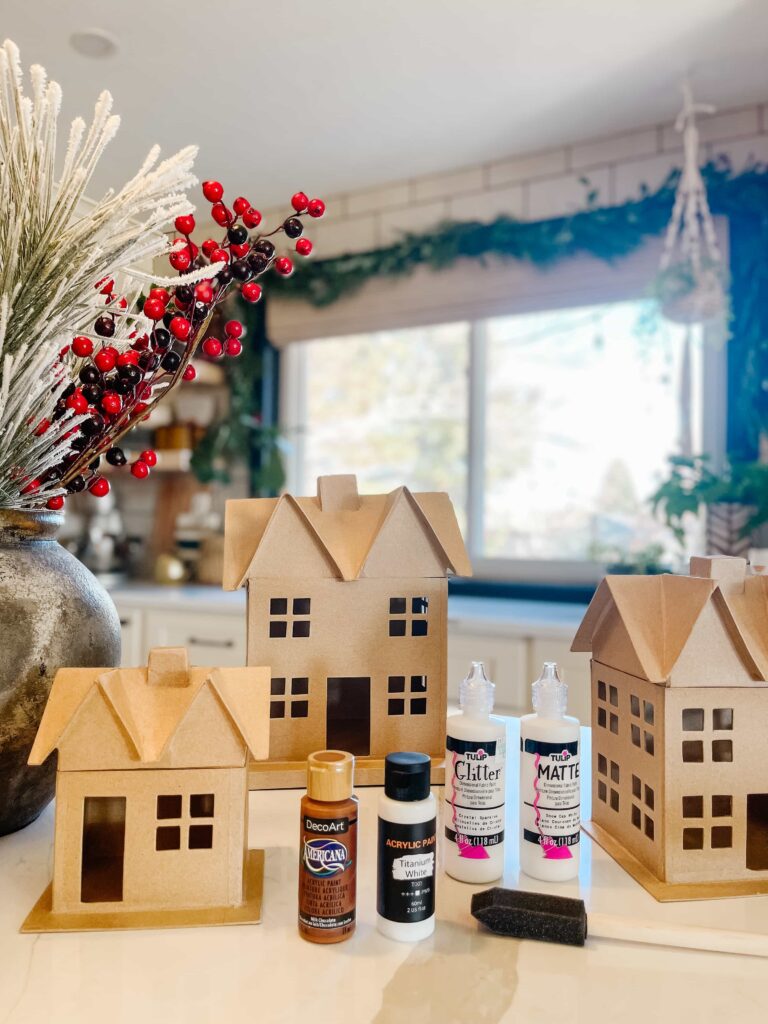
What You’ll Need:
- Paper Mache Houses (I bought the set from Hobby Lobby which is the best price but you can search online for similar options if Hobby Lobby is out of stock)
- Brown Acrylic Paint (I needed 2 bottles; I also used some white paint to make a lighter brown color)
- Baking Powder
- Paint Brush
- Puffy White Paint (I used 2 bottles)
- Hot Glue Gun
- White Hot Glue Sticks (I used a full pack and wish I had more)
- Flameless Candles
- Fake Snow (optional)

Step 1 – Paint Houses
I bought this set of paper mache houses from Hobby Lobby and they are perfect for making gingerbread houses! The set at Hobby Lobby is normally $10.99 but you can sometimes get it for 50% off which is such an amazing deal for these houses. They sell out quickly though around the holidays, so if they are out of stock at Hobby Lobby you can search online for similar options. I’ve linked some similar paper mache houses towards the bottom of this post.
I wanted to try to make the paper mache houses look more like gingerbread, so I added a coat of paint. I started with a quick coat using a foam brush. The foam brush made painting all the sides and crevasses super fast but once the paint dried it was streaky and definitely needed a second coat.
For the second coat I wanted the paint to look thicker, more like a cookie, so I mixed some baking powder into the paint which gives it a fluffy texture. Make sure to mix in a little bit at a time and work quickly because the baking powder makes the paint dry out fast. This method worked really well though and the thicker layer helped make the houses look less paper-like.
Step 2 – Add “Icing” Details
I used a puffy white paint to add the “icing” details. I’ve also seen people use white hot glue for this step but I feel the puff paint is easier to use and allows you to make the designs more intricate.
I searched for gingerbread houses on google for some design inspo and then just free-handed the designs for each house. You could also draw on the houses with pencil first if you want to plan it out.
I worked on one side at a time and allowed the paint to slightly dry before flipping the house over the make sure it didn’t drip.
I ran out of white puff paint (and my local Hobby Lobby was also out of stock) so ended up using a glitter puff paint for the roof details.
Step 3 – Add Hot Glue “Snow”
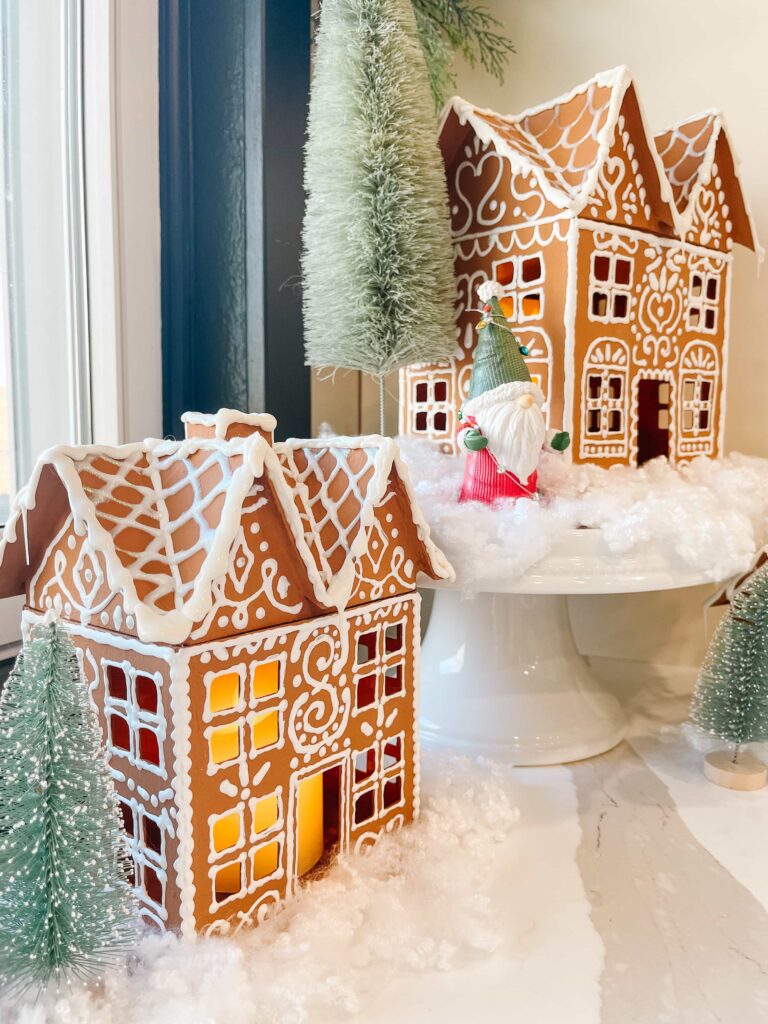
This part was so much fun!!! The white hot glue worked soooo well for the “snow” details! I added the glue to all of the edges of the roof and worked around each edge slowly to give the glue a melty, drippy snow effect. I went through a whole pack of mini white glue sticks and wish I had a second pack to add even more snow because I just love how it looks.
I used a mini hot glue gun on the low-temp setting. I feel that is important so the glue doesn’t come out too fast. You want to work slowly so it has time to dry before dripping down too far. If any parts dripped down too much i cut them with scissors once dry to give them an icicle effect.
Step 4 – Final Touches
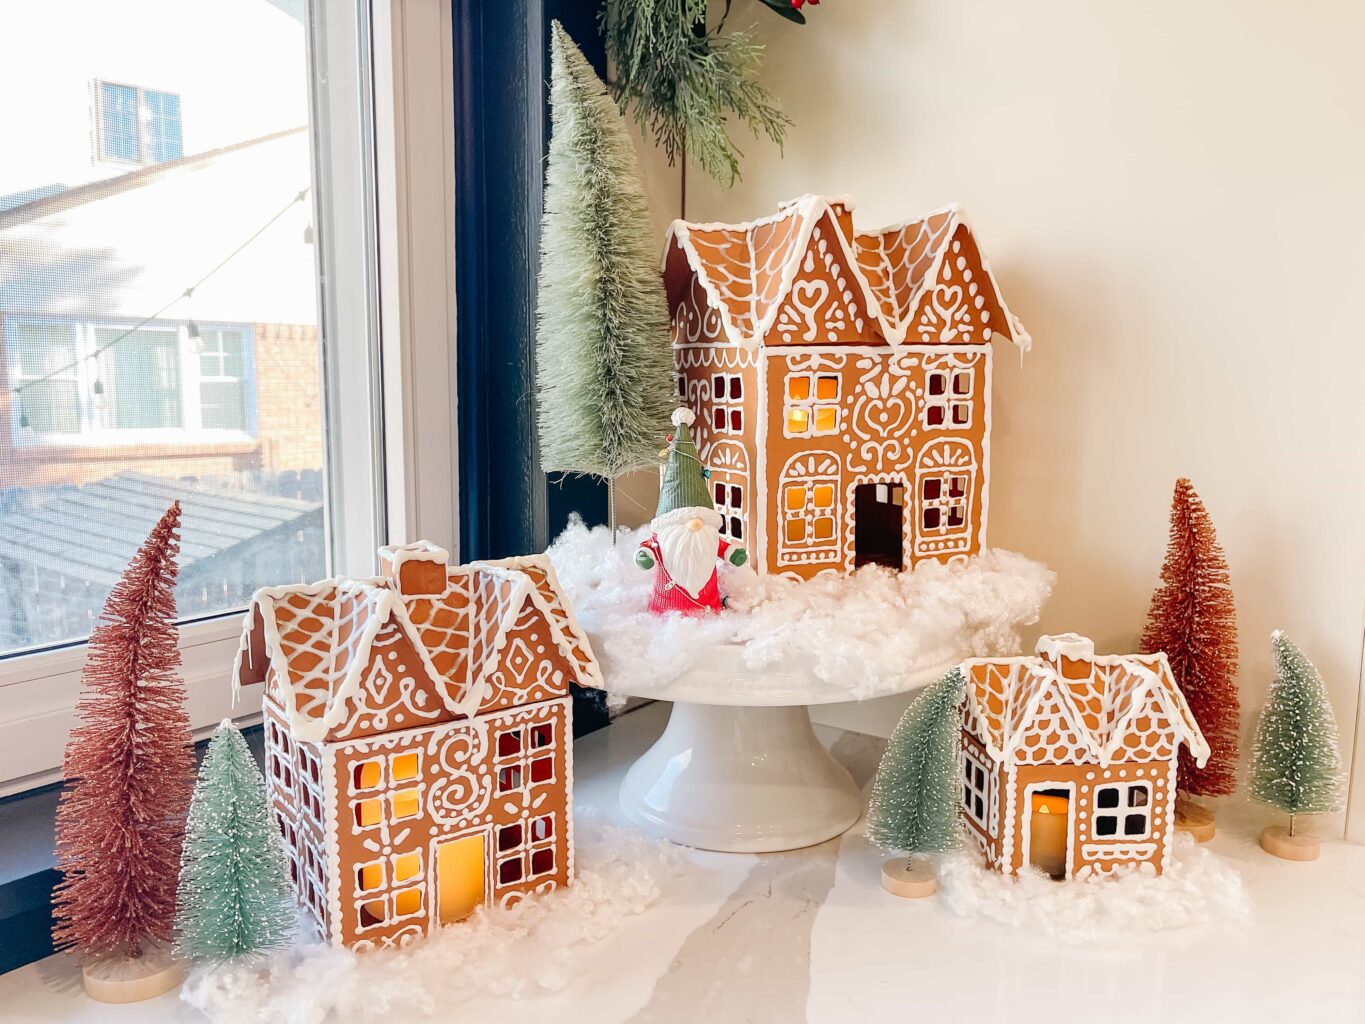
Once the gingerbread houses were dry I created a mini village on a corner of our Kitchen counter! I added some fake curly snow to cover up the bases, and scattered some bottle brush trees around them.
I added some faux candles inside the houses to give off a pretty glow at night.
Simple DIY Gingerbread House Village
I LOVE how these DIY Gingerbread Houses turned out!! I’m actually shocked about how much I like them. I think I might make another set next year to add to the village.
This gingerbread house craft was very easy, fun, and affordable. This would be a great Christmas craft to do with kids too! With the houses being made out of paper they are very kid-friendly and would make a cute nightlight addition to your Kid’s Bedroom Christmas Decor.
More Paper Mache House Options:
- Hobby Lobby Paper Mache House Box Set
- Cardboard Papier Mache Cottage Home Ornaments – Set of 6
- Paper Mache Gift House – Set of 2
- Saltbox Paper House Ornaments – Set of 4
- 6″ Paper Mache House
- 6″ LED Wood Winter Triangle House Décor
- Paper Mache Village Houses – pack of 3
If you would rather not make your own Gingerbread House, here are some of my favorite options that you can purchase:
- 8″ Snowy Gingerbread Tabletop House
- Christmas Gingerbread Decorative Set
- 5″ Pastel Gingerbread House Set of 3
- 9″ LED Snowman Candy Lighted House
- Claydough Gingerbread Inn
- 7″ Glittery Snow-Topped Gingerbread House
- Gingerbread Village Houses
Let me know if you try making these and how they turn out!
This post contains affiliate links; see our Disclosure here.
Leave a Reply