Follow these tips for Colorful and Whimsical Christmas Decor for your Kid’s Bedrooms!
Have you ever decorated your kid’s room for the holidays?? I’ve always loved seeing photos when other people do, but I never have myself; until this year! And now I think I need to make it a permanent thing! My son had the biggest grin on his face when he saw his Colorful & Whimsical Christmas Kid Bedroom Decor for the first time, and that definitely made all of the prep and time worth it!!
I was lucky to partner with Colorado Parent Magazine for this Colorful & Whimsical Christmas Kid’s Bedroom Makeover too! I will share the article here once they publish it; I can’t wait to see the photos they took!
Below I’m sharing some tips on How to Decorate your Kid’s Bedroom for Christmas, and links for everything I used!
This post contains affiliate links; see our Disclosure here.
Colorful & Whimsical Christmas Kid Bedroom Decor Ideas
ADD TO WHAT YOU ALREADY HAVE
I really wanted to keep it simple and build off of what he already had in his room! That meant cleaning up the clutter in the room and clearing off the tops of all of the surfaces to start with a clean slate. I always start with this step because it gives me a chance to clean and dust everything – win win!
I cleared off the top of his nightstand, bookcase, and dresser. I picked up any toys he had lying around, and organized his bookshelf. Luckily my son is pretty clean and doesn’t keep a ton of toys in his room, so this part was easy!
My goal for these Christmas Bedroom Decorations was to make the room fun and colorful and magical, but also keep it practical. I wanted to surprise him, but didn’t want to overwhelm him by completely changing the look of his room.
CREATE SCENES ON TOP OF DRESSERS AND BOOKCASES
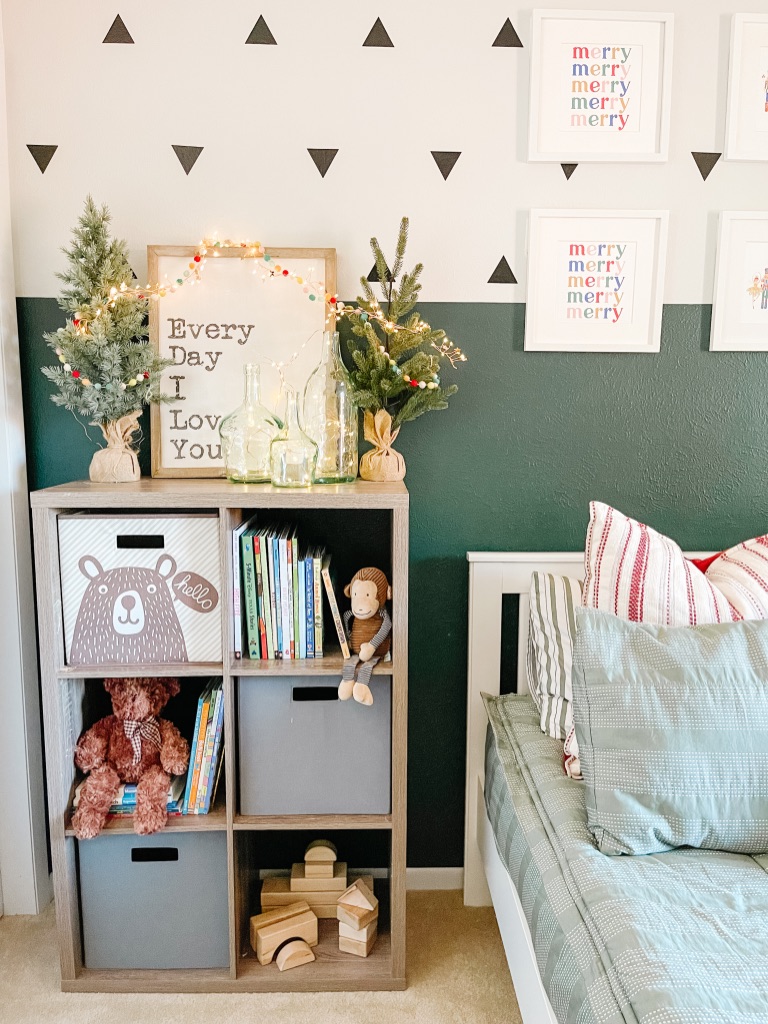
I love creating small scenes or vignettes on top of tables or dressers! And Christmas decor makes it so easy because you can’t go wrong with a grouping of small Christmas trees!
Try to work in layers to create some depth to your tabletop decor. In the above photo I layered an art frame with a string of fairy lights and a pom-pom garland. Then I balanced out each side with a small Christmas tree. I also had those wooden reindeer from a couple of years ago and love how they look in front of the frame! You could also layer multiple frames in front of each other.
Use objects that are varying heights, shapes and textures to really draw your eye in! Add a string of lights to make it pop!
I kept the existing art here since it is pretty neutral and I felt like the theme worked fine with the holidays! If you feel like your existing art isn’t working, try downloading a cute holiday art print! I give more details on that below!
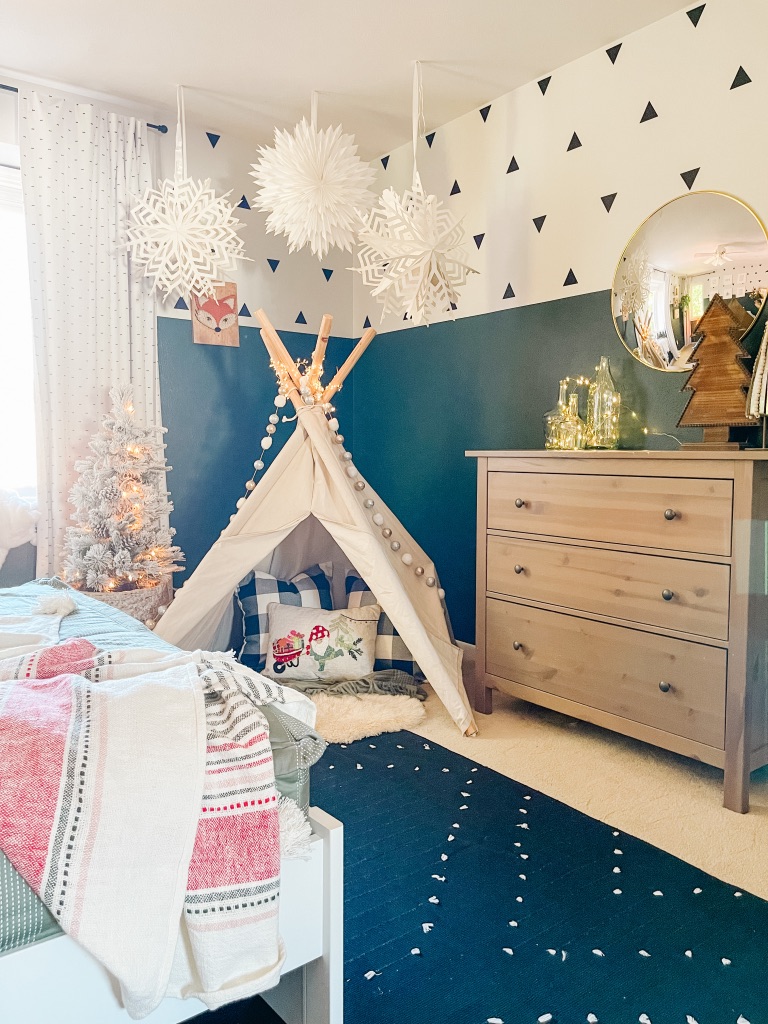
ADD A WARM GLOW WITH LIGHTING

Creating a soft warm glow with lighting can instantly make any space feel cozy and magical! Perfect for that festive holiday feeling.
I love adding some small strings of fairy lights throughout the room! They are battery powered so they are easy to drape over art, headboards, trees…and they really make the room feel cozier! By adding a few sets in different corners it helps draw your eye around the room and makes it feel balanced.
On top of the dresser I added some lights to a small grouping of clear glass bottles. This was a simple way to make a big impact and it gives off a pretty glow!
On his nightstand I used his existing woven rattan lamp from Ikea, because it also gives off a nice glow!
CHANGE THE BEDDING
Because the bed is one of the biggest items, and a focal point in the room, it makes a big impact to change your bedding. Changing the comforter or duvet cover, or even just the decorative shams or adding a throw or quilt on top, can make the room feel different.
For this holiday room makeover, I finally got Griffin a Beddy’s set for his room!! I have been wanting to get him a set of Beddy’s bedding ever since I heard of them over a year ago! If you haven’t heard of Beddy’s, you definitely need to check them out!
The bedding set is all one piece (the comforter connects to the fitted sheet and zips up the sides) so it is perfect for a kid’s room! His blankets don’t fall off of the bed at night, which used to drive him crazy. It is also so easy for him to make his own bed now. His room feels cleaner because his bed doesn’t look like a mess, and that saves me time too!
USE CODE SPRUCING FOR 15% OFF!!
I chose the Wild Things set because the light sage green color works perfectly with his dark green walls. I also love the subtle pattern. It is fin but doesn’t compete with the triangle decals on the wall.
The Beddy’s set comes with everything you need to make the bed – fitted sheet, comforter, pillow cases, and decorative shams. I also added some striped red euro squares behind the decorative shams to add in some more color.
I’ll write a full review of our Beddy’s bedding set soon, but so far we love it! It washes easily and is great quality!
LAYER COZY THROWS AND ACCENT PILLOWS
I’m a big fan of layering accent throws and decorative throw pillows on sofas, chairs and beds to create a warm and cozy feel. Adding some extra texture into the room helps it feel welcoming and lived-in.
This is also an easy way to add some pops of color! By simply changing the throws and pillows in a room you can create a new mood for each season!
Around the holidays is the perfect time to add these cozy layers too, because you can find so many cute holiday themed throw pillows! I love the eclectic Anthropologie type pillows (and came so close to buying this one) but they are pretty expensive. Probably not the most practical purchase for a kid’s bedroom. So I was so happy to find a few options that had the same feel!
On the bed I went with a long, colorful and playful lumbar pillow. I love adding these long lumbar pillows to beds because they are simple, practical, and add a little color. I thought this “Merry Everything to Everyone” pillow was perfect for a kid’s bedroom and it really fit our colorful Christmas theme!
I also created a couple of cozy nook areas in his bedroom with a few more blankets and throw pillows. The window in this room has a very deep ledge, which I love, so it is almost like a small window seat.
SWAP PHOTOS AND ART IN FRAMES FOR HOLIDAY THEMED PRINTS
If you have any frames in the bedroom, a quick and easy update for the holidays is to swap the art or photo with a holiday themed print! Griffin has 6 square frames above his bed so that was the perfect spot to add some fun and colorful Christmas art!
One of my go-to places to look for digital art downloads is Etsy! You can find almost anything you need on there. I did a quick search for “colorful Christmas art” and found these cute Nutcracker themed prints! They ended up matching the colorful lumber pillow on the bed perfectly!
I usually just print these art prints out on our home computer! I use a thicker cardstock paper, which looks a little nicer in the frame. If you don’t have a home printer you could easily send the files to Walgreens, Target, Mike’s Camera, etc. to have them printed.
CREATE A COZY READING NOOK
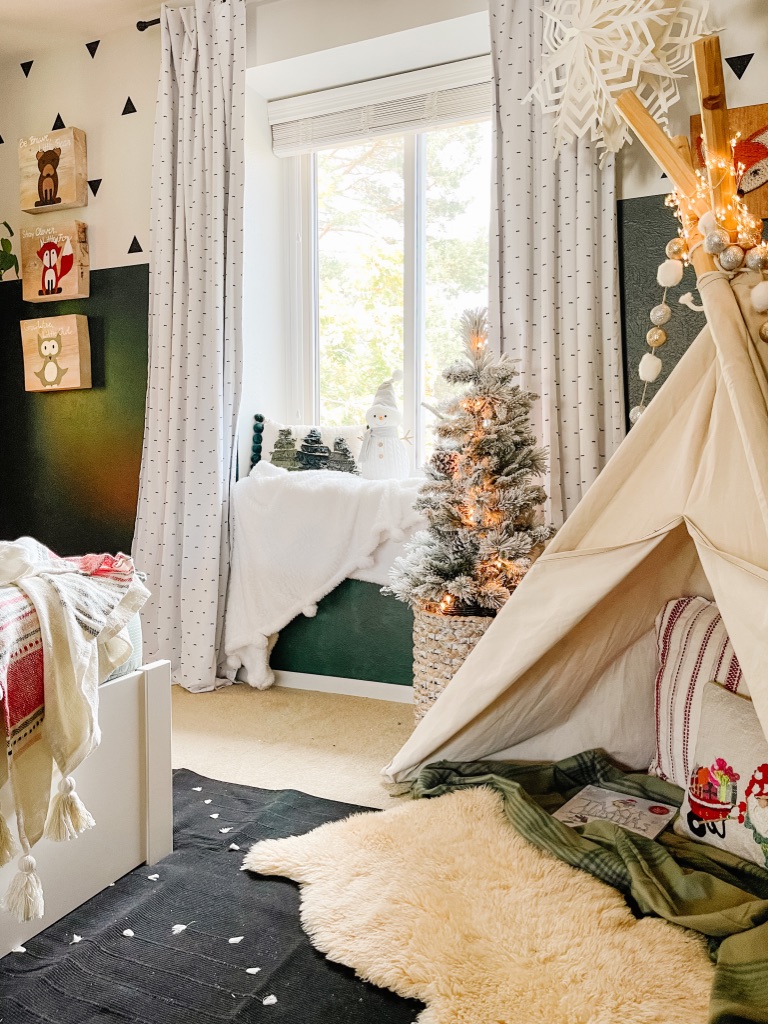
As I mentioned above, I love creating cozy nooks, especially in bedrooms, and especially during the colder months! By adding a fun decorative Christmas tree throw pillow and a cozy white pom-pom sherpa throw to the deep window ledge, it was transformed into a cute window seat reading nook! It’s such a fun spot to sit and look out the window!
We’ve also had this DIY Canvas Teepee for a while and I thought it would look perfect in Griffin’s Christmas Bedroom! It’s another spot that he can escape to to hide or read, or even watch a movie on his tablet! I added a few large 24″ x 24″ throw pillows, and another fun embroidered Santa throw pillow, and a soft green plaid throw layered on top of his sheep skin rug. This is definitely my favorite corner of the room!
ADD A STATEMENT
The teepee corner is the statement of the room! I love how this corner turned out! It is so fun and whimsical and really catches your eye the second you walk into the room.
To dress up the DIY Canvas Teepee I added a few sparkly pom-pom garlands, and some fairy lights on the top!
Then above the teepee I hung these snowflake paper lanterns! These are my favorite purchase from this whole project, and I am tempted to buy more for other rooms in our house! They feel so magical! You can actually purchase a light kit to use with them, but I couldn’t figure out how I would hang them in this bedroom like that. But just imagine how pretty they would look lit up!
ADD A SMALL CHRISTMAS TREE
Ok last but not least, you of course have to add a small Christmas tree to the room!! And if you are looking for one to purchase you have to check out this 3′ Flocked Tree that we used!! It was only $33 and I was truly shocked by the quality! I can’t recommend this 3′ Flocked Tree enough! It is also pre-lit, and comes in a small black woven basket! Seriously such a good deal and perfect for a Kid’s Bedroom!
We haven’t decorated it yet (and honestly I’m not sure if we will) and it still looks so cute. There are a few small pinecones on it, and with the flocking and the lights, it really doesn’t need much else! I also don’t want my son messing with the decorations, haha, so we will probably leave it bare this year.
This tree is 3′ tall, which is really a good height, but to make it feel a little bigger sitting next to the teepee, I placed it inside a bigger basket. I put it on top of a cardboard box to lift it up about 6″ taller.
SHOP THIS CHRISTMAS BEDROOM DECOR:
I’m so happy I went ahead with this project to decorate my kid’s bedroom for Christmas! I know that it has made my son just as happy to have a special room for the holiday season! We will have to make it a tradition!
Also, if you are curious about the wall design in this room (how fun is it?!) you can read all about the Boho Colorblock Walls HERE!
Love it! I especially love the paper lanterns! I want some for my house!
Thank you!! They are my favorite!